I have an elderly Proctor Silex coffee maker that I've used for years now in the workshop. I'm not big on washing the thing, so it's not the most hygienic-looking appliance on earth. Here's a view of it.

It's a 'Type A20' -- a basic, basic coffee maker, and it has served me well. (I bought it at Canadian Tire on the 31st of July, 1999.) In my experience, Proctor Silex's small appliances are unbeatable for dollar value and reliability.
But, no matter how good it may be, no appliance is going to last forever, and this one has finally packed it in.
I'd gotten warnings that something was amiss. Every so often, at random, the thing would only deliver a fraction of the amount of coffee for the amount of water I'd put in it. I caught it in the act once, and discovered that it was doing the oddest thing. It was sort of working backwards.
It would deliver some water through the normal route, and brew some coffee, but it would send most of the heated water back into the reservoir where it would steam off in a great cloud.
I gave it a thorough vinegar rinse treatment, but that didn't solve the problem. For quite a while, I just lived with it since the trouble occurred so infrequently.
Then it did it yesterday morning, and again this morning. Enough. The appliance is no longer trustworthy at all. Fortunately, I have a spare Black & Decker unit for a replacement, so my morning coffee ritual can carry on without interruption.
Anyway, since I'll be discarding this poor old soldier, I thought I might dismantle it and, if nothing else, get a look at how it's constructed inside. Maybe I'll learn something.
- - -
Access to the innards is via the underside. There's a metal bottom cover to be removed.

A T15 security Torx driver, and 3/8" nut driver are all that's needed.
And here we are.

There's a clamp-plate affair that holds the whole hot-plate/heater/pump-tube assembly together. Take off the single 3/8" A/F hex nut holding that together, and you get to here.

Supposedly, there's a check valve in these things that's key to the pump's operation. That's probably what's at fault in this coffee maker. Let's see if I can locate the check valve, and see what sort of condition it's in.
There's a bulge in the lower end of the water supply tube (upper tube in the above photo). So I opened that up (the old tubing tore easily) and sure enough, there was the check valve. Here's a view of the torn-open spot where the check valve resided.

And here's a view of the check valve (or at least what's left of it).

Needless to say, there's no way I can get replacement parts for this coffee maker. I can probably replace the whole thing if I have to (when my Black & Decker unit packs it in) for twenty dollars.
Electrical Components
As long as I'm at this, I may as well show and tell about the few electrical components that go into a basic coffee maker. Here's a view of them out of the appliance. (I left out the line cord; a line cord kind of goes without saying.)
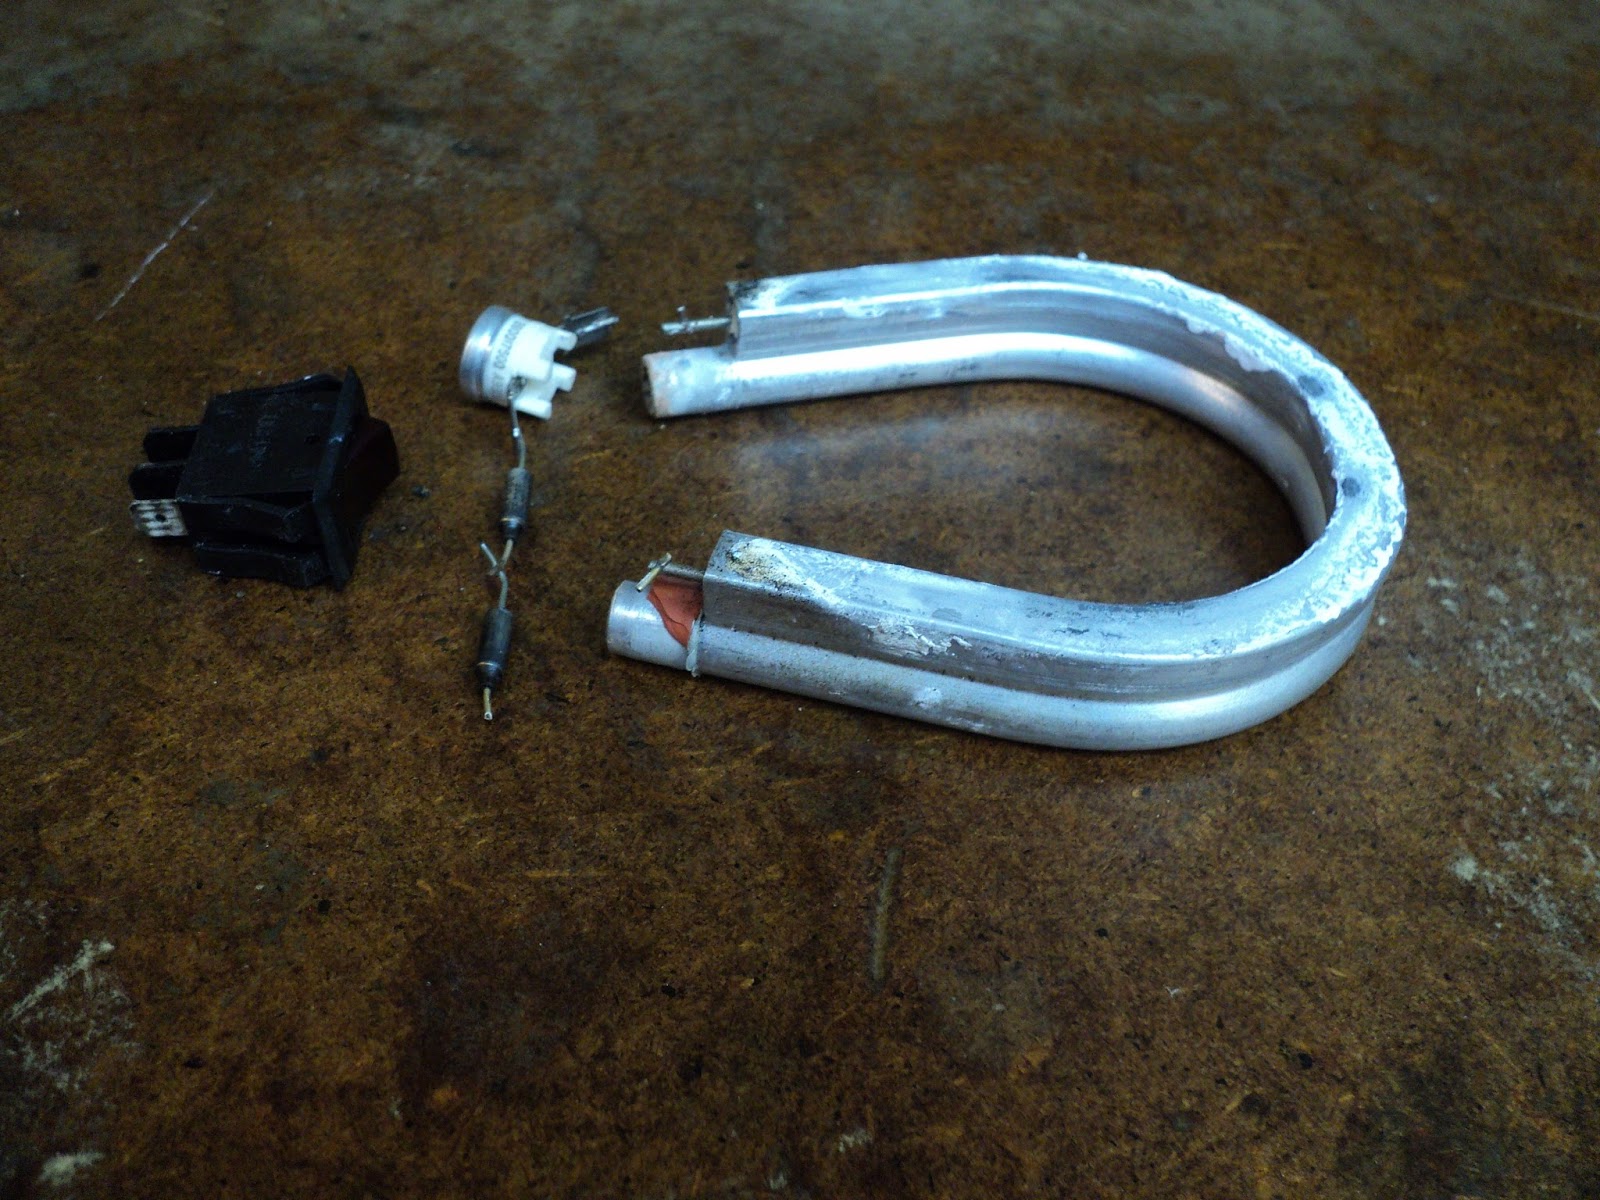
From left-to-right we have:
The thermostat resides right up against the pump tube. It control's the hot-plate's temperature once a brewing cycle is complete.
The two thermal fuses are a safety feature. In the event of a thermostat failure that results in an over-heat condition, one or both of the fuses will go open. The fuses won't reset themselves. If a thermal fuse goes open, that's the end of the coffee maker.
# # #
# # #
I had the exact same coffeemaker and what was surprising to me was that I had a kinda pricey Mr. Coffee as my main unit and this as my backup when I decided to take my Proctor Silex on a trip since it was smaller and easier to move. But then I realized it actually made better coffee than the one that cost five times more. So I started using the one in this post up until today, when I dropped the basket on the floor and shattered some plastic pieces that are now irreplaceable. This was a great workhorse unit that was nothing special but made great coffee easily. I will miss this unit and tomorrow I'm going to have to go find its replacement and I know I will spend a lot more for something that doesn't nearly work as well.
ReplyDelete