Monday, February 20, 2012

Lee Valley's Rare-Earth Magnet Sampler

Lee Valley has a 50-piece rare-earth magnet sampler for a reasonable price. I emailed Santa last fall and he brought me one for Christmas.

I had nothing specific in mind for the things, but I thought uses might suggest themselves if I had them on hand. And sure enough, an application for one of them has cropped up.

I have a magnetic pickup tool with a telescoping handle that I got long ago, I think from Princess Auto. It would be quite a nice tool if it weren't so bleeping feeble.

'Feeble' is not a word that one can apply to the rare-earth magnets. The forcefulness of them is uncanny -- almost a bit scary.[1] They're not easily separated.

I'll try attaching one to the tool's existing magnet with CA adhesive, and see how that holds up.

The magnets' dimensions are fractional inch. One of the 3/8" diameter magnets will suit.

- - -

Here's the reworked tool plucking a steel dog blank out of a vise jaw.

The tool's original magnet wouldn't have begun to do that.

I'll have to find a place to hang the tool well away from any ferrous metal. It could make a right nuisance of itself in a tool-chest drawer.

Notes:

[1] Lee Valley's catalogue blurb suggests that a possible application could be for fridge magnets. I wouldn't try it. You'd be at risk of toppling the fridge while trying to get a magnet loose.[2]

[2] (FRIDAY, DECEMBER 12, 2014) My facetiousness aside, the magnets do make excellent fridge magnets with a little modification. See this post for a method of installing 'handles' on the magnets to turn them into useable, forceful fridge magnets.

# # #


# # #

Sunday, February 19, 2012

An Elevated Camera Tripod Mount

I quite like the Sony camera I got recently, but it has one little feature that's occasionally a slight inconvenience. Access to the memory card is at the bottom of the camera, so when the camera is mounted on a tripod, you can't get the memory card out to check a photograph on the laptop without dismounting the camera. Sometimes, I'd like to leave a tripod setup completely undisturbed while I check on the outcome of a photo.

I made up this extension to solve that.

It does the job. The only downside is that the batteries want to slide out when I go to get the memory card, but that's not difficult to cope with.

Camera tripod mounting is standardized. The screw thread needed is 1/4"-20, which is as common as gravel. The thread depth on both my Sony and my Kodak is just over 1/4" -- that depth is very likely standard as well.

So, all it took to make this was two coupling nuts, one regular nut, a fender washer and a 1 13/16" length of threaded rod. Here's a view of it apart from the camera.

Tighten the nuts very tight and there's no need to use a threadlocker.

# # #


# # #

Eyelets

Eyelets are something I've never paid much attention to, or had much use for. I've long had two sizes of them on hand, along with their setting tools that I found at Canadian Tire. I have these small (1/4") ones.

And these larger ones.

It's not clear to me how nominal dimension is arrived at for these things. The 1/4" eyelets have a 5/16" flange diameter, and a barrel diameter just slightly over 3/16".

I don't know the 'nominal' dimension of the larger ones, but their flange diameter is 15/32", barrel diameter is 9/32".

There's an outfit name of Stimpson that's got more eyelets than Carter's got pills.[1]

Anyway, I recently found the small eyelets useful as 'bearings' in the repair of a kitchen garbage pail's lid lift mechanism. (Scroll down to the sixth and seventh photographs.) That got me thinking that I should keep the things in mind -- I might find them more useful than I'd thought. Then what comes along but a broken spring-clip clothes hanger, and it looks like I might be able to apply eyelets for a repair, much like I applied them to the garbage pail's lid. Here's a view of the item currently in need of repair.

The small eyelets just fit over that rod, and they fit inside the pivot holes in the plastic clamp halves. The difficulty here is that there's no room to use the setting tool. I'll have to find another way to set the eyelets.

I'll try this.

I've got a nail set clamped in the vise so I can employ its square head as an 'anvil', and a 1/4" diameter steel ball bearing perched on the end of the eyelet for a swage. A whack with a brass hammer should more-or-less set the eyelet.

- - -

That worked, and after tormenting the thing a bit more with a pin punch and pliers, here's what I've got.

It's not pretty, but it will serve. I'll apply some CA adhesive around the eyelet for good measure, and that should be a permanent repair.

The other half of the clamp will be a little more problematical. There's less space to insert an 'anvil' between the two pivot points.

- - -

One of my scrap metal bins coughed up something suitable. This should work. The only remaining problem will be getting the torsion spring's coil to fit back in place.

That swage turned out better than the first one.

Here's the clip back together and back in place on its hanger rod. Refitting the torsion spring turned out not to be a problem.

That all went remarkably well. If I discover more uses for eyelets, I'll append them to this post.

- - -

Note:

[1] Younger readers may not catch the allusion there to Carter's Little Liver Pills. In the late 1950s and early 1960s, if you watched any American TV, you were certain to see this sort of thing plenty of times.

# # #


# # #

Saturday, February 18, 2012

Magic Chef Gas Stove Repair

Our house, that we've been in for about twelve years now, came with a Magic Chef gas stove, Model No. 3468XVA. It's quite a decent stove, but it's not maintenance free -- I've had to replace oven ignitors a couple of times. We recently had an incident where an ignitor failure took the control panel with it. That can make for a costly repair, and we briefly considered replacing the stove with a new one.

Then, I thought long and hard about the cost of that, and the difficulty of getting the old stove out and a new one shoehorned in, and the outrageous waste of tossing what is mostly a perfectly good stove and concluded that a repair job was in order.

Fortuitously, it turned out that my son has an acquaintance in the appliance repair business. His acquaintance kindly offered us repair of the control panel, and non-OEM replacement ignitors for a lot less money than I'd expected to pay. I went for that like a cat goes for tuna. I just received all the parts yesterday, after a couple of weeks' wait for the control panel repair.

So, it's stove repair time at our house today. I sure hope this goes smoothly. Permit me here to give you some information about gas oven ignitors of this oven's type.

Ignitors

['Ignitor' can also be spelt 'igniter', for what that's worth.]

The oven has two ignitors -- a broil ignitor for the upper burner, and a bake ignitor for the lower burner. Here's a view of an old one.

The Owner's Guide calls it a 'glo bar'. What it amounts to is a big, open-air electric light bulb filament. To light a burner, the ignitor is first energized until its 'filament' glows white-hot. The electronic controller then opens the gas valve, the gas encounters the white-hot 'filament' and ignites.

Ignitor failure appears to be the commonest problem with these stoves. I've seen it express itself two ways.

Typically, oven (bake) operation becomes erratic -- the oven won't maintain a set temperature. Replace the bake ignitor and you're back in business.

The other symptom an ignitor can bring on is that it trips the stove circuit's breaker in the house's breaker panel. When that happens, do not reset the breaker and try again. Abandon use of the oven until the ignitor is replaced. Resetting the breaker and trying again is what led to control panel failure in our stove; more on that later. (By all means do reset the breaker, though. The stove-top burners' ignition system is still useable. Just don't retry lighting the oven.)

Replacement Ignitors

OEM (Maytag) replacements are outrageously costly. The appliance parts outfit near where I work quoted me $99.00 for one, and I wanted to replace both while I was at it.

It turns out there's an outfit name of Supco that makes replacements for all manner of OEM parts. Here's a view of Supco's replacement for a Maytag P/N 12400035 ignitor.

It comes with two styles of connector shell bits and their mates, in case the mating connector in the stove is a ruin (unlikely, actually). There's also a wad of thermal insulation material, and a mounting plate of some sort for replacing a slightly different style of ignitor.

So far, so good. I sure hope I don't end up regretting that I didn't go for OEM parts.

- - -

Replacing the Ignitors

Bake Ignitor

To get at the bake ignitor, first remove the racks. There's a porcelainized steel panel at the bottom that has to come out. Unlatch it at the rear, tip up the rear end of it and you can free its front lip and remove it.

Here's a view of the bake ignitor at the bottom rear of the oven.

It's held in place by two screws. The broil ignitor up above is similarly mounted, though its fasteners are a bit more awkward to get at because of the broiler's heat reflector.

The bake ignitor is replaced from inside the oven -- there's no need to remove the back cover of the stove. Remove the two screws with a 5/16" nutdriver. (The screws are 10-24 x 5/16" hex head.) Tug on the wiring and coax the connector out past the burner tube -- it can be a little obstinate, but it does have clearance to come out. (You'll likely disturb some insulation material.) The wiring has enough slack that the connector can be got hold of and disconnected. Connect the new ignitor, stuff the wiring back down the hole, stuff in the insulation material provided and fasten the ignitor in place.

Broil Ignitor

It might be possible to replace the broil ignitor from inside the oven as well, but removing the stove's rear cover gets you certain, easy access to the ignitor's connector. (I long ago installed low-profile appliance rollers on this stove, and I'm ever so glad I did; it makes this sort of job a lot easier.) You need a No. 2 Phillips screwdriver to remove six No. 8 x 1/2" truss head screws. With the rear cover off, disconnect the ignitor and then go to work on the ignitor's fasteners inside the oven. They're not at all pleasant to deal with because of the heat reflector in the way. You may want to have a 1/4" square drive universal joint arrangement, and a 5/16" box end wrench in addition to a nutdriver.

There's a small baffle-plate that has to come off (one screw) to permit the connector to come through from the back. Feed the new ignitor's wiring through its hole, fasten the ignitor and reinstall the baffle-plate. At the back, stuff in the insulation material provided, connect the ignitor and reattach the rear cover. That's it for ignitor replacement.

- - -

Control Panel

It turns out that I'll have to wait awhile longer to install the control panel. Someone's quality control went AWOL, and my repaired control panel is missing some pieces. That's being attended to. Meanwhile, I can at least show and tell what happened to the original control panel.

Until this incident, the stove's control panel has been trouble-free. Here's a view of the front of it.

And here's a view of the back of it.

Those two black rectangles are the ignitor relays.

Earlier, I warned against making retries when an attempt to light the oven trips a circuit breaker. Here's why I made that warning.

Conductive printed circuit foil runs associated with the bake ignitor's relay ended up acting as 'fuses', and partially vapourized. It looks as though attendant arcing may have taken out an integrated circuit (IC) on the opposite circuit board. Needless to say, it's game over for that control panel.

When I get the missing pieces of the 'repaired' control panel, I'll show what that was all about, and finish up this repair and post. You'll see that control panel replacement is a straightforward job -- not at all difficult or daunting.

SATURDAY, MARCH 3, 2012

Control Panel Replacement

The control panel ended up back at the repair outfit for confirmation/correction of its defect, and yesterday I got it back complete and ready to go, presumably.

What had happened was that eight little rods associated with the panel's push-button switches had been left out; the panel was completely inoperable. How it managed to get out the door of the repair place like that is beyond me. Anyway, it's now complete and it has a warranty seal on it, so it looks like they may have been paying attention this time.

Control panel replacement can be done entirely from the front of the stove, there's no need to get at the back of it except to UNPLUG IT BEFORE PROCEEDING -- line voltage is present at several of the control panel's terminals.

The stove's console face is fastened in place by four screws, two at each end. You'll need a stubby No. 2 Phillips for the two lower screws. With the screws out, the console face can come away and be laid down like so.

There's not a lot to the wiring. At this point, draw a sketch of the wiring or label all the wires. Disconnect everything.

Two screws fasten the lower lip of the panel's sheet metal surround to the console face. With those removed, you can get to here.

Four screws and the panel comes out -- not a difficult job at all.

The only bit of difficulty I ran into was in getting the screws that fasten the console face back into place -- the construction of the console ends is atrocious.

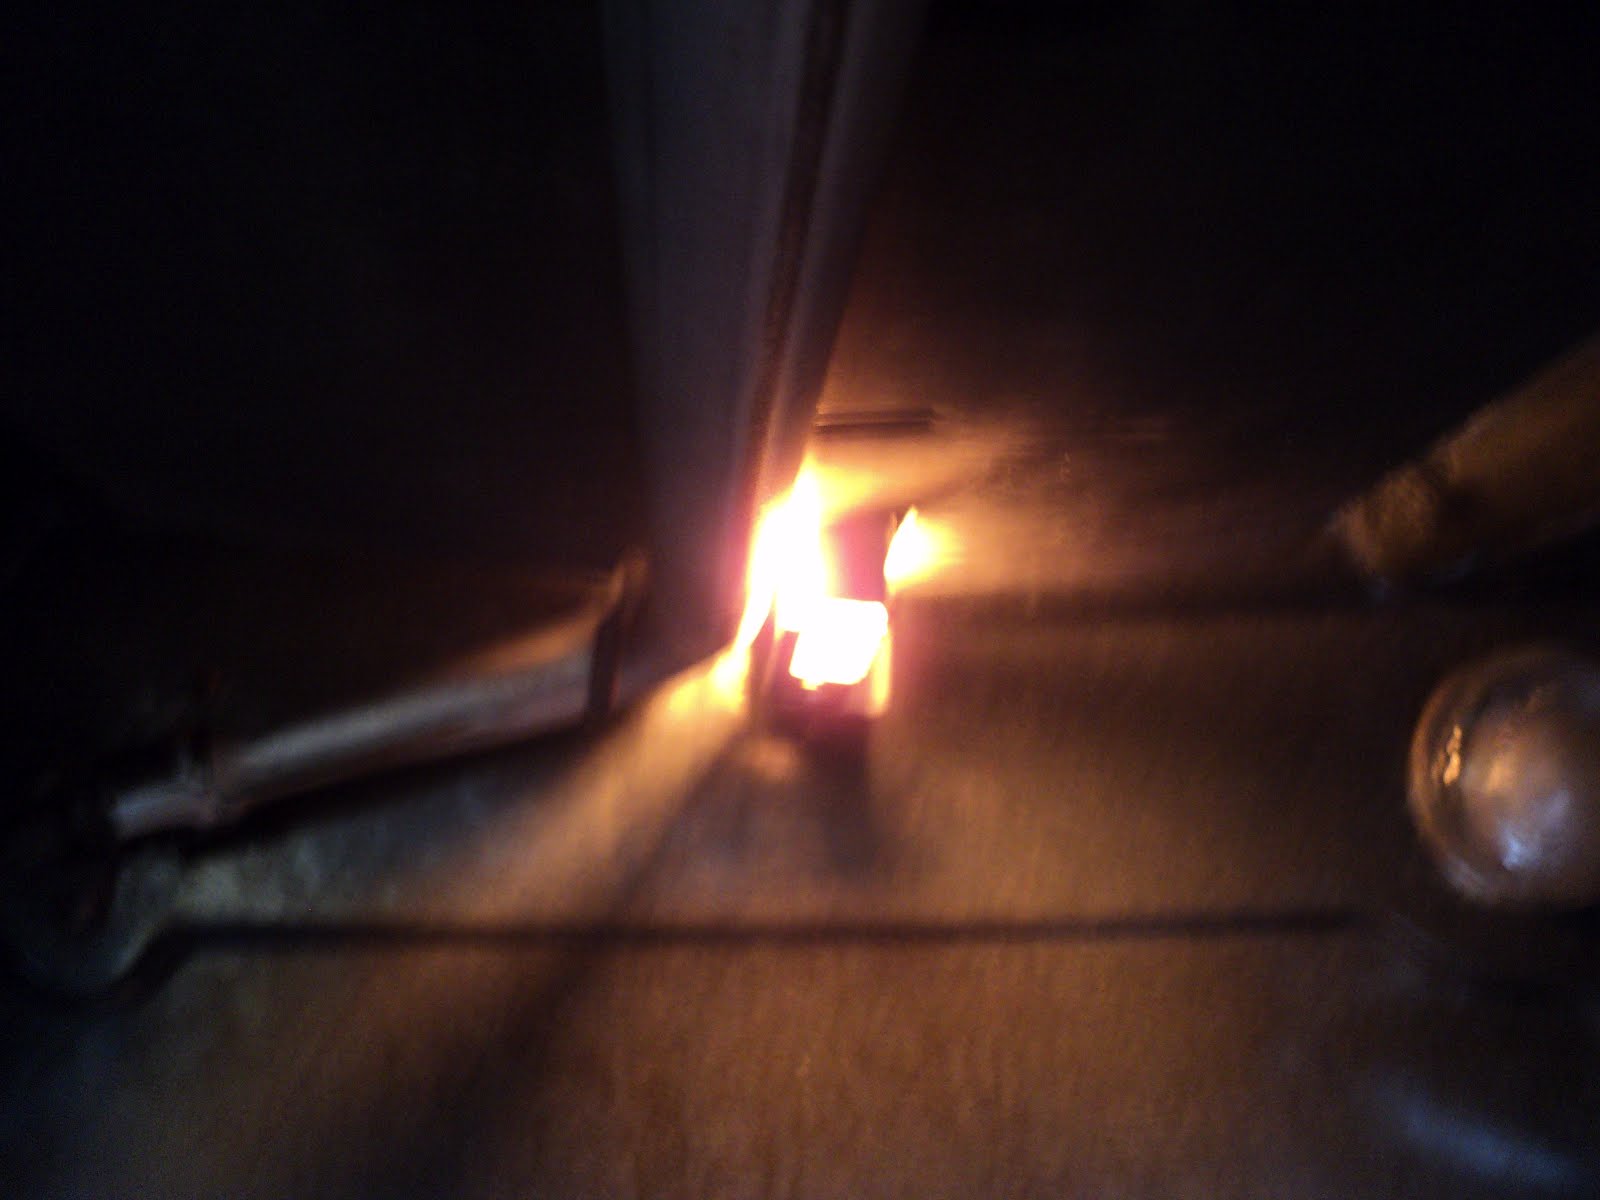
Anyway, everything appears to be working. The glowing ignitors don't photograph well, but here's a view of the broil ignitor just before the gas valve has opened.

Hot stuff.

And here's the broiler lit.

Provided those non-OEM ignitors prove reliable, this will have been a very low cost repair. This evening, the bake ignitor will get a workout. We'll see how that goes.

- - -

Update -- SUNDAY, MARCH 25, 2012

The repaired control panel lasted about a week, then it up and died. I was a little leery of it right from when I installed it because the display seemed not as crisp as on the old one, and its beep tone was odd -- harsher.

Anyway, I got it back today, repaired under warranty. It's back in the stove and its display looks good, so maybe that's an end to the aggravation for awhile.

# # #


# # #

Sunday, February 12, 2012

Venetian Blind Installation and Shortening

Our house has six basement windows, five of which have venetian blinds on them. For some reason, the sixth window was easy to ignore, and it's been blindless for a very long time. Finally this week, my wife got around to buying a blind.

She got it at the Home Depot; it's a standard, ready-made 36" wide by 48" tall blind. That's a little too wide, and much too tall, but that's ok. The Home Depot can cut down the width for you on the spot, which my wife had them do, and the height can be reworked by removing slats, repositioning the bottom rail and cutting the excess cord. Going that route is much less expensive than ordering a custom-made blind, but there's one little caution that I should insert here.

Have a tape measure with you, and verify the width dimension before you leave the store with the blind. That will save you a trip back to the store if they get it wrong, which was exactly what they did with the blind my wife bought.

Anyway, to their credit, they replaced the blind so now I can install it. These things are pretty easy to deal with; the mounting hardware is clever, well-thought-out and straightforward stuff. Here's a view of the right side mounting clip in place.

The blind came with two of those clips. It seems that wider blinds will have a third clip to support the centre of the headrail.

Since there are only two clips, I thought it wise to position them fairly well inboard, just to the inboard side of the draw cords. All I have to do now is snap the head rail onto the clips and the blind is up, all 48" of it.

The first time I shortened one of these blinds, I did it by measurement with the blind laid out on the floor. It's actually much easier and safer to do it empirically, with the blind hanging. No measurement error can occur, because there's no need to measure.

The instructions that come with the blind are pretty clear. You end up with what is for all intents and purposes a custom-fitted blind, like so.

Now all the basement windows finally have proper blinds on them. The place is getting positively civilized.

# # #


# # #

Saturday, February 11, 2012

Window Blind Boo-Boo -- or -- Way To Go, Home Depot

My wife got a venetian blind at the Home Depot just recently, for the last of our six basement windows that's been without a blind for far too long.

The blind was a ready-made 36" wide one. It needed to be 1 1/4" narrower than that, and the Home depot will cut them down for you on the spot. That's a nice service -- it gets you a blind that fits for considerably less money than a custom-made blind.

They had the correct dimension in mind, and wrote it on the box along with "No Return", like so.

Fair enough. Why would I want to return a blind that's been cut to fit our window perfectly?

Possibly because they goofed by over an inch.

We'll see how this plays out. I'll let you know.

- - -

SUNDAY, FEBRUARY 12, 2012

Update

They replaced the blind -- no hassle. Now I'm out of excuses.
I have to install the thing.


# # #


# # #

Sunday, February 5, 2012

Some Observations on Workshop Blogging

I've been at this blog for quite a while now -- I began it in December of 2009. It's grown to be quite a body of work, and I'm mostly quite pleased with and proud of it [though I should quit using that modifier 'quite' so much].

Making oneself write about and photograph everything that one does in one's workshop is a salutary experience; it brings about favourable behaviours that the world at large might benefit from. Here are a few random thoughts in that vein:

On 'Speed':

Blogging slows you down, down to the speed at which you can document your progress at whatever you're progressing at. That speed seems to me to be exactly the right speed at which to progress. Western capitalism can take its 'time is money' ethos and blow it out of or shove it up whatever orifice it may care to; time is far too precious a commodity to squander on hurry.

If the speed at which you can blog is not fast enough, that's too bleeping bad. Maybe that's telling you that you've bitten off more than you can chew, and you need to back off and lighten up.

On Precision of Work/Precision of Thought/Precision of Word:

Those three are linked like chain links; blogging enforces the integrity of the linkage.

Knowing that everything you're about to do will have to be presented to the world in clear, concise and accurate words and pictures focuses the mind. This afternoon, I was working on a handle for a woodworking vise [scroll way down]. Because I meant to blog about the endeavour, I had to think it through very carefully beforehand. Doing that contributed to a fine outcome.

Blogless work is more inclined to be thoughtless, precisionless work.

- - -

It's late in the day and I've run out of steam here for now. I'll bear this post in mind, and perhaps return to it and add to it. This medium is a wonder. For me, it's a dream come true -- my own publication free of editors, bosses, gatekeepers and what-have-you. It can stand or fall on its merits, such as they may be.

Good night and best wishes,

Tom

# # #


# # #