Saturday, June 30, 2012

A Magnifier Lamp Lens Replacement

And, "Why would a magnifier lamp's lens need to be replaced?", you may be wondering. Well, there's an easy way to ruin one, as I discovered some time ago.

I was modifying an 11/16" socket wrench to make a special spanner for removing the freewheel from a Raleigh bicycle's rear wheel, like so.

Getting the final touches done to those two lugs with a hand grinder was a delicate bit of business. I got the bright idea to employ my magnifier lamp as both a magnifier and as eye protection while I finished up the spanner. That worked out well enough that I got my spanner made, but the particles that flew from the grinding work had a rather ill effect on the under surface of the lamp's lens, like so.[1]


I lived with that spoiled lens for quite a long time before I finally got fed up with it and decided to pursue getting a replacement. I emailed Busy Bee Tools and asked if they had replacement lenses for their model B886 lamp. They replied that they didn't, but they could ask the manufacturer if lenses could be had and for what price. It was early in February of this year that I got that ball rolling. It took quite awhile for the exercise to bear fruit, but Busy Bee did come through for me.

They now carry replacement 5" magnifier lamp lenses for $9.99 each. The P/N is P886L. They graciously absorbed the shipping charges since I'd had to wait so long for it; I just received it earlier this week.

Anyway, replacing the lens is a breeze, really. Take out the fluorescent tube and there are three screws securing both the tube clips and the lens retainers, like so.

A few minutes' work, and I finally have a nice clear view through my magnifier again.


Those who know me know that I'm no fan of the business world, but I must give credit where it's due here. Busy Bee followed through on my request for a lens in exemplary fashion. It's much appreciated.

- - -

Note:

[1] The term 'coated optics' springs to mind here. The lens is glass and seems to be glass-hard, but the grinding fallout wrought irreparable damage to the lens' surface; I never expected that to happen. Anyway, the lesson is, "Don't use your magnifier as eye protection for grinding work."

# # #


# # #

Sunday, June 24, 2012

Extreme Salvage

My wife asked me for a bigger replacement for the screw-eye pictured below.

That new hanging flowerpot hook doesn't fit the existing eye very well at all.

I went for a scrounge where I  keep such things, and found this bit of ancient wreckage.


The top end of that was once a threaded stud -- 1/4"-20, probably. I may be pushing my luck here, but I'll see if I can restore that to a reasonable facsimile of a screw-eye.

- - -

Here it is paint-ready.


I wire brushed it and closed up that peculiar split shank[1] with a loop of steel wire, then filled what gap remained with five-minute epoxy to seal it. There was enough left of the shank-end that I was able to cut a vestigial M6 thread on it. If I install it with two nuts and blue threadlocker, it'll hold. I'll give it a flat black paint job, leave that to harden for a week and it'll be good to go. (I'll add a photo of it on the job when I get it installed.)

- - -

SATURDAY, JUNE 30, 2012

All Done

Here's a photo of the finished installation.


Not too shabby at all, considering what I started with.

- - -

Note:

[1] This may have been some sort of antenna mast standoff, originally. When we first moved into this place years ago, there was a dismantled TV antenna in the attic.

# # #


# # #

Saturday, June 16, 2012

Whirlpool Dryer -- Drum Belt Access

Applicability Note:

The following deals with a Model YLER7645JQ0 dryer. It's probably fairly typical of many dryer models.

* * *

Access to the drum belt is pretty easy to obtain. Four screws are removed to allow the lid (w/console attached) to tip upward. (The lid is hinged at the rear.) Two screws hold the machine's front cover in place. You'll need a No. 2 Posidriv screwdriver, a No. 2 Phillips screwdriver and a 5/16" nutdriver. Unplug the dryer and proceed as follows:

- - -

1) At either lower rear corner of the console, there's a No. 8 x 1 1/4" oval-head threading screw facing upward. (Posidriv recess.) Remove those.[1]

2) Remove the lint filter, and at the front of the lint filter opening, remove two No. 8 x 5/8" washerhead threading screws. (Phillips recess.)

3) Pry up the front lip of the lid. The lid will pop free of two plastic catch-blocks, and will be free to tip upward and rearward on its hinges.

4) From inside near the top, remove two No. 10 x 1/2" hex washerhead screws.[2] The front panel will be free to tip forward. Here's a view of the dryer opened up


5) Disconnect the door switch. (The connector can be quite tenacious. A small screwdriver is helpful for coaxing it apart.)

6) The front panel perches on two small steel hooks near the bottom. Support the drum with one hand while you lift away the panel with the other. (I have a 4 3/4" length of 2" x 4" that I use to prop up the drum while the front panel is off.)

- - -

Here's a view of the drive arrangement.


Note that the tension 'idler' is not a pulley -- it's just a smooth glide that the back of the belt runs over. Force the tensioner rightward to slacken the belt so you can slip it off the motor's pulley.

Belt tension is what holds the tensioner in place. With the belt off, the tensioner comes out easily. Here's a view of the thing's glide surface.


That's quite a clever bit of engineering; one less rotating component to want lubricant or wear out.


This dryer's original belt broke almost exactly one year ago when someone overloaded the drum. The reason I'm into it again is that a peculiar symptom has cropped up -- I'll press the start button, I hear what sounds like the motor turning and its pulley squealing, but the drum doesn't turn.

The belt looks ok. I'll clean the motor's pulley and the belt with lacquer thinner and put the dryer back together. If the problem recurs, I guess I'll have to get a new belt; I really can't imagine the trouble being anything other than belt slippage at the motor's pulley.

- - -

I should briefly mention a few things about the drum's supporting idler wheels. Here's a view of the one toward the right side of the machine above the motor.


There's another one of those lower down toward the left. There's a plastic spacer missing from the spindle of the pictured wheel. Here's what became of the spacer.


It melted when the belt broke and the dryer was on without the drum turning. By the time the high temperature limit thermostat opened up, it must have gotten ferociously hot inside the dryer.

Fortunately, the spacer isn't really needed. That wheel finds its own correct axial position on its spindle without any help from the spacer.

Note that the wheel's spindle is open-ended. (The other wheel's spindle has a support bracket at its front end.) There's a reason for that.

When you're re-installing the drum, you'll want to have only the lower support wheel to contend with while getting the drum back into place. The pictured wheel is easily removed to facilitate drum re-installation. When the drum is back in place, slip the wheel back onto its spindle and force the retainer back into its groove.

Once the drum is back on both of its support wheels, rotate the drum through one full turn, and make sure that the drum's rear seal hasn't folded under. Make corrections A/R.

- - -

Anyway, as major appliance repair jobs go, dealing with the drum belt in these dryers is a breeze. They're a well-thought-out machine.

- - -

Notes:

[1] Removing the two screws also makes it possible to unhook and lift the console off the machine, but for this job the console can just remain right where it is.

[2] There are two Tinnerman nuts on the lips of the front panel that the screws fasten into. The nuts are easily dislodged when you're getting the panel off its hooks. Check that the nuts are in place before reinstalling the panel.

# # #


# # #

Sunday, June 10, 2012

A Barbeque Heat Distribution Tent Reconstruction


These things lead a hard life; two years and it's game over.


That tent had been serving as a replacement for the original vaporizer bar in a Thermos Quickset barbeque. The good news is that I've still got two tent sections left over from the original tent kit, like so.


I should be able to salvage enough of the old tent to make up a reasonable facsimile of a replacement tent. If I get one more season out of it, I'll be happy.

- - -

It's not pretty, but it'll get through one more season at least.


I ground and drilled off the heads of the screws that were holding the old tent together. Some wire-brushing with a six-inch diameter wire wheel got the pieces reasonably clean. Aviation snips work fine for cutting the material, but eye protection is called for -- the porcelain coating erupts into a great spray of particles as the snips go along. 8-32 or M4 screws and nuts are ideal for fastening the sections together. There was a full set of four of the long 'leg' bolts left over in the box along with the two spare tent sections. Had I not had that, 3 1/2" long 1/4" carriage bolts would have served fine.

I checked Canadian Tire's web site, and it appears they still carry this item. It does the job for a reasonable price, and it spares you the aggravation of tracking down and ordering an OEM part.


Update -- SUNDAY, SEPTEMBER 8, 2013

Well, I got almost all of a full season out of my barbeque burner tent reconstruction. Then it sorta, kinda collapsed.


That tent is at the point where even I give up on a thing.

My son went looking for a replacement, and found what looks to me like an excellent one at Canadian Tire. Here's a view of it.


Here it is installed in my old Thermos Quickset barbeque.


It fits almost as if it were made for the thing. There was no need to install the optional 'legs' to prop it up off the 'floor' of the barbeque.

And here it is with the grille in place.


That looks to me like a fine barbeque burner tent.

Here's a view of the product's wrapper.


I don't know the price. P/Ns are GT-RAD-012; CTC P/N 085-1379-2

- - -

Update -- FRIDAY, AUGUST 2, 2019

Almost six years later, here's the condition of the replacement tent.


That's about had it. 'Time for a new tent again.

Canadian Tire still carries the same part number -- 085-1379-2. The brand name has changed from "Grill Trends" to "Master Chef", but it looks like it's still the same thing.


So, 'time to open up the package and see how it goes.

- - -

And here we are with the new tent assembled and in place.


Again, there was no need for the 'legs'. The tent perches nicely on ridges that are integral to the barbeque's casting. The tent's shortest assembled length (about 19 1/4") is right for my smallish barbeque.

The fasteners are all M6. A 10mm wrench, and a No. 2 or No. 3 Phillips screwdriver are needed for assembly.

# # #


# # #

Saturday, June 9, 2012

A Shepherd's Hook Modification

My wife found this very nice shepherd's hook[1] somewhere, but it needs a change made to it.


That clamp affair has to be deleted, and replaced by a foot long spike or spikes. (We had quite a wind storm yesterday; there are downed leaves all over the place.)

The clamp is tack-welded to the staff at four places, two on either side, like so.


I don't want to shorten the staff at all, so I'll cut the welds with that cut-off wheel in the Dremel.

- - -

Here's a view of some progress at weld cutting.


Reinforced cut-off wheels are awesome. They see a fair bit of use around here.

Anyway, sufficient cutting, plus a little persuasion from a hammer and chisel got me to here.


Now I have to file flat what's left of the welds on the staff, and prepare the spikes. I've found some material for spikes that should work nicely.


Those are tractor drive shafts from scrapped Okidata 320T dot-matrix printers. They're 7mm square cross-section, 12 7/16" long. I'll put pointy ends on them in the lathe, and attach them at either side of the end of the staff with screws and nuts. This hook won't be supporting anything very heavy, so this should work fine.

- - -

Here's a view of the spikes assembled to the staff.


Those are one-inch long 6-32 hex socket head screws with undersize, 1/4" A/F hex nuts. There's no need for lockwashers -- at final assembly I'll apply CA adhesive as a threadlocker, and as a sealant for the staff/spikes interface.

Drilling the 9/64" screw holes very precisely was a bit of a challenge. Here's how I went about it:

a) With masking tape applied as a layout marking aid, I laid out, spotted and centre punched the hole locations on one of the spikes. 'Drilled 3/32" pilot holes. 'Followed up with 9/64". That got me a 'template' for drilling the other spike.

b) I 'ganged' the two spikes together in the drill press vise, and drilled through the undrilled spike using the drilled spike as a template.

c) The square spikes are 7mm A/F, the square staff is 9mm A/F; that presented a bit of a complication for applying a spike to the staff for use as a template. I did that by eye, and used a set of Vise-Grips to clamp the two items together, like so.


d) That arrangement was a bit clumsy to handle on the drill press, but it was doable, and got me the desired outcome. I ran into one interesting little snag while drilling the staff, though.

I first drilled the lower hole through the staff -- that went easily, the staff is made of mild steel. When I got most of the way through drilling the remaining hole, the HSS twist drill began shrieking and ceased to make progress. I had to switch to a cobalt drill to finish drilling the hole.

(If I may digress here a bit, I've had incidents before of steel exhibiting variations in hardness; it's not an uncommon occurence. One time, I had to cut through two 'identical' bolts with an angle grinder in the course of an exhaust system repair on my Ford Ranger. The first bolt presented no great difficulty -- the grinder's wheel went through it about as I expected it to. The second bolt was significantly harder; it was all I could do to get the grinder to make progress.)

Anyway, I just have to give the two stakes pointy ends, and I can make this item paint ready.

Chucking Square Rod

My four-jaw chuck doesn't close down far enough to hold 7mm A/F square rod, so I came up with this method of chucking the rods for pointing the ends.


That's a three-inch length of 20mm diameter hardwood dowel. The square rod measures exactly 9mm across its rounded corners, so I bored the dowel through 8.5mm diameter. 'Hammered the rod through the bored dowel and there we are -- square material concentrically chucked in a three-jaw chuck. And here's a view of the outcome.


That worked nicely. I'm sure that's not the last time I'll have use for that method.

One more pointy end, and I can assemble and paint the thing. I'll add a photo of the finished item when I get it all done.

- - -

SATURDAY, JUNE 30, 2012

Ready For Installation

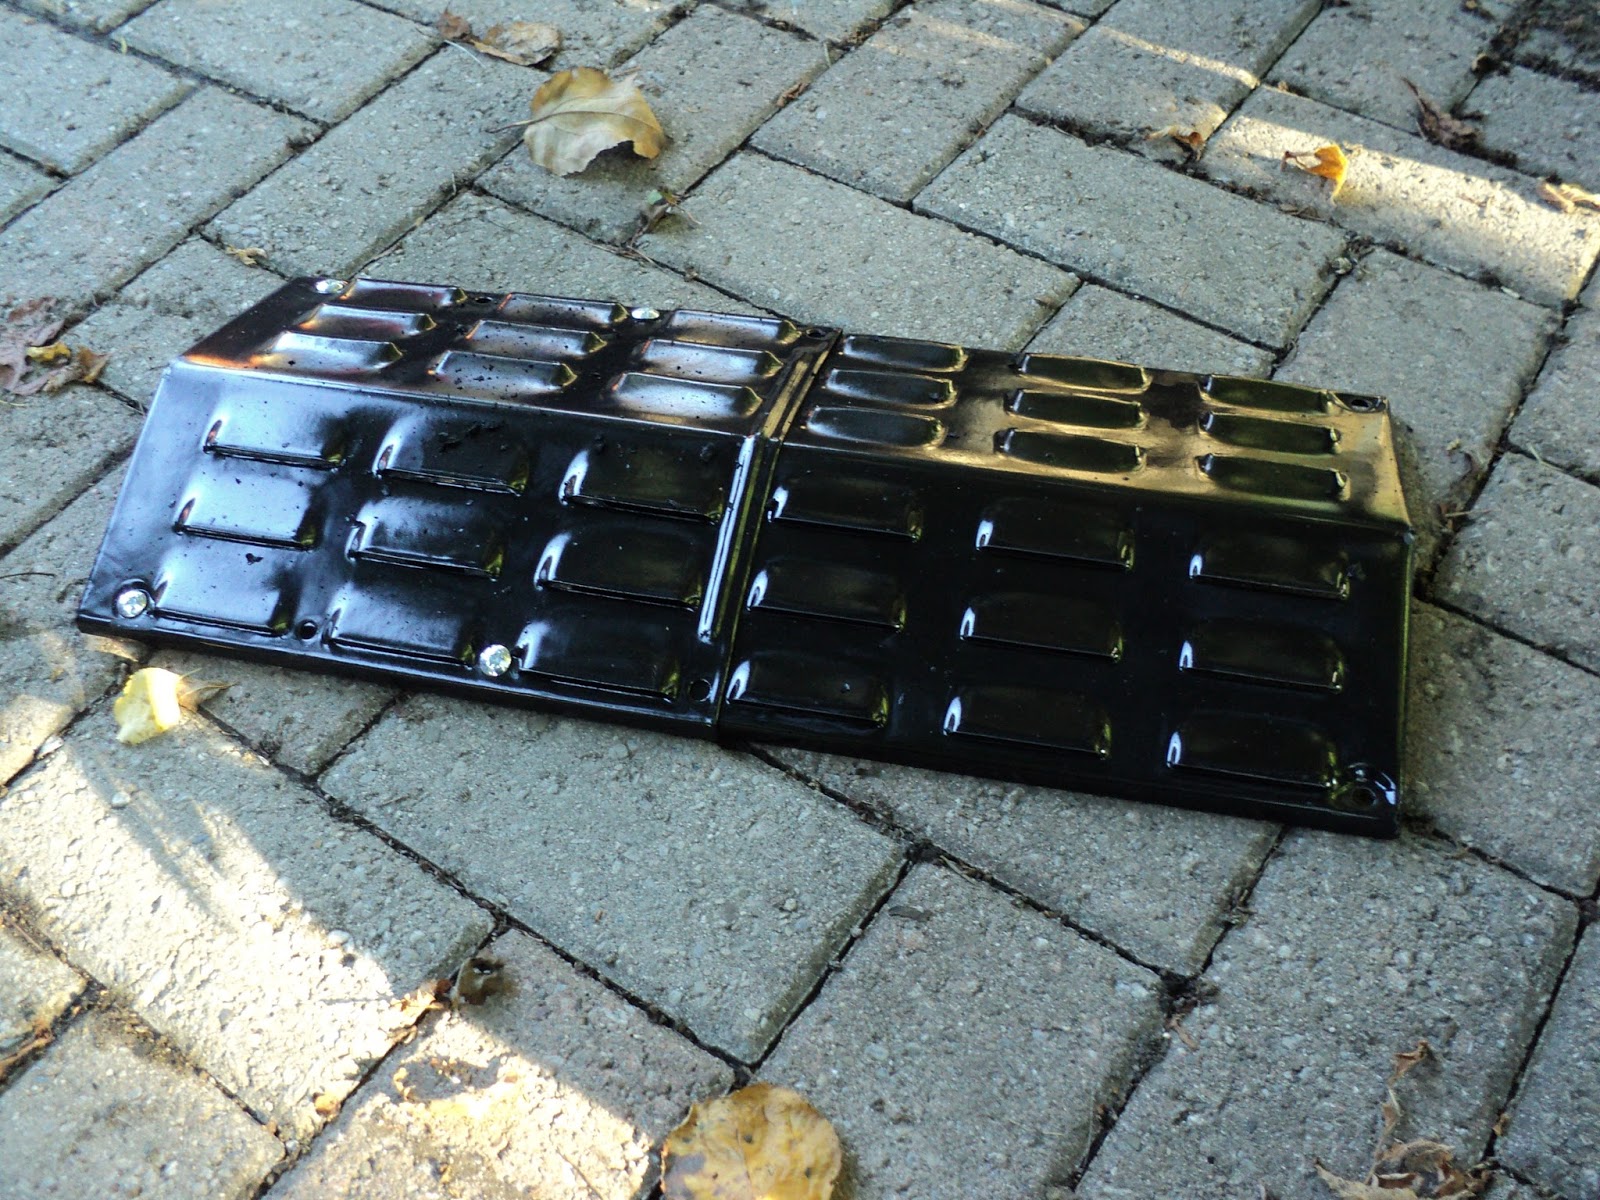
Here's a view of the fully assembled and painted spikes.


The original paint job on the staff is a green/black 'hammered' finish that I wasn't about to attempt to match. Most, if not all, of what I painted will be in the ground, anyway.

And here's the hook doing its job.


We'll see if we can fatten up the hummingbirds around here.

That turned out well. That big planter is deep enough that the spikes went all the way in. The tandem spike arrangement anchors the staff quite securely. So there we are, Okidata makes fine shepherd's hook parts.

- - -

Note:

[1]  You'll also see these called a 'shepherd hook', which strikes me as ungrammatical. A 'shepherd hook' would be what one would use to hook a shepherd -- not the right idea at all. 'Shepherd's hook' is correct.

# # #


# # #

Sunday, June 3, 2012

A Spatula Repair

This spatula has popped a fastening.[1]


With the thing clamped down at the edge of the workbench, I was able to do a pretty accurate job of centre punching the dome of the fastening.


Chrome-plated steel is hard, slippery stuff, so I started with a small, very sharp centre punch. Then I used a bigger, blunter centre punch to get a more pronounced dimple. Now I'll see how good a job I can do of drilling that through with a cobalt drill.

- - -

It's not perfect, but it's close enough that I can make this work out.


I drilled that 9/64" diameter, which is slightly oversize for cutting an 8-32 thread. I'll grind away that protruding material, and see if that steel is mild enough that I can tap it. It wasn't too difficult to drill, so this may work.

- - -

That turned out remarkably well.


I installed that truss head screw with red threadlocker, and tightened it really tight with a 3/8" square drive screwdriver bit. The screw's length is such that the end of the screw protrudes slightly from the spatula's shank. When the threadlocker has cured, I'll peen the screw's end over rivet-fashion, and that should be a permanent, long-lasting repair.

- - -

Here's the end of the screw peened over.


That screw's not going anywhere soon.

So there we are. Come the collapse of the global economy, those of us who can repair a spatula will still be able to flip a fried egg.

- - -

Notes:

[1] I had a devil of a time coming up with what to call that peened-over fastening.

I'm inclined to call such things 'peens' or 'swages', but it seems that's not the done thing. The result of peening is not called a peen, nor is the result of swaging called a swage.

In Wikipedia's article titled "Rivet", I found the terms 'shop head' and 'buck-tail' for the peened-over end of a rivet.[2] (They appear early on -- at the end of the first paragraph.) Both terms were new to me, and I prefer to keep this blog relatively free of specialized jargon, so I settled on 'fastening'. If anyone knows of a better, more intuitive word for the peened-over end of a rivet, I'd like to know what it is.

[2] The factory didn't actually use any separate rivets in the spatula's construction, but the fastening method used is effectively that of riveting. The fastenings are the peened-over ends of tiny, cylindrical protrusions that are integral to the shank. It's amazing the difficulties one can encounter in trying to write about a seemingly very simple item.

# # #


# # #