Sunday, November 17, 2019

A Toro Power Curve 1800 Snow Thrower


Someone brought me an electric snow thrower to repair. It's a Toro model No. 38025, S/N 290008995 -- an 18" swath, 12 amp machine.

It's missing its final drive belt, and the toothed primary drive belt is looking a bit frayed. Here's a view of the left side of the unit, where the belts reside.


Final drive belt replacement looks like it should be a breeze. Primary drive belt replacement will involve removing a pulley.

- - -

Intermediate Pulley Removal


That 9/16" A/F (across flats) hex is the head of the intermediate pulley's spindle. It has a left-hand thread, so it's CW to remove it. Removing the spindle with its pulley gets you to here.


The toothed belt's Toro P/N is 73-0160. Belt width is 19mm. On close inspection, the belt appears to be in good condition, and needn't be replaced.

- - -

Final Drive Belt


It's Toro P/N 61-8802; a five-ribbed belt. The belt is a tight fit -- it takes a bit of doing to get it on its pulleys. You may want to unspring the tension idler to make installation a little easier. Belt tension seems excessive to me, but it is the correct belt.

Here's a view of the installed belt.


Left Side Cover

The cover was missing its three fastening screws, and an associated skid plate. I replaced the screws with No. 8 x 3/4" hex washerhead sheet metal screws, GC Electronics P/N 11-206-C. The machine will have to do without its left side skid plate, unless the owner can find what's become of it. Here's a view of the left side cover installed with its replacement screws


Discharge Chute

The upper deflector portion of the chute is loose on its pivots.


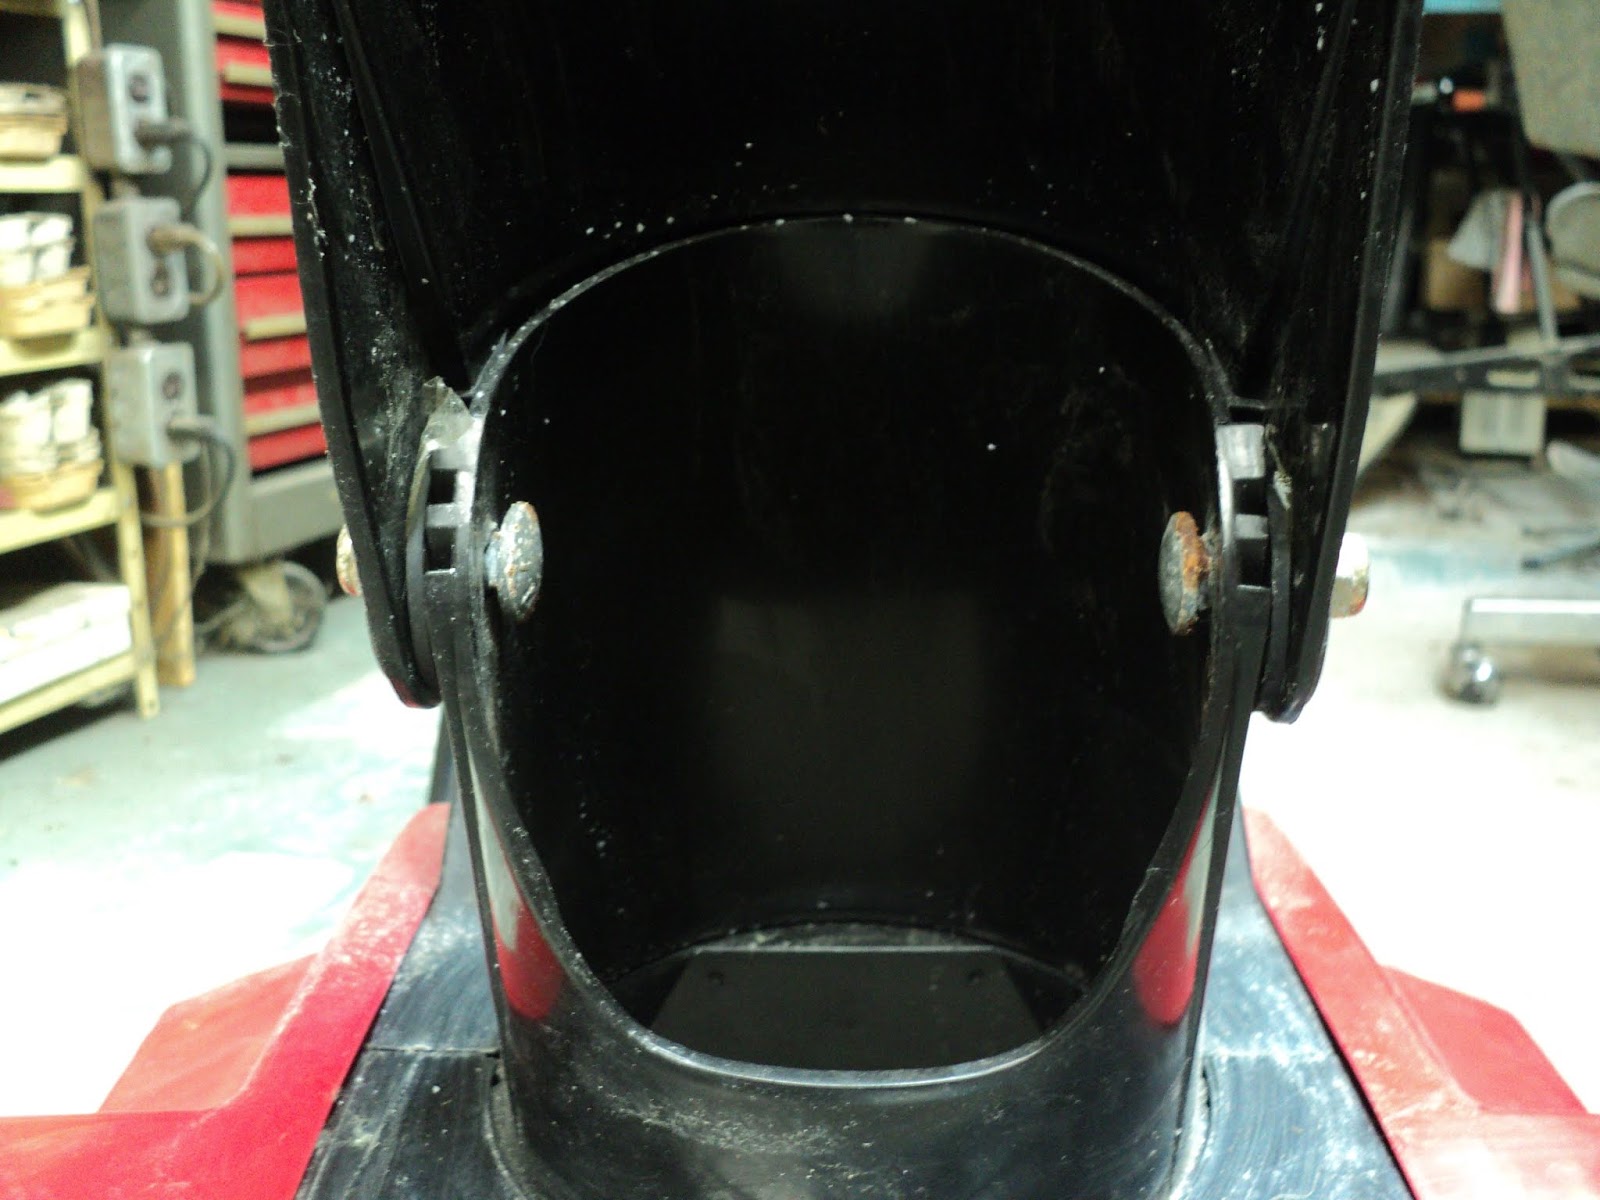
The 5/16" x 1" carriage bolts aren't seated in their square recesses, and the prevailing torque of the nyloc nuts is too great for the plastic material to resist. Trying to tighten the nyloc nuts only causes the bolts to turn. The bolts' shanks won't seat in the square recesses. The pivoting/tensioning scheme cannot work as designed.

I replaced the carriage bolts with 1" hex head bolts with 5/16" plate washers under the heads. That makes it possible to snug up the bolts so the deflector is properly tensioned.

In Conclusion

A worthwhile repair, I suppose, although the price of the replacement final drive belt struck me as outrageous -- $46.46 CDN + HST came to $52.50! A new replacement machine, same make and model, is $449.00 CDN + HST at the Home Depot, so repair cost here was within reason.

- - -

Missing Left Side Skid Plate Dealt With -- WEDNESDAY, NOVEMBER 20, 2019

That missing left side skid was bothering me, so I came up with a fix. Here's a view of the skid that's on the right side leading edge of the auger housing.


Note the two tabs that employ two right side cover screws to fasten the skid in place.

I could see no practicable way to fabricate a truly equivalent part.[1] So, I fabricated a skid with a different fastening scheme. Here's a view of what I came up with for the left side.


That's a 5" length of 1/8" x 1/2" steel flat, rolled to conform to the auger housing's profile. Three countersunk holes accept No. 5 x 1/2" flat head wood screws. It looks to me like a sound arrangement -- I'm quite pleased with it.

- - -

Addendum -- FRIDAY, NOVEMBER 29, 2019 -- Get The Idler Tension Spring Hooked On Right!

You want the idler tension spring to be securely hooked. Here's how it ought to look.


If the spring is hooked the other way around, the hooking won't be nearly as secure.

* * *

Note:

[1] "So why not just obtain an OEM replacement for the missing skid?", you may ask.

Too much aggravation and expense is why. Another trip out to the small engines place in Pickering, where they'd be unlikely to stock such an item. Then, if the part were available to be ordered, another trip out to Pickering to collect it, plus the cost of the part itself.

By fabricating a functionally equivalent part from material I had on hand, I bypassed all that and I now have a truly finished repair that I can return to the customer right now. An outcome well worth the effort of part fabrication.


# # #


# # #

Saturday, November 9, 2019

A Freakish Knife Failure


Found in the dishwasher after a wash cycle.


A supposedly high quality Cuisine de France chef's knife. It just up and broke in two -- quite mind boggling.

And it was one of my wife's favourites.

Anyway, there's no conceivable way of repairing that, that's for sure.

# # #


# # #

Tuesday, November 5, 2019

Honda HS621 Snow Thrower Oil Change


Changing the oil in a Honda HS621 snow thrower is a bit awkward owing to the placement of the drain plug and the filler neck. Here are a couple of items that make the job relatively easy.

First is a suitable drain pan. In Canadian Tire's kitchenwares section, I found a Lagostina cake pan that's 9" square by about 1 1/2" deep. It's perfectly suited to the task. The pan was on special so the price was reasonable. A dollar store might have something similar for even less money, though. Here's a view of the pan in position for draining the oil.


The drain plug's hex takes a 10mm socket wrench.

Second, you'll need a funnel with a 9" length of tubing for a neck extension. Here's what I cobbled together from what I had on hand.


That solves the difficulty of getting to the engine's oil filler neck.

Honda's oil recommendation is 5W30. Sump capacity is 600ml. With a full sump, oil should just be visible at the opening of the filler neck.

# # #


# # #

A No-Name 19" Push Lawnmower


A roadside find, in rough condition, possibly destined to be scrap metal.


It's also easily the ugliest lawnmower I've ever seen -- a dreadful colour scheme.

Anyway, the first order of business is to deal with the stuck starter. It won't recoil. The starter cord's handle is some sort of steel bracket.


- - -

Starter Working

The spring needed winding up. The cord is too short to be parked up on the handlebar as it ought to be, but it's long enough to work so I can test for spark.

- - -

Starter Update -- SUNDAY, NOVEMBER 24, 2019

I installed a new cord -- an 88" MTD/Atlas item from Canadian Tire. Canadian Tire P/N 60-7553-8. $5.99 CDN + HST. I had a salvaged grip on hand. The new arrangement works fine. The 88" cord length is adequate for parking the grip up on the handlebar.

- - -

Spark Plug

It's a Champion RJ19LM, which is correct for the engine. The plug is in reasonably good condition, but the gap is oversize. I set the gap to a snug 0.030". A spark test reveals that I do have spark.

Engine

Engine is a Tecumseh. As best I can make out the codes embossed on the front of the cowl, it's a TVS90 43368F SER 80686.

Compression Test

I got a reading of about 42 PSI. That's pretty lame. A well worn engine may exhibit 50 PSI, so this engine is past it. Just for the heckuvit, I'll see if I can get it to start and run.

- - -

Compression Test Update -- THURSDAY, NOVEMBER 7, 2019

I did get the engine to start and run. After running the engine for a brief while, I did another compression test. That test returned a reading of almost 60 PSI. I imagine that the piston rings got a good shakeup, and started to seat better in the cylinder's bore. 60 PSI is still not great compression, but in my experience, 60 PSI is viable compression -- the engine still has useful life in it.

- - -

Fuel Tank

The fuel tank lifts off two ways at the rear of the cowl. There's a spring-type hose clamp to be dealt with at the fuel line nipple.

The tank is all but empty. There doesn't appear to be water or sludge in it. The cap is cracked. The cap's gasket is ill-fitting, and falls out easily.

- - -

Fuel Tank Update -- SUNDAY, NOVEMBER 24, 2019

New red fuel tank cap. Tecumseh P/N 34210.

- - -

Air Cleaner

The air cleaner is mis-installed, and missing its cover. Two special 10-32 shoulder screws with 1/4" A/F (across flats) hex heads with No. 2 Phillips recesses fasten the air cleaner's body to the carburetor. There's a round gasket in the air cleaner's air horn where it contacts the carburetor. The gasket is inclined to stay in its groove and not come loose.

Cowl

At the front, two 10-24 x 1/2" hex washerhead screws with captive external tooth washers, 5/16" A/F.

At the rear, two 1/4"-20 hex washerhead screws, 3/8" A/F.

Governor/Throttle Control Plate On Top Of Carburetor


Note the positions of the adjustable features of the plate -- the throttle cable jacket's position and the plate's position.
  • Throttle cable. Loosen off the clamp (1/4" A/F hex) and unhook the cable.
  • Control plate. Two 10-24 x 1/2" hex washerhead screws with captive external tooth washers, 5/16" A/F.
  • Unhook the governor spring link.
Carburetor
  • Two 1/4"-28 x 7/8" hex head screws, 3/8" A/F with two 7/16" A/F KEPS nuts.
  • Note the position of the governor link in the throttle lever, and unhook the link.
  • Float Bowl Screw. 1/2" A/F hex.
The carburetor is a float bowl type, as simple a design as one will ever see. There are no adjustments aside from float level. There is no idle jetting. Pressing the primer bulb forces a visible squirt of fuel up and out of the main jet into the venturi.

- - -

Start Up Trial

'Put some fuel in it, gave it three primes and it started on the first pull. So, even with compression as low as 42 PSI, a four-stroke engine will start and run.

That doesn't save this lawnmower from the scrapyard, though. It's too ugly and too far gone to sell.

* * *

Oh, What The Hey -- SATURDAY, NOVEMBER 23, 2019

For want of anything better to do, I decided to go ahead and try to make a serviceable, saleable mower out of this piece of junk. That took a fair bit of doing. Here's what I've done.


Painting

I stripped the blue paint off the handlebars with paint remover. The handlebars, engine cowl and discharge chute all got painted gloss black. 'Looks much better.

Primer was Canadian Tire Armor Coat grey primer P/N 048-0621-0. Paint (two coats) was Canadian Tire Armor Coat gloss black enamel P/N 048-0314-2.

Deck Cracks Behind Rear Wheels

I cut two patch plates from 1 1/2" wide steel flat, and installed them with 1/8" hollow aluminum rivets, like so.


I also used the same 1 1/2" wide steel flat to fabricate two rectangular 'washers' for underneath the handlebar brackets.


The rear of the deck is now rigid as it ought to be.

Trailing Flap


The original flap was completely torn off. The pictured flap that I've installed is the same as that used on my own lawnmower. The parts breakdown in my user's manual gave me the part number -- MTD P/N 731-06953 -- so I was able to order one from the small engines place in Pickering.

For hinges, I used 1/2" All Round strapping. The hinges are anchored by two 10-24 aluminum threaded inserts, with 1/2" long hex socket head screws.

Air Cleaner Cover

The air cleaner cover was missing altogether. I had a salvaged one with a broken tab on it, so I made up for the broken tab with a 10-24 x 1" screw and another 10-24 aluminum threaded insert.


- - -

So there we are -- the mower is now a serviceable machine. I'll try peddling it on Kijiji come spring.

# # #


# # #

Monday, November 4, 2019

A YARD MACHINES by MTD 4.5HP/21" Snow Thrower


My son picked this up in working condition for $20.00 CDN. He's asked me to look it over before he tries flipping it for a profit.

It's an MTD MODEL 31A-150-500. MFG. CODE 21-074-4411

It's a single stage machine with a two-stroke engine. Fuel mix ratio is 50:1. There's a 120 VAC electric starter feature.

Engine is a Tecumseh:
  • ENGINE MODEL HSK845 8204D (H)
  • ENGINE FAMILY VTP139UB25RA
  • DISPLACEMENT 139
  • D.O.M. 7254G
Let's have a look-see and discover what sort of condition the machine is in.

A Motley Collection Of Auger Drive Cover Screws


The heads of the screws fastening the auger drive cover are all different. I'm almost afraid to discover what the screws' threads are. There's a cross-slot, a slot, a PoziDriv and a slotted hex head. there's one screw missing down below.

- - -

The screws are a mixed bag -- mostly threading (sheet metal) screws. I think they should all be 1/4"-20, so I chased the holes with a tap, and now I've got uniform 1/4"-20 screw locations at all five places. I'll install 1/2" long hex socket head screws, split lockwashers and flat washers at final reassembly.

The Auger Drive


The V-belt looks to be more-or-less ok. The tension idler feels lubricant-starved. I'll take that off and oil it as best I can.

Belt Tension Adjustment

The clutch control cable terminates in an extension spring that hooks onto the idler pulley bracket. There are three holes in the idler pulley bracket for the spring to hook into. The lowest hole affords the least belt tension. The two higher up holes afford progressively greater belt tension. Here's a view of that.


Note that the spring in the photo above is hooked into the lowest of the three holes, for least belt tension. That belt tension seemed marginal to me, so I hooked the spring into the middle hole.

Note also the second extension spring higher up. That's the idler pulley bracket return spring. The spring seen in the photo is not factory -- it's someone's kludged replacement. The return spring is not supposed to be hooked into a tension spring hole; it's supposed to hook onto that notch in the bracket that's just below the tensioning spring holes. I don't have a better replacement for the return spring, so I'll just have to leave that be.

The Top Cover

Remove nine threading screws to unfasten the top cover. Remove the fuel tank cap and the discharge chute's wingnut. The cover will be free to come away, though some forceful coaxing will be needed to get the cover past the exhaust pipe. Here's a view of the machine with the top cover off.


Note the electric starter motor directly below the muffler.

The Carburetor

The carburetor is a float bowl type, with no adjustments aside from float level. The float bowl is readily accessible from below, as can be seen in the following photograph.


I took the float bowl off for inspection. (A 1/2" wrench is needed.) There was some sediment in the bowl that I rinsed out. Float level looked satisfactory.

On reassembly, I ended up with a leak at the float bowl screw's gasket. The gasket is an ill-fitting thing. Reassembly and re-tightening solved the leak.

Carburetor Removal

Carburetor removal on this machine looks like a nasty bit of business -- not to be undertaken without a pressing reason for it.

It appears that in order to remove the carburetor, one must unfasten the dashboard to get it out of the way. Then, a ball-ended hex key might be needed to loosen off the carburetor's two fasteners, and I don't have any of those. Since this machine starts and runs satisfactorily, I'm going to leave well enough alone.

The Spark Plug

The spark plug is accessible via a hole in the dashboard. The spark plug in this machine's engine is an NGK BPMR7A, with a 3/4" hex and a 0.025" gap. The plug shows some evidence of oil fouling, but is in good condition. (The oil fouling may be from having run with too oily a fuel mix.)

And That's It

The machine starts and runs, and auger drive looks ok. It can go on Kijiji.

* * *

Update -- SATURDAY, MARCH 8, 2020

I never did put the machine up for sale. Instead, I let it sit unused all winter under the carport. I tried starting it today and it was no go -- the machine absolutely refused to start.

I dragged it into the workshop and checked for spark; that was ok. I uncovered the carburetor's intake and checked for priming. There was no evidence of priming spurts whatsoever. I upended the machine on the front of its auger housing and tried the primer bulb. Fuel emerged from around the float bowl's ring gasket. Bingo!

That explained a lot. With the float bowl's ring gasket leaking, pressing the primer bulb only blew air past the ring gasket; the float bowl wasn't being pressurized so that fuel would be forced up the main jet into the venturi. The priming function was rendered inoperative by the leaky float bowl ring gasket.

A replacement ring gasket solved the problem. A reminder that a small, normally invisible detail can disable an engine.

# # #

FEEDBACK

# # #