Tuesday, August 9, 2016

Hose Reel Cart Leader Hose Replacement


Preface -- TUESDAY, JUNE 12, 2018

Since writing this post, I've discovered that automotive heater hose can't reliably withstand the pressure of a domestic water supply for much over a year. Leaks eventually break out, and the hose has to be replaced.

 * * *

 This elderly Ames ReelEasy hose reel cart has a leaky leader hose.


(A 'leader hose' is the short length of hose on a hose reel cart that connects to the water supply.)

The leaking leader hose on this cart is not the original. It's a vinyl replacement that I installed years ago, and is now almost as stiff as rigid pipe.

A slight complication is that the cart's water connection right at the cart itself is a nipple that's meant to take 5/8" hose, and I don't have any 5/8" garden hose that I can get a short length from -- only 1/2"

When I long ago installed the leader hose you see in the photo above, I got around that problem by heating one end of a 1/2" vinyl leader hose to soften it, and forcing it onto the 5/8" nipple on the cart. That actually worked out ok, and that hose connection is not leaking, it's the female hose fitting end of the leader hose that's leaking.

I'd rather not use vinyl hose for a leader hose again -- vinyl hose is dreadful stuff, really. I find that it stiffens within a season. It dawned on me that 5/8" is a standard size of automotive heater hose, and that can be had by the foot. Then it dawned on me that I might have a spare length of that stuff in a drawer. I went and checked, and sure enough it was there. I went and checked my spare hose fittings bin, and I found a female hose fitting for 5/8" hose. I had everything I needed on hand -- I didn't have to go out to buy a thing to repair the cart.

(I've been having a string of good fortune lately, and it's beginning to worry me. Am I being set up for a disaster?)

Anyway, on with removing the old, stiff leader hose.

The Cart's Connection Nipple

This is the one that I had force fitted a 1/2" hose onto. Note the pronounced bulge.


I'll try heating it up again with a heat gun to get it to come off. I'd rather not cut it, and risk scoring the nipple. Here goes.

- - -

That was easy.


I'll salvage the female hose fitting and the hose clamp, and discard that wretched bit of stiff hose.

The Leak Explained

I asked for it by using a salvaged, pressed metal female hose fitting without proper barbs on it, like so.


I won't do that again.

The Replacement Leader Hose Installed

Here we are with a slightly longer, rubber leader hose.


That should far outlast a vinyl hose. Now to try it out.

- - -

And here we are with everything connected and the hose fully pressurized.


No more little water fountain effects.

So the lesson is, "When you need a leader hose for your hose reel cart, go to the auto supply for heater hose."

* * *

A Mystery Leak -- MONDAY, MAY 28, 2018


I suspect that a young raccoon may have chewed the hose; those critters will test anything to see if it might be food. I had the same thing happen years ago to a barbeque's fuel supply hoses.

I'll just shorten that leader hose by a couple of inches to get rid of the leak. Hopefully, the raccoon has learned that rubber hose is not edible.

For whatever it's worth, here's a view of what the toothy creature did to the leader hose.


- - -

Whoops! -- TUESDAY, JUNE 12, 2018

I was wrong. The leaking leader hose wasn't the result of raccoon vandalism; it was hose wall failure. Since repairing the first leak, I've had more leaks develop.


So it appears that automotive heater hose is only good for one full season in this application, then it can no longer withstand the pressure of a domestic water supply.

I have more heater hose on hand, so I've replaced the old leader hose entirely with a new six inch length, and I should be ok for the summer.


If I could get proper 5/8" water hose by the foot, I could do a permanent repair, but I can find no such hose. So, I'll just have to keep periodically replacing my leader hose with automotive heater hose. That's not too difficult to do.

# # #


# # #

Monday, August 8, 2016

An Ashtray Perch For The Table Saw Stand


I may be finally getting the hang of this retirement gig -- the approach to take is even if you have 'better', more pressing things to do in the workshop, just go ahead and do whatever damn well pleases you at the moment; it's liberating and fun.

In that spirit, I present my table saw stand ashtray perch.


Some explanation is perhaps in order.

The lilliputian 'office' portion of my workshop, where I write these things, is right by the front of my table saw. I've been putting my ashtray on top of the table saw, where it's reasonably handy to me just off to my left. But my table saw's table is fairly high (39" -- it's a bit of a reach up from my chair), and I have to relocate the ashtray whenever I need to use the saw.

So, in the interest of sound ergonomics, I made a perch for the ashtray that's mounted lower, at the front of the machine's stand. A bonus is that the ashtray is no longer in the way when I need use of the saw.

The perch is just a softwood disc that I turned on the lathe. It has a recess in its top that accepts the base of the ashtray securely. A 5/16"-18 tee-nut in the centre of its top recess fastens it to a threaded rod stud, like so.


It's quite a sturdy little arrangement that suits me fine

# # #

FEEDBACK

# # #


Sunday, August 7, 2016

Wire Wheel Machine Enhancements


A long time ago, I wrote about the first wire wheel machine that I built for my workshop, and a second machine that I had meant to give to my son. It turned out that my son had no place at his home where he could possibly fit in a wire wheel machine, so I still have that machine, and need to either sell it or give it away.

In order to make the machine reasonably attractive to a potential buyer, I came up with a stand for it, and added a safety feature -- a belt guard for the front end of the v-belt and its pulley. here's a view of the machine on its stand without the belt guard.


And with the belt guard.


Now I need to paint the deck and the belt guard. The stand has rails at roughly the mid-point of the legs. Those rails could easily support a deck, to lend storage space to the stand. I'll see if I can scrounge up material for that.

A Mid-Point Deck

I happen to have a plank that I glued up from maple flooring long ago. It was something that didn't work out as planned, so the plank has been taking up space ever since. Fortunately, I can put it to good use here and be rid of it.

Here's a view of the shelf in place.


That allows the use of a fair bit of space that would otherwise be lost in the stand.

Getting a shelf like that installed in a stand that tapers upwards like this one does is not so easy. One leg has to come off completely in order to get the shelf in place.

I've marked fastener locations from underneath for bolts to secure the shelf to the short rails. (The rails already have holes suited to just such a purpose.) I'll take the shelf out, drill bolt holes, and do one more trial assembly with the proper fasteners. Then I can take the shelf out again, fill its defects, sand, prime and paint it.

Done

I've painted the belt guard, the deck and the mid-point deck. Here are the photos I took for a Kijiji ad.


That's not a bad looking piece of machinery, if I do say so myself. We'll see what it fetches, if anything, ever.

# # #


# # #


How Not To Treat A Tool


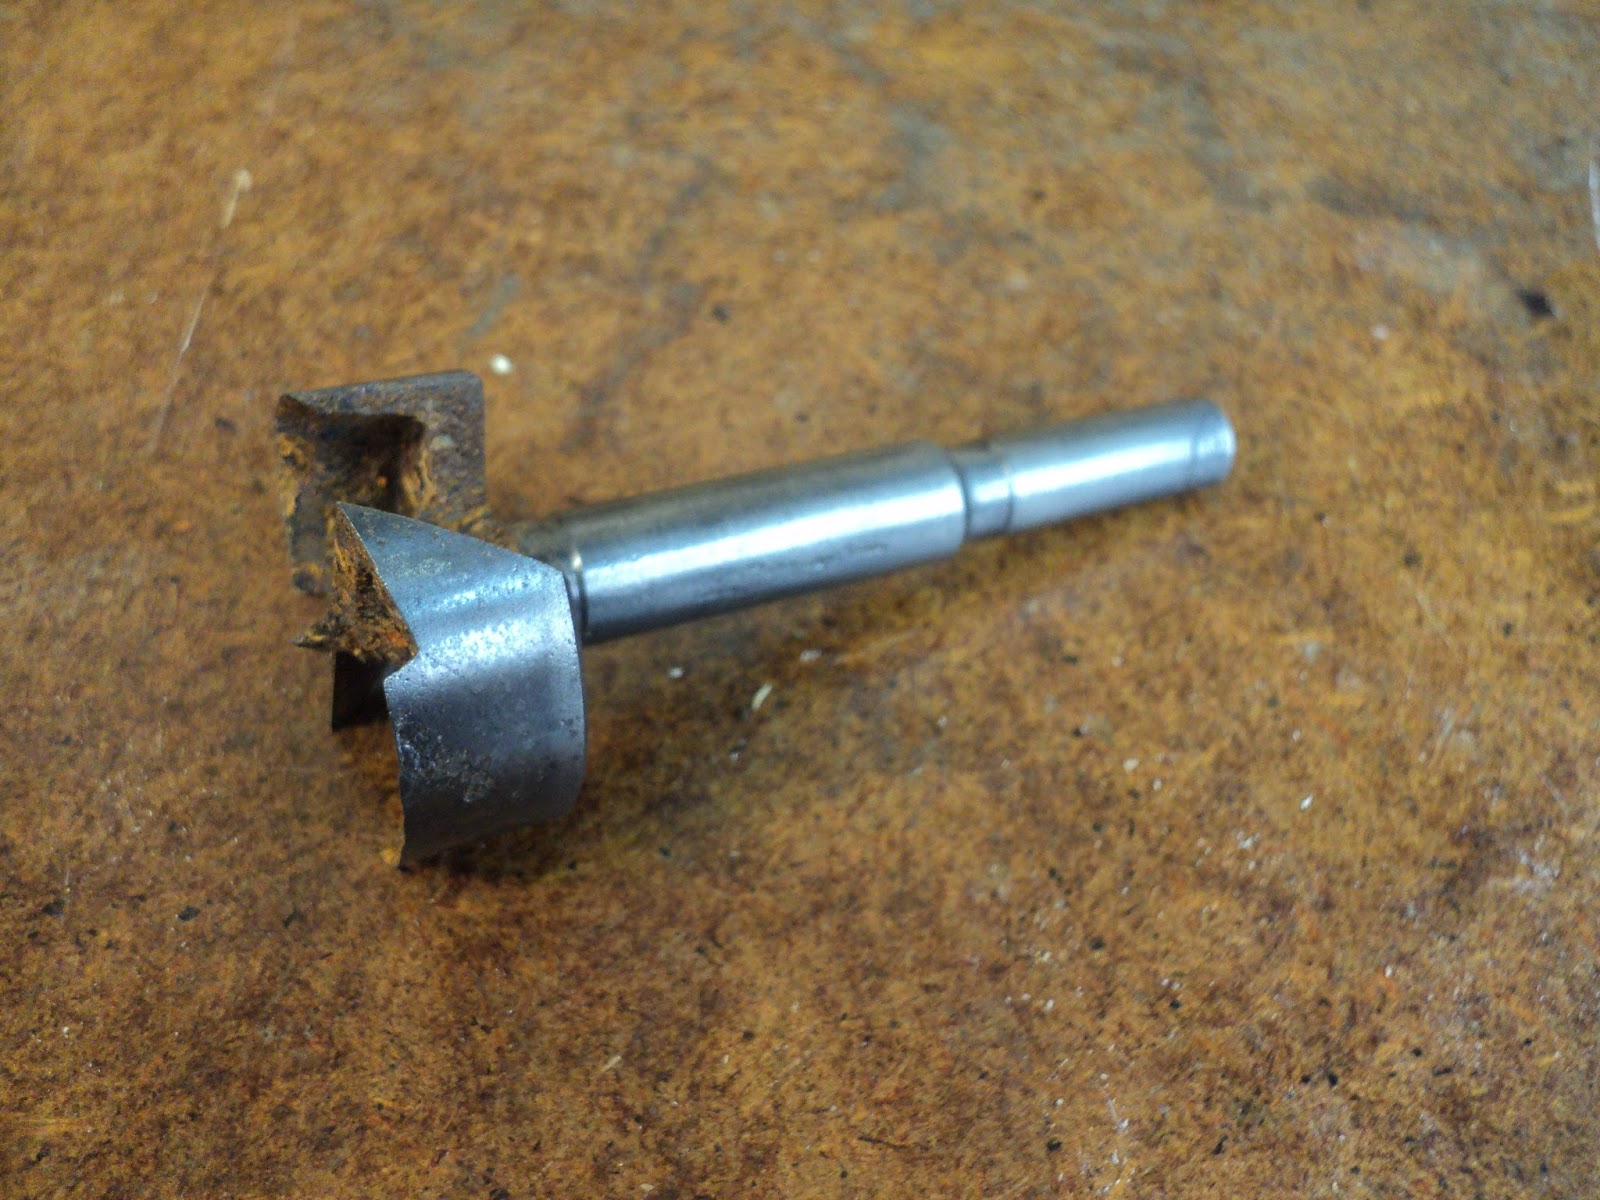
I found this Freud FB-011, 1 1/2" Forstner bit in a neighbour's garage.


Oh my God. What a freaking mess. The bit must have been left out in the rain in its unsealed package, then put away unattended to.

I'll clean it up on the wire wheel machine as best I can, and try it out.

Here it is after a wire wheel treatment of the shank and the cutting head's periphery.


The inside of the cutting head just isn't accessible for rust removal. Using the drill should clean up that area somewhat.

Here it is having seen some action.


The rust has probably dulled the drill a little, but it drills to perfectly true nominal size.

Here's the Freud drill again next to a Busy Bee 1 1/2" Forstner bit.


The Busy Bee item drills slightly oversize, but it does have the virtue of being much more affordable. Freud's Forstner bits are not cheap.

Freud appears to have obsoleted the 'FB' series of Forstner bits, and replaced it with the 'FC' series. The 'FC' series is carbide tipped.

By the way, Benjamin Forstner was quite an accomplished gentleman. His invention of the drill bit that bears his name made him a wealthy man.

# # #


# # #

Saturday, August 6, 2016

A 'Work-In-Progress' Shelf For The Workshop


Something I used to have in my workshop is a 'work-in-progress' (WIP) shelf. It was a 36" x 16" x 38" tall steel shelving unit, on which I'd keep the loose bits and pieces of items I was working on, so they wouldn't get misplaced and mislaid and lost.

The shelf got evicted when I had to make space for a bandsaw and an arc welder. It went to a storage room where it was no longer convenient to me, and I fell out of the habit of using it as I had.

I find now that I miss the old WIP shelf terribly, and I'd like to have one in the workshop again. The difficulty is that, on the face of things at least, there's no place left in my workshop to put one. I have 300 square feet, with no unoccupied wall space left.

Then the thought occurred to me that if I were to mount a shelving unit on a wheeled dolly, I could keep it in a seldom used spot by my paint bench, and just roll it aside when I needed to -- I'd have a WIP shelf again.

I have the makings of a rudimentary dolly, and Canadian Tire has a low-end resin shelving unit for $29.99. So I went to Canadian Tire this morning and picked one up. Here it is still in its factory banding.


Assembled, it's about 32" x 14" x 72" tall. For capacity, it should more than make up for the loss of my old WIP shelf.

I'll get going on the dolly, and maybe I'll have a WIP shelf again before the day is over. (Or not; no one's ever accused me of being speedy.)

The Dolly's Underside

I've got the dolly's base cut to size from an old hardwood plank I had on hand, and I've added cross-pieces at the ends to attach the casters to, like so.


(Those casters aren't fastened yet. I just placed them to show how it will look when done.)

Those cross-pieces are two inches longer than the base plank is wide, so the casters will be slightly out-rigged for the sake of stability.

Now I have to add similar cross-pieces on top, but with holes/sockets in them to accept the 'feet' of the bottom shelf, so the shelf can't possibly slide off the dolly.

The Dolly's Topside

And here we are with the topside's cross-pieces installed.


Those 'sockets' are 1 5/8" diameter holes bored clear through the cross-pieces with a Forstner bit. They're 1/8" oversize in diameter for what is nominally called for -- that gave me some wiggle room to compensate for the difficulty of laying out such an arrangement, and locating exact hole centres. It's turned out fine. Here's a view of the thing with a shelf parked on it.


That's pretty much exactly what I was after -- a way to positively secure the shelf from sliding off the dolly.

Now I just have to fasten the casters, and the dolly is done. I can assemble the shelving unit, mount it on the dolly and see how it all looks.

The Dolly Completed


There it is, all ready for an assembled shelving unit.

And here's the dolly with its shelving unit parked in its spot.


I think I'll have to forego the topmost shelf. The thing is a bit tall for my workshop, what with all the stuff I have suspended from joists.

That aside, I think this is going to work out ok.

The Topmost Shelf Removed

Here's the shelving unit without its topmost shelf.


That's much less awkward; I can live with that. The loss of capacity is no big deal.

Tippyness

Empty, the shelving unit is quite light and easily tipped off the dolly. The dolly is fairly heavy. I think I'm going to have to fasten the bottom shelf to the dolly somehow. Then I'll have a relatively heavy-based assembly that will be much less prone to tip.


Securing The Bottom Shelf To The Dolly

I happen to have four of these little offset straps.


They may be just what I need here. Their holes will accept No. 6 screws. I'll be back shortly after I've installed these in the manner I have in mind.

- - -

And here we are.


There's one of those little straps at each corner of the bottom shelf; end of tippyness. My WIP shelf is ready to accept whatever I need it to.

- - -

Addendum -- SATURDAY, AUGUST 20, 2016

Here's a quick and dirty way to add an extra shelf to the unit.


That's a salvaged piece of slightly warped 15mm plywood, supported by corner braces and hose clamps that I've added to the tubular uprights. Here are two views of the details.


So the plywood plus four 1" corner braces, plus four 1 1/2" capacity hose clamps, plus four No. 8 x 1/2" flat head wood screws are all that's needed to obtain a securely fastened auxiliary shelf.

I've had the use of my new WIP shelf for two weeks now, and it's been a real boon to the workshop. It really helps me keep projects ticking along in an orderly fashion.

# # #


# # #


A Cast Iron Ornamental Bird Feeder


My wife got this damaged item for nothing from the plant nursery where she works.


The little white tag reads, "X-614 RUSTED BIRD FEEDER[1]
UDL - MADE IN CHINA"

It obviously has a bit broken off -- I'll see if I can repair that satisfactorily with CA adhesive. The column is missing an M5 threaded stud that's needed to attach the bowl to the top of the column. That should be easy to correct, so I'll start with that.

Replacing The Missing Stud

It turns out that I have a 16 mm long M5 setscrew on hand. It's almost exactly what's needed here.


 I'll install it in the top of the column with blue threadlocker, with 6mm of the setscrew's length protruding for attachment to the bowl. That will be a near-perfect solution to the problem.

- - -

And here we are with an M5 stud right where it ought to be.


Trial Assembly

It went together fine.


It's quite a handsome little objet, really. It remains to be seen what the birds think of it.

Anyway, next up is to reattach the broken-off piece. That may prove to be a bit challenging.

Repairing The Break

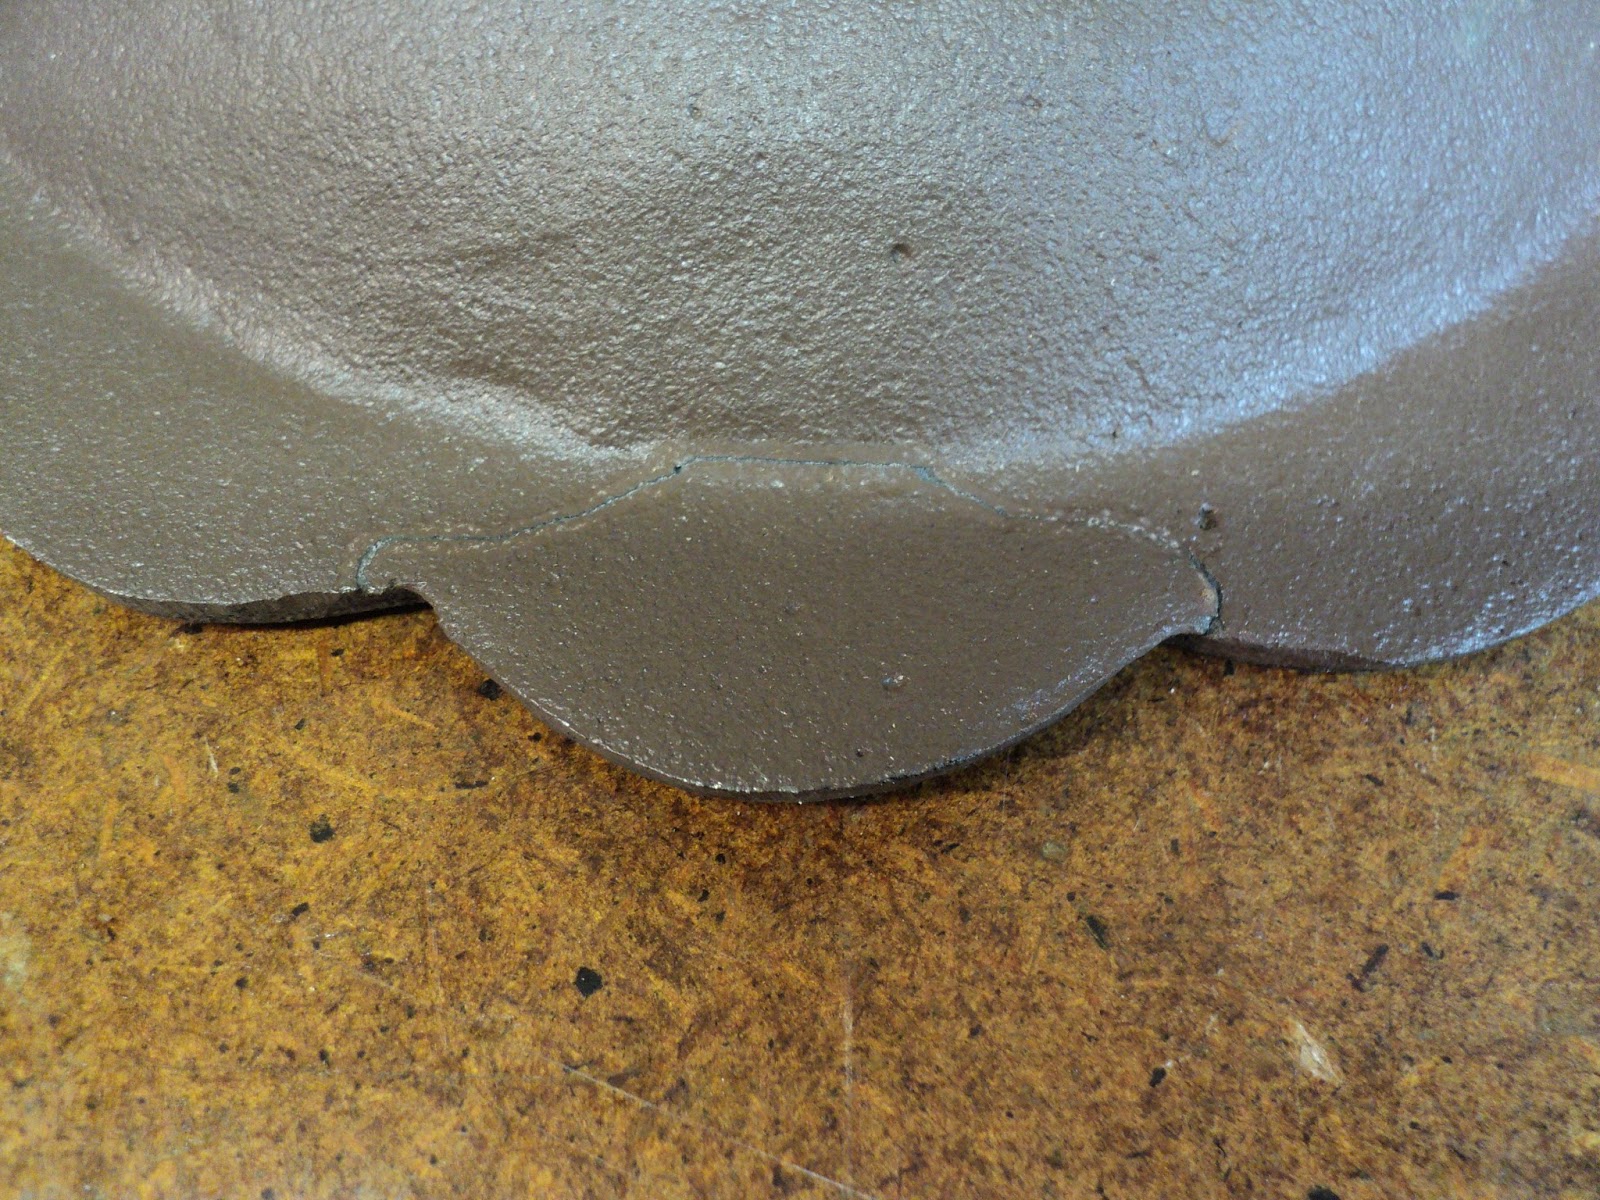
Here's a view of the bowl with its broken-off piece fitted back into place, and propped up on a small block of wood.


The fit is good but not perfect. CA adhesive might work here. Although CA adhesive is not meant to be a filler, I've found that repeated applications to very small gaps will serve as a filler.

I've been advised to use J-B Weld for this, and I may yet regret not heeding that advice, but I'm going to go with CA adhesive, if only because it's so easy to use in a case like this. Just hold the parts together and apply the adhesive to the seam. Provided that the CA adhesive is fresh and runny, the adhesive will wick into the seam by capillary action, and bond the two pieces together. (At least, that's the theory.)

For this job, I'll hold the thing together upside down with my left hand, and apply the adhesive at the underside of the seam with my right. If I get lucky here, I may get a repair that's nearly invisible.

The Repair So Far

Here's a view of the repair from the underside, the side where I applied the glue.


And from the topside.


It's a good repair as far as it goes, but I'm a little disappointed that I don't see evidence of the CA adhesive having wicked through all the way to the top surface.

Although it will spoil the appearance a bit, I'm going to apply more CA adhesive, this time at the top. That should truly seal the repair interface, and should leave me with a repair that can withstand being left out in any weather.

The Topside Appearance Now

After two applications of CA adhesive.


The adhesive residue does call attention to the repair somewhat, but at least now the repair interface is well sealed topside.

Something I'd Overlooked

This had escaped my notice somehow; my wife pointed it out to me. There's a single hole near the perimeter of the bowl.


The hole is countersunk underneath, as though for a flat head screw. There's no doubt a piece missing from from this item -- a perch, probably.[2]

I'm not going to pursue the matter. Anything I could fabricate by way of a perch would look mechanistic, and out of character with the bowl. The missing piece probably had a nice, sculpted appearance to it, mimicking a leafy branch, possibly.

Anyway, the repair is as done as it's going to get.


I think the thing would make a better candy dish than a bird feeder, actually, but it might be wisest to keep that opinion to myself around here.

- - -

Notes:

[1] This item looks to me a lot more like a bird bath than a bird feeder. I think others would agree. How a manufacturer can not even know the proper name of what it is that he's manufacturing is a mystery to me.


[2] A reader kindly clued me in to what the missing piece most likely is -- a bird, so it would look as though there's a bird already at the bath. If you google for images of 'cast iron bird bath', you'll find many examples.


# # #


# # #


Thursday, August 4, 2016

A Rockwell/Delta 10" Table Saw


This shabby old saw was in my deceased next door neighbour's garage for God knows how long.


My deceased neighbour's son has sold the house,[1] so he was getting rid of a great deal of stuff. He let me have this old saw for nothing.

 - - -

There's no Model No. I.D. Plate on it anywhere that I can find There's a lot wrong with it. If I can set it right, I'll have a half-decent 10" saw to replace my ancient 8" Beaver. We'll see how this goes.

This is going to be a very disjointed, jumbled up post. It's really only going to be notes on what I'm up to at any given time.

- - -

The single biggest issue with this saw is that it needs new arbor bearings. If I can successfully replace those, then the saw becomes worthwhile to restore to pristine condition. If I fail at replacing the bearings, then the saw is scrap metal. So, I'll start with getting the arbor out.

Removing The Table Insert

The table insert should just slip out easily -- it's theoretically just held in place by gravity. But on this saw, I had to hammer it from underneath bit by bit with a big brass punch to free it; it was somewhat seized in place. The insert appears to be a zinc casting, so it's easily cracked or broken. Here's a view of the thing out of its pocket finally.


It was a fine item in its day, but it's in rough shape now. There's a crack in the edge opposite from the one you can see, and the whole thing is pretty badly distorted.

The Blade

Remove a 15/16" A/F hex nut (RH thread), a flange washer and then the blade.

The Elevation Screw

The elevation screw must be removed in order to be able to remove the arbor assembly. I saw an e-clip on the elevation screw that looked like it might be key to removing the elevation screw, but removing that e-clip got me nowhere -- the screw still would not back off and come out. I'm going to have to get the saw off its stand so I can turn it upside down, and see how the elevation screw really does come out. Once I have the elevation screw out, it should be possible to remove the elevation pivot pin, and then remove the whole arbor assembly. First, though, I have to remove the rip fence, its rails and the table extension to lighten the load.

The Rip Fence

The rip fence just slides off the ends of its rails when it's unclamped.

The Rip Fence Rails And The Extension


Each rail and its spacers is attached with two screws and two nuts.

The extension is attached with three screws w/split lockwashers.

Back To The Elevation Screw

It turns out that I was correct that the e-clip I noticed on the elevation screw was key to removing the screw, it's just that the screw-shaft was balky about leaving through its hole. I put Vise-Grips on it for extra leverage and that did the trick. I got the screw out. Here's a view of it.


There was also a grip-ring to contend with, but that wasn't difficult.

Elevation Pivot Pin and Arbor Casting

Now there's the big elevation pivot pin to be removed.


With its e-clips removed, the pin wasn't too difficult to coax out of place; it wasn't seized. And with that pin removed, the entire arbor casting is free to come out. Here it is.


Now I can attend to the bearings -- the single biggest defect the saw has.

The Line Cord Plug And Wiring

This stuff is in very poor condition, and will have to be replaced.


I'll get a better on/off switch for it too.

The Arbor Pulley And V-Belt

In the following photograph, note the setscrew protruding from the bottom of the pulley's groove, and the groove in the underside of the v-belt.


That setscrew is actually the correct length, it's just that the screw has loosened off almost to the point of falling out; hence the screw's protrusion. And you can see what the screw's protrusion has done to the underside of the v-belt -- it's pretty awful.

Needless to say, a new 40" v-belt is in order. I may go with a link-style belt, if I can scrounge up the money for one.

The Arbor Pulley

Neither the pulley nor the Woodruff key were inclined to leave home. For the pulley's removal, I ended up using a socket wrench for a  punch, so I could punch the pulley further onto its shaft. That dislodged the pulley, then I was able to pull it off with a two-jaw puller without distorting it. The Woodruff key wanted coaxing with a small cold chisel and a hammer. Bit by bit I got it to leave its keyway. Here's a view of those items off their shaft.


That pulley is a precious thing; it has a 17mm bore -- not something I could easily find a replacement for.

The arbor bearing that's now exposed is an NTN 6203LB -- 17mm bore x 40mm OD x 12 mm width. I can get a replacement for that at Princess Auto. The opposite bearing is probably the same, but I won't know that for certain until I've gotten it out.

The Arbor Bearings

With a great deal of hammering, I've gotten the arbor assembly mostly apart. Here's where I am with it presently.


The bearing at the pulley end still feels ok (though I mean to replace it regardless). The bearing at the saw blade end is a ruin and must be replaced.

I'd like to get that bearing off without disturbing the factory installation of the saw blade flange. So, what I may have to do is get the balls out of the bearing, and the outer race off. Then I'd have access to the inner race to grind through it until it eases its grip on the shaft and can be forced off.

'Got It!

The bearing is off.


I had to grind clear through the inner race to get it to where I could force it off the shaft, so I did some very slight damage to the shaft, but it should have no ill effect.

The next thing I want to do is chuck that shaft in the lathe, and check the flange for axial run-out with a dial indicator. If it's perfect, I'll try to install the new bearing from the pulley end. If it's flawed, then I may as well pull the flange off and install the bearing from the threaded end, as it's supposed to be done. (I should have checked saw blade flange axial run-out before beginning, but frankly I wasn't thinking straight -- didn't know what I was doing. Oh well, now I know.)

Saw Blade Flange Axial Run-Out

Here's my setup for checking run-out.


It turns out that axial run-out of the flange is over 0.007"; that's abominable. So, all that bushwah I went through to preserve the factory installation of the flange was in vain. I'll press off the flange, and deal with the run-out after I've installed a new bearing, and reinstalled the flange.

Pressing Off The Saw Blade Flange

Here's the arbor on the press, about to have its saw blade flange pressed off.


And here are the two pieces separated.


That was a breeze, really. The flange pressed off nicely, with no complaints. It may have helped that I had applied penetrating oil to it a few days ago.

Next up is to replace the e-clip that indexes the bearing's axial position on the shaft, and install the new bearing. Then I'll reinstall the flange, and check its axial run-out again on the lathe.

- - -

Bearing And Flange Reinstalled

That went pretty smoothly. I rechecked the flange's axial run-out, and it was 0.001" better than before, but still unacceptable. I sharpened a lathe cutter and turned down the face of the flange; good outcome -- zero (or near zero) axial run-out. I completed reassembly of the arbor, and I appear to have a defect-free arbor assembly now.

This business of machine restoration is more complicated, and fraught with peril, than it may appear. I could still run into a defect that renders the machine worthless -- e.g. blade to mitre gauge slot parallelism impossible to achieve -- so I can't just set off to paint the stand and the chassis as I go, and risk wasting all that work and material. I have to prove the whole machine out first. In a nutshell, here's what I have to do:
  • Fully reassemble the machine, and prove out all of its functionality/adjustability
  • Dismantle the machine for cosmetic restoration.
  • Cosmetic Restoration.
  • Reassembly.
  • Final adjustment/proof.
It's a heap of work, but then it's not as though my Day Timer is loaded with other commitments.

- - -
End Of Part I

This post is getting long. See 'A Rockwell/Delta 10" Table Saw -- Part II' for the continuation.

- - -

Note:

[1] There is, of course, much more to the story.

Bob, my deceased neighbour, was a pillar of the community, and the best next door neighbour one could ask for. He was thoroughly enjoying his retirement, especially his fabulous gardens, when he was struck down several years ago by esophogal cancer. The world is neither a just nor fair place.

Bob and his wife Linda were very close -- always together. After Bob's death, Linda's spirits never really recovered, and her health began to decline. She contracted cancer, was treated for it, and currently resides in a convalescent home. She's not in a good way. She underwent drastic surgery on her jaw, and her recovery process has not gone well.

All of that left Bob and Linda's son, Jim, no choice but to sell the house, which he has done as of this writing. The new owners have yet to move in.

# # #


# # #