A common practice among manufacturers of small engines is 'squeeze-through' installation of fuel line tubing. Here's an example of it on a Ryobi leaf blower.

The fuel tank has no nipples. At the factory, the resilient fuel line tubing is squeezed through undersize holes in the wall of the fuel tank to effect a sealed installation.
It's a dirt-cheap method that lasts for at least the warranty period, so the manufacturers love it. Serviceability leaves something to be desired, though.
Fuel line tubing installations all have a finite life; eventually, the tubing gets brittle/rotten and fails. If you can get exact replacement tubing, you can probably re-create the factory's tubing installation. If available tubing is undersize or oversize in the outside diameter dimension, you have a problem.
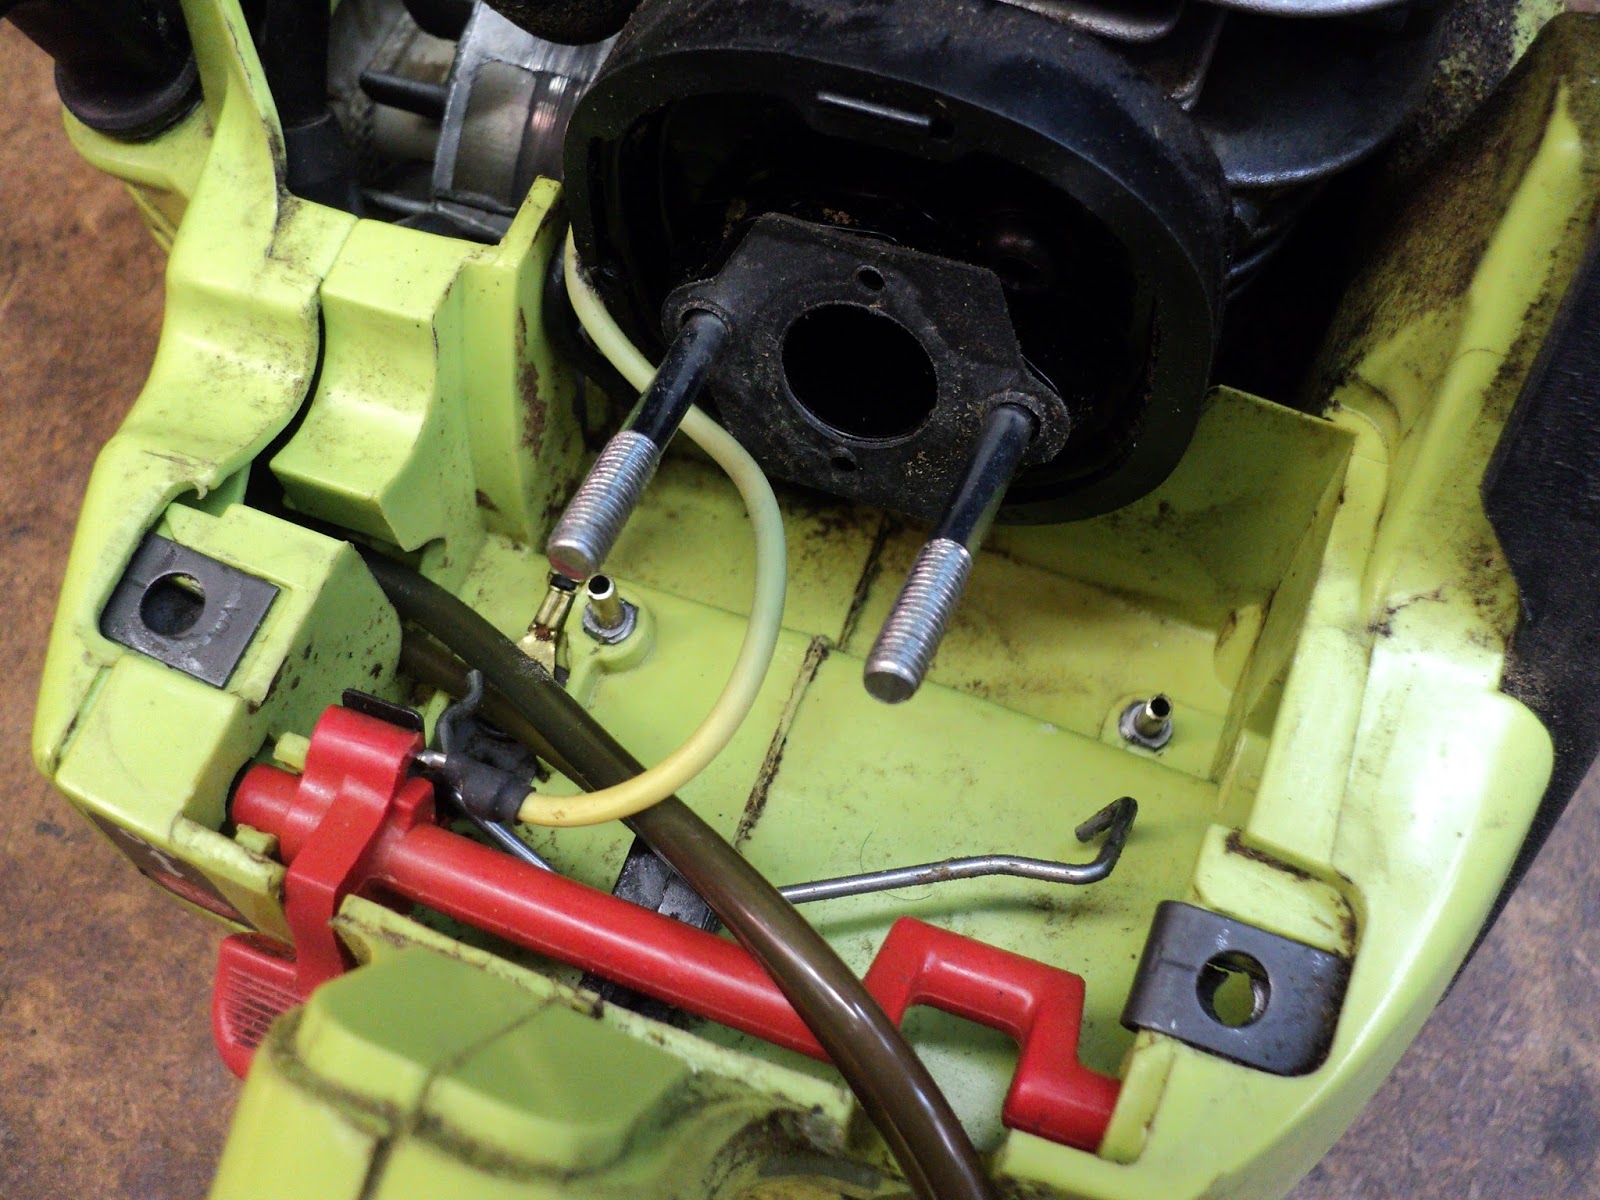
I've taken to getting around the problem by fabricating nipples from 1/4" - 20 threaded rod, and 1/8" hard brass tubing. Here's a view of such an installation on a Weed Eater string trimmer's fuel tank.

It's a bit of work, and parts of it can be awkward (e.g. fitting the fuel pickup tube inside the tank), but it gives you a fully serviceable fuel line tubing installation that's not fussy about tubing outside diameter.
I have an old Poulan 2050 14" chain saw that's in need of new fuel line tubing. The machine's fuel tank architecture is not friendly to modification, so this will be a bit of a challenge. But it will let me use tubing that I have on hand, saving me a trip to the small engines place. Also, even if I had just the right tubing, it would be very difficult to re-create a squeeze-through tubing installation on the Poulan's fuel tank. It's not a design that lends itself to serviceability.
Before starting in on one of these jobs, make certain to create a photographic and/or written record of your machine's correct tubing connections -- they can be a difficult thing to puzzle out without documented guidance. A typical installation will have the following elements:
a) Fuel pickup tube from fuel filter inside tank, through tank wall, to fuel pump side of carburetor.
b) Primer suction tube from primer bulb to metering side of carburetor.
c) Primer return tube from primer bulb to a hole in the tank wall.
Items 'a)' and 'c)' above are those that need to get nipples provided.
Fuel Tank Preparation
Drill out the tank's tubing squeeze-through holes with a No. 7 drill, and tap the holes 1/4" - 20.
Here's a view of the upper wall of the Poulan's fuel tank with its two squeeze-through holes.

The smaller, upper, left-most hole is for fuel pickup. That will need a double-ended nipple.
The larger, lower, right-most hole is for primer return. A single-ended nipple will suffice there.
And here we are with the two holes drilled out and tapped, and all the chips blown away with compressed air.

The Nipples
Here are two finished nipples.

The 1/4" - 20 threaded rods are 13/32" long; the 1/8" O.D. tubes are 1" long. The threaded rods were bored through on a lathe. The pieces are assembled with CA adhesive. Note the filed wrench flats. (It was just as easy to make both nipples double-ended, even though only one of them needs to be.)
Coat the threads with CA adhesive prior to installation, and be ready to screw them fully in quickly, before the CA adhesive seizes on you. The fuel pickup nipple will have to have its tube in place before the nipple is installed -- it will be very difficult, if not impossible, to get the tubing on the end of the nipple, once the nipple is in the fuel tank.
With the fuel pickup nipple installed, attach the fuel filter from outside the tank, and tuck the works inside the tank.

And here's how the nipple installation looks up top.
Now it's just a matter of reinstalling the carburetor with correct tubing runs. If everything else about the engine is ok, your machine will be back in business. The subject chain saw here primed properly and started up easily with this repair/modification done.
# # #
# # #
No comments:
Post a Comment