Wednesday, May 8, 2019

An Inoperative Yardworks Garden Shredder


[Last updated: Thursday, May 16, 2019.]

My son got this shredder cheaply; it was new in its box.


As my son told it:

"Started it up and ran, but then there was a pop, some smoke and now it spins up and then stops, then repeats that cycle.

I opened it up and it seems this large capacitor strapped to the side of the engine exploded."

- - -

Hmmm. Now the thing won't even spin up briefly. It's completely dead.

There's no model number ID on the unit, only this bilingual label with what looks like a serial number.


So, let's open it up for a look-see.

Four No. 2 Phillips recess screws fasten the bottom cover on. At the centre rear, there's an M4 x 12mm threading screw, then way up under the deck there are three M5 x 14mm screws with split lockwashers and flat washers. Removing those four gets us to here.
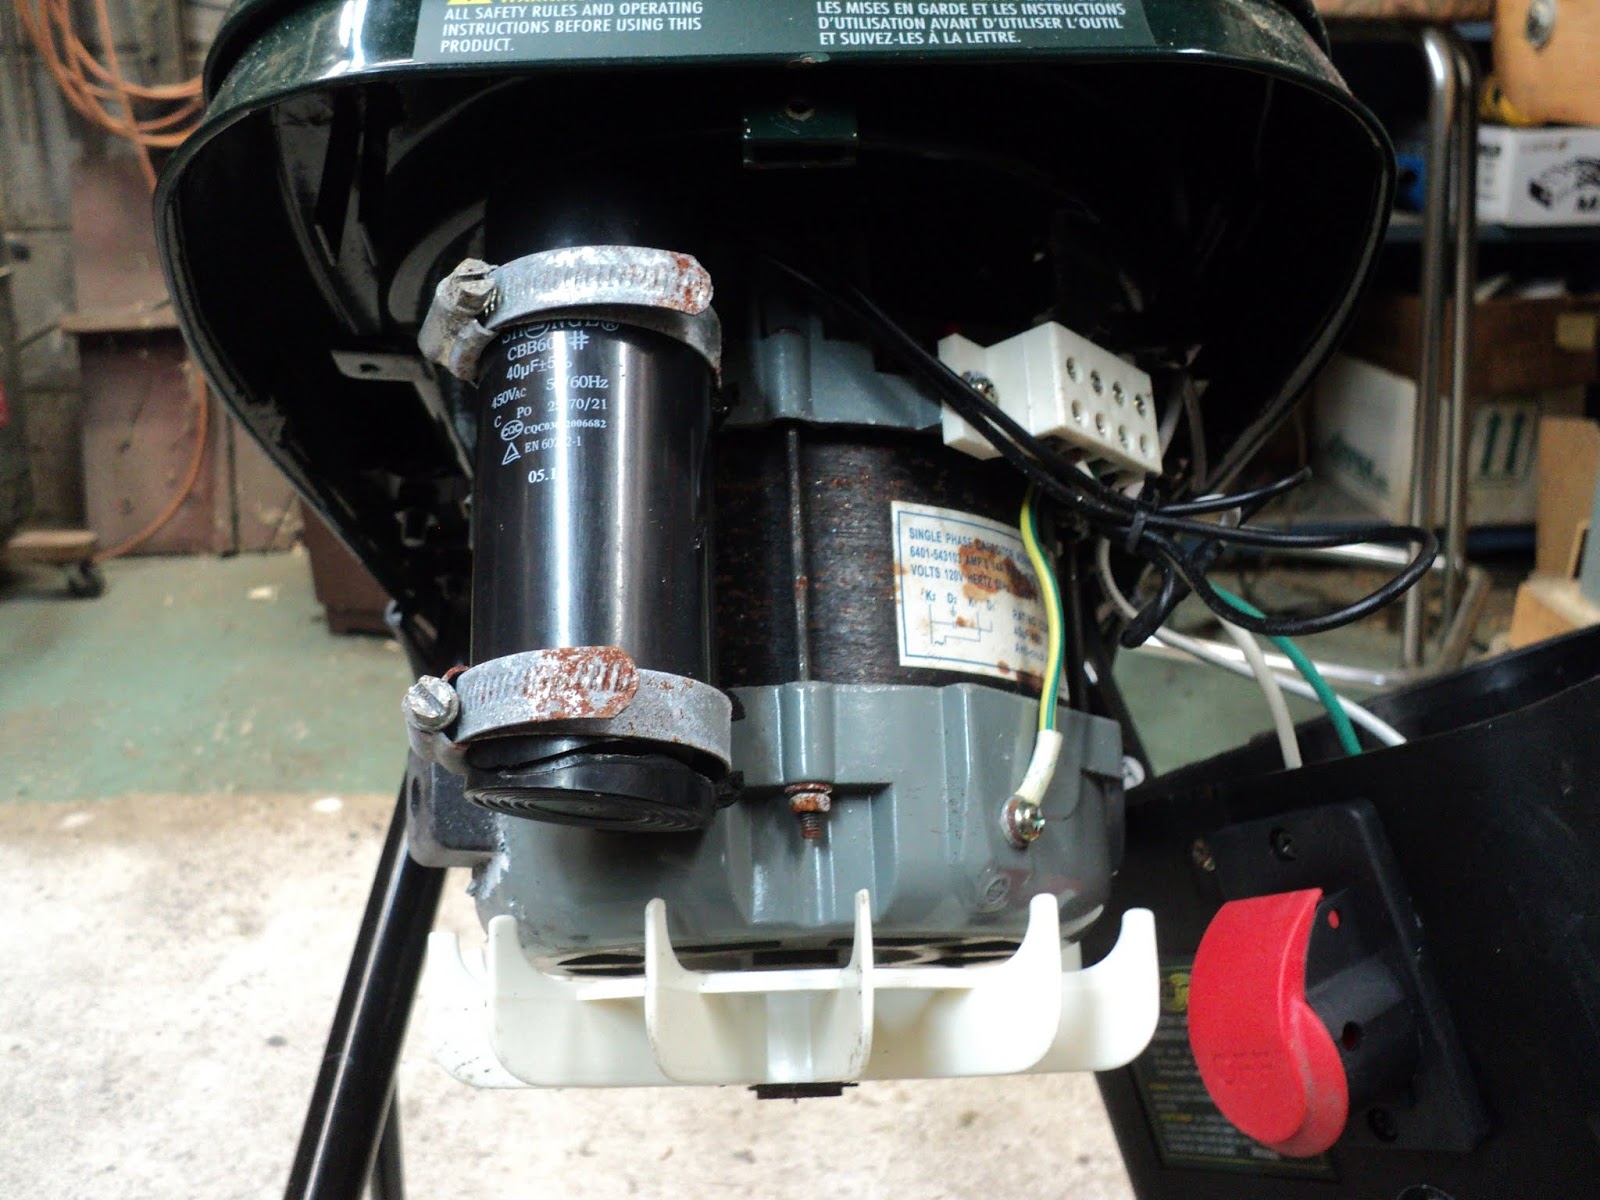


And I discovered why the machine is completely inoperative -- there's a wire that likes to come off its terminal at the circuit breaker when the cover is manipulated. With that wire reconnected, the machine does spin up, only to shut down in a few seconds.

Anyway, the capacitor is obviously a ruin. That may prove to be difficult to source. The motor feels odd when turned by hand. There's a seemingly random turning resistance that doesn't feel right to me. Also, there are indications of there having been water incursion at one time.

Teardown

Cutter Head Removal

With the hopper opened up, one has access to the cutter head. It's fastened by a single M10 x 25mm hex head screw, 16mm A/F (across flats), with an internal tooth lockwasher and a big cup washer.


The screw was installed with threadlocker; it takes an impact wrench to remove it. (Chase the female thread with a tap to clear out the old threadlocker after removing the screw. Blow out the debris with compressed air.) Here's the cutter head removed.


The hub affair looks like a fine, rugged design. (Note the rusty screw heads of the motor fasteners.)

- - -

Motor Removal

Make a sketch of the electrical connections. Disconnect the lower row of four terminations from the terminal block. Release the capacitor from its clamps.

Up top, there are four M8 x 16mm flat head screws with external tooth lockwashers, 5mm hex recess. The motor is heavy. Remove the screws with great care. Here's the motor out and up on the bench.


And now I can see what looks to me like a centrifugal brake at the upper end of the motor.


There's a hub in there that can move downward, away from two brake shoes that are integrated with the motor's frame. And that explains why the big screw holding the cutter head on was installed with threadlocker -- so that the cutter head's inertia can't unscrew the cutter head when the brake applies.

The odds appear to be reasonably good that this motor is ok -- that it just needs a new capacitor. 'Time to reassemble the machine, and see about obtaining a new capacitor.

- - -

An Inoperative Hopper-Open Interlock Switch -- THURSDAY, MAY 9, 2019

While trying out the machine, I inadvertently discovered that the hopper-open interlock switch doesn't function -- the machine will run with the hopper open.

The switch is mounted on a rectangular steel plate, and the whole affair is fastened to the shredder's frame by two M4 x 12mm pan head screws, No. 2 Phillips recess, with split lockwashers and flat washers. The wires are attached by two M3.5 x 6mm pan head screws, No. 2 Phillips recess with captive internal tooth lockwashers.

Here's a view of the switch assembly out of the shredder.


And here's the switch disassembled.


'Disassembled' may not be quite the right word here. 'Destroyed' is more like it. The body-clamping ears snapped off when I pried on them a bit. I can think of a way to go about a repair attempt, but I'm not optimistic of a good outcome.

Anyway, it appears that the switch was misassembled at the factory, and could never have worked since day one. The shorting plate and its spring were assembled in such a way that the switch was always closed.

- - -

And after a bit of an ordeal, the switch is back together and working.


I rearranged the switch's innards so that the switch could function, and wired the casing closed with 0.031" diameter steel wire. I ran a bead of CA adhesive all around the seam between the body and the mounting bracket.

I reinstalled the switch in the shredder and it's working as it's supposed to. We'll see how it holds up. Should it fail, it'll likely just have to be deleted and shorted out. The odds in favour of finding a replacement are slim to nil.

- - -

Replacement Capacitor On Order -- FRIDAY, MAY 10, 2019

Maybe this will be the cure.

- - -

The Capacitor Arrived -- THURSDAY, MAY 16, 2019


Now I see what I didn't quite understand from the vendor's description -- it's a dual run capacitor. It's two capacitors in one casing; one 40 microfarad and one 5 microfarad. These are used in air conditioners. One capacitor is for the fan motor; the other capacitor is for the compressor.

The terminals are labelled 'C', 'FAN' and 'HERM'. 'C' is for 'common', 'FAN' is for 'fan', obviously, and 'HERM' is for 'hermetically sealed compressor'. 'FAN' to 'C' is 5 microfarads; 'HERM' to 'C' is 40 microfarads. So there's my 40 micofarad replacement capacitor. The 5 microfarad capacitor will just go unused.

- - -

Capacitor Installed

It fits.


I clipped out the old capacitor and fitted out the wires with 1/4" female spade terminals. 'Clamped the new capacitor in place and reinstalled the cover.

The motor starts and runs up and keeps on running.


It remains to be seen how it behaves under load.

- - -

To be continued.

# # #


# # #

Saturday, May 4, 2019

Replacing A One-Piece Toilet


This toilet has been a pain in the neck ever since we moved in twenty years ago.


It's a lame one-piece design of unknown make. I had a go-round once with its fill valve, and I swore that would be the last time I'd ever repair the thing. So when it started leaking again in earnest, that was it. It was off to Lowes for a new toilet.


A two-piece unit this time -- a Kohler Cimarron; I never want to see a one-piece toilet again in my life.

So it's on with de-installing the old toilet, and discovering just what sort of ordeal I've let myself in for here.

- - -

Water Supply Turned Off; Tank And Bowl Sponged Empty


Water Supply Tube Removed

At the valve, the 3/8" compression fitting end, a 5/8" open end wrench is needed. At the tank, the 7/8" ball cock (BC) fitting end, one should theoretically need only one's fingers to unscrew the fitting. I needed Channellocks, because the last time I worked on this toilet, I reinstalled the original water supply tube with Permatex Ultra Grey gasket maker at both ends. (I know, I was supposed to have used a new tube, but I was being cheap about it.)


Permatex Ultra Grey is great stuff. It did what I needed it to for years.

The Toilet Unbolted From The Floor

The studs are 5/16"-18, so the hex nuts are 1/2" A/F (across flats). The nuts came off readily enough in spite of the corrosion of the studs.

And now I have to wait for assistance with hoisting the toilet up off the studs, and out the door to the roadside.

- - -

The Old Toilet Out Where It Belongs


The New Toilet's Home-To-Be


The old installation had been done with a rubber gasket, so at least I don't have old wax gasket muck to clean up.

It's past 5:00 pm, and I don't do overtime if I can possibly avoid it, so the job can keep till tomorrow.

I'll keep the bathroom's door closed tonight, so the albino sewer alligators can't get further into the house.

- - -

Snags -- SUNDAY, MAY 5, 2019

I fully expected to run into snags. A lot of the work done on my house was done by a DIYer who knew just enough to be dangerous. I've repaired many of his botches already, so I wasn't surprised at running into trouble with this job.

A Chrome Plated Water Supply Pipe


I had bought a new mini ball valve to solder on in place of the old valve, but it turns out that the water supply pipe is chrome plated -- it can't be soldered to. The old valve is attached by a compression fitting.

I could go get a shut off valve with a compression fitting, but compression fittings are not my friends. I'm afraid of opening up a real can of worms if I try to replace the valve.

I pressure-tested the old valve. It doesn't exhibit any leakage at its stem, so I'll just leave it be.

An Iffy Flange Fastener


The leftward 5/16"-18 bolt in the above photo is steel, not brass as it ought to be like the rightward one. It's head doesn't have quite the right profile to keep it from turning in the flange. I've chased its thread with a die so the nut will go on smoothly.

- - -

A Minor Boo-Boo With The Wax Gasket -- MONDAY, MAY 6, 2019

Kohler supplies a wax gasket with the toilet, and on the box that the gasket comes in, it clearly shows that you're supposed to put the gasket in place on the underside of the toilet before lowering the toilet into place on top of the floor flange.


I managed to overlook that, and I put the gasket on the floor flange, then lowered the toilet bowl down onto the affair. No big deal, but a stupid blunder, especially from a guy who so values sound documentation and instruction.

And Another Boo-Boo

The floor flange bolts ended up being too long for the concealment caps to fit over. Kohler's installation instruction sheet advises one to cut down the bolts with a hacksaw when that occurs. I can't imagine a more awkward, difficult hacksawing task than that, so I used a cut-off disc in an angle grinder to cut down the steel bolt at the left side, and ended up doing some cosmetic damage. Here's a view of it. (Poorly lit, so it didn't photograph well.)


The particles flying off from the cutting job had such force behind them that they bruised the porcelain. I tried using metal polish to fix that damage, but it was no go. I should have seen that coming, and masked the area with masking tape. If there's ever a 'next time', I'll know better.

Anyway, aside from those two boo-boos, the installation went smoothly, and I'm delighted with the toilet. The unit got a genuine test this morning, and the flush action is amazing. The flush is forceful, and eyeblink-quick. Kohler has a good product here.

- - -

Tank Fill Level Adjustment

There's a screwhead affair in the tank for adjusting the fill level.


There's allegedly a fill level mark on the flush piston to go by, but I can't see it. I set the fill level to about 1/2" below the top of the flush piston, and that seems to work fine.

All Done


All in all, a success. That wretched one-piece toilet is gone -- no longer will it leak away money to Toronto's water meter.

# # #


# # #

Friday, May 3, 2019

A Homelite UT20704 String Trimmer


Another roadside find.


It's a 25cc machine. Serial number is HA0483185. There's what looks like a date of manufacture of 02-99, so I've got a machine here that's over ten years old.

There are a few obvious defects:
  • The fuel lines are in ruins. I can't tell which is uptake and which is return.
  • The air filter element and the air cleaner cover are both missing. There are a couple of square recess screws in the air cleaner body. Square recess screws on small engine equipment is always a sign of inept tinkering.
  • The primer bulb is an embrittled ruin.


All that aside, let's see if we have spark.

The spark plug is a Champion RDJ7Y -- a resistive type spark plug. Hex is 5/8" A/F (across flats). Gap is a very snug 0.025". The plug looks in not bad a condition.


And we have spark. So it's on with getting the carburetor off and dismantled. I can just imagine the state of the metering diaphragm.

- - -

Carburetor Removal -- SATURDAY, MAY 4, 2019
  • Remove two tubes from their nipples on the carburetor. If the tubes are sound and intact, make certain that you know which tube goes to which nipple before removing the tubes. That'll spare you having to puzzle out which nipple/tube is which come reassembly time. If the tubes are utter wreckage as they are on this machine, You'll have to sort out uptake from return at reassembly time. More on that later.
  • Two 10mm A/F prevailing torque type hex nuts fasten the entire air cleaner body and carburetor to the engine. Remove those.


  • Slip off the air cleaner body. It can dangle by the kill switch wire, or you can remove it altogether by removing an M3.5 x 12mm pan head screw, No. 2 Phillips recess, from the kill switch wire's ring terminal.
  • Slip off the carburetor, noting the location of the throttle cable's 'Z' fitting in the throttle lever. Unhook the throttle cable.
  • Note the gasket at the engine side of the carburetor. It'll probably be stuck fast to the carburetor. Just leave it there.
- - -

Carburetor Off The Engine


The carb is a Zama. Embossed on the body is "C1U" -- that's the body type. Etched on the body is "H39A 8XA" -- that's the model number. I've seen Zama carburetors similar to this one on string trimmers before, but not ones with the mixture adjustment affair that this one has. The mixture adjustment feature appears to be designed to defy dismantling.

Primer Side Dismantled


Note the following:
  • There's a clear plastic diaphragm and a gasket stuck to the fuel pump body. (Some diaphragms are opaque black.) The diaphragm goes inboard directly to the carburetor's body; the gasket goes outboard to the fuel pump. A diaphragm kit will have new ones of those.
  • The primer bulb's flange can only go on one way; you can't go wrong when reinstalling it.
  • The two screws are M4 x 15mm, No. 2 Phillips recess.
- - -

Metering Side Dismantled


Note the following:
  • The metering diaphragm goes outboard directly to the cover. The gasket goes inboard to the carburetor's body.
  • Diaphragm stiffening is the common failure. The diaphragm must be supple, else the carburetor will not function.
  • Note the small hole in the cover. That hole must be free of debris so that it can admit atmospheric pressure to the outboard side of the diaphragm.
  • The two pan head screws are M3 x 6mm, No. 2 Phillips recess.
Inlet Needle Valve Dismantled


  • Exercise extreme caution when handling the tiny spring. It can take off for the dark side of the moon on you in an eyeblink.
  • The flat head screw is M3 x 6mm.
- - -

Diaphragm Kit -- FRIDAY, MAY 10, 2019

The diaphragm kit for this carburetor is Zama P/N GND-18. The kit contains five diaphragms and four gaskets, so one has to pick out only the items needed for the carburetor at hand.

On my carburetor, the metering diaphragm was very stiff -- completely inoperative. That's to be expected on virtually any diaphragm-type carburetor that's years old and been neglected.

- - -


Fuel Tank Removal -- THURSDAY, MAY 9, 2019

The fuel tank here needs to be fitted out with all new tubing, so I'll have to get the tank off the engine. That means loosening off the engine's rear crankcase cover. That cover is fastened in place by four 10-24 x 9/16" pan head screws, T25 Torx recess, with captive split lockwashers and flat washers. The screws were factory-installed with threadlocker, so it's a bit of work to get them loosened off.


I was fortunate in that the cover came away with no damage to the gasket. A damaged gasket would have to be replaced, or repaired with silicone gasket maker. The seal at the crankcase cover is absolutely critical to engine operation.

Fuel Tank Repair -- FRIDAY, MAY 10, 2019


The factory installs the tank's tubes by squeezing them through undersize holes. The same thing can be done in repair work; you just have to obtain the correct size of tubing.

The tubing holes in the tank are 11/64" diameter, so 3/16" O.D. tubing can be squeezed through nicely. The stuff to have is Tygon F-4040-A tubing, 3/16" O.D. x 3/32" I.D. Any small engines place should have the tubing. It's sold by the foot.

For a return tube, feed about an inch of tubing into the tank, then cut off a length outside the tank that's sufficient to reach the carburetor. It's helpful to cut the starting end of the tubing at an angle, to facilitate getting it started through the hole in the tank.

For an uptake tube, feed in tubing until it emerges from the tank's filler neck, where you can install the fuel filter, like so.


Cut the tubing end squarely and install the fuel filter. With the fuel filter in place, pull back on the tubing until the filter is back inside the tank, then cut the tube outside the tank as you did for the return line.

Label the tubes 'R' for 'Return', and 'U' for 'Uptake' with a Sharpie marker.

- - -

Fuel Mixture Ratio

I don't know what the mixture ratio is for this engine. 'Best guess is 40:1; I'll go with that.

- - -

All Together And Running

Here's a view of the carb and fuel tank installed with their new uptake and return tubes, and a new primer bulb. On the Zama carburetor, the nipple nearest the primer bulb is return; the nipple furthest from the primer bulb is uptake. The way that I arranged the fuel tank's tubes has made for a neat tubing installation. The tubes run parallel to one another; they don't cross.


With everything buttoned up, the engine started and ran more-or-less ok, but it wouldn't idle off choke. 'Time to get at the limit-capped mixture screw.

- - -

I got the mixture adjustment affair dismantled.


There's a needle valve for what I take to be idle mixture (the valve was about one turn out), and a force-fit plug in what I take to be the main jet's mixture well. I really don't know what to make of that.
Anyway, I put it all back together and it now idles with the idle mixture screw about 3 turns out. Idle speed seems high, even with the idle speed screw backed all the way off. Wide open throttle operation sounds a bit 'laboured', but it works.

- - -

Trimmer Line Hub

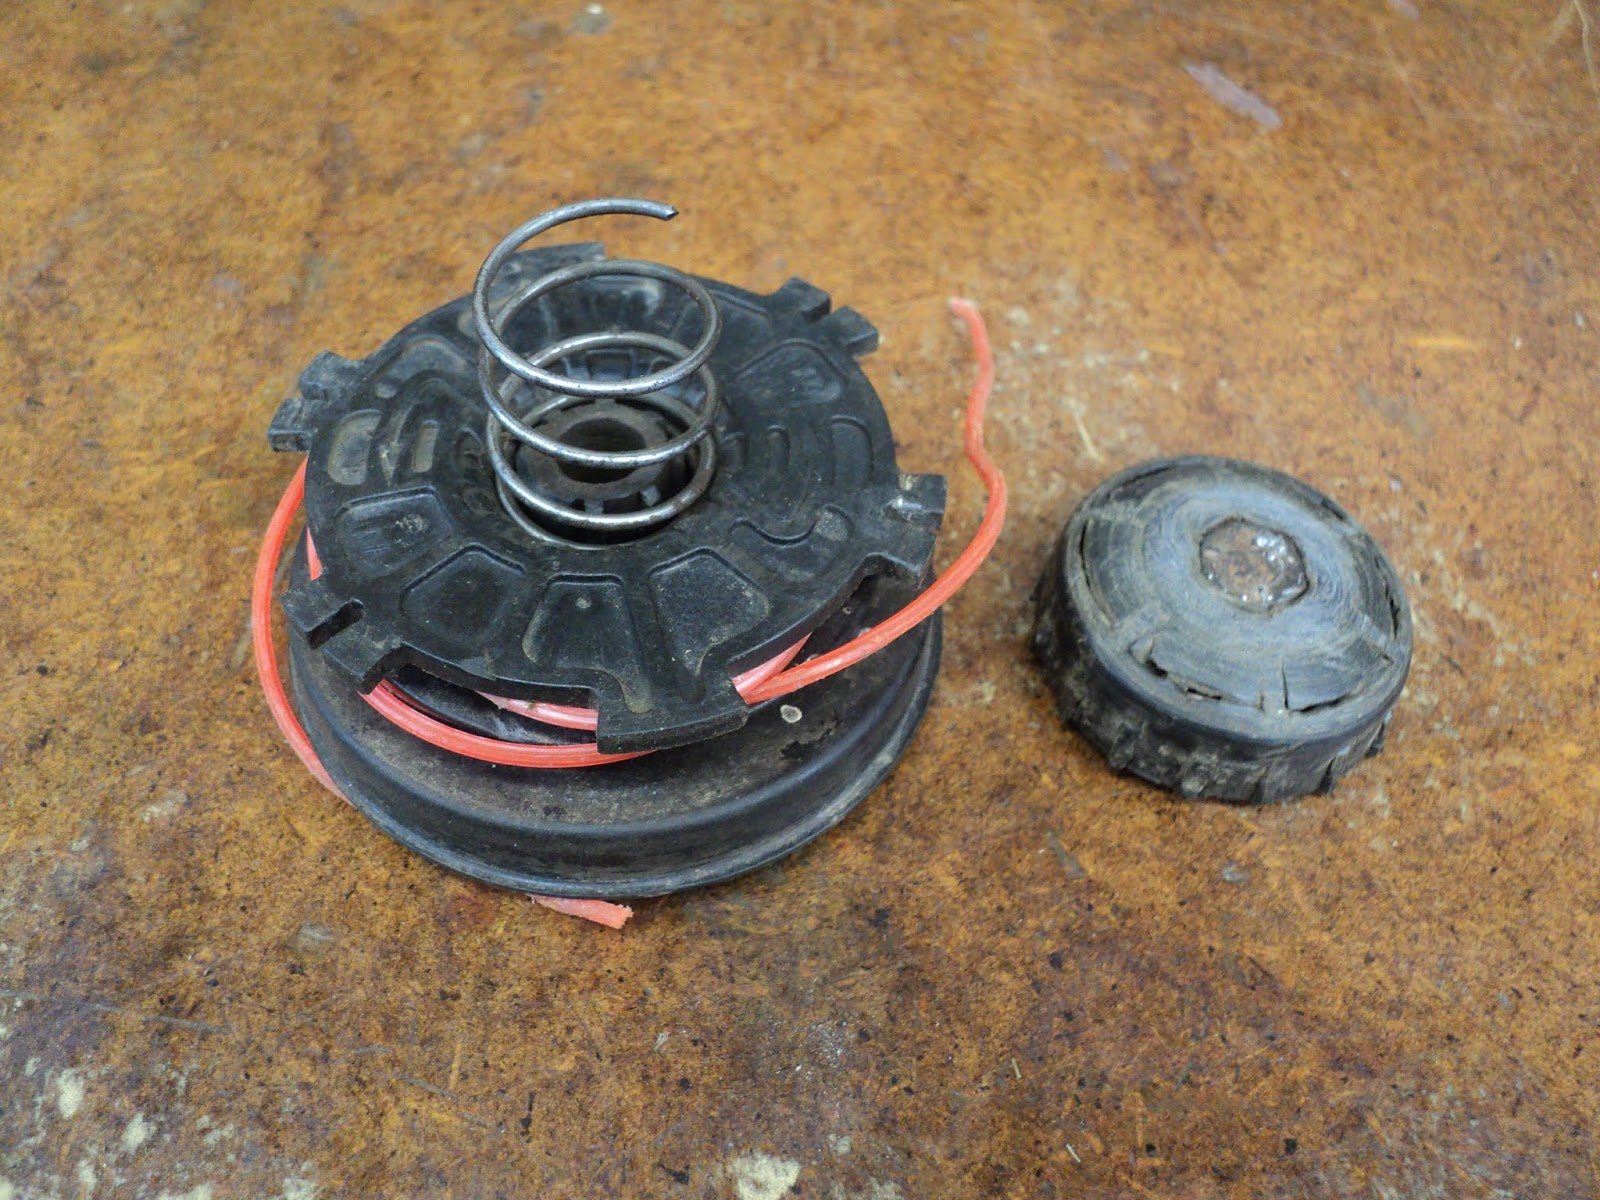
The trimmer line that's on the hub is 0.080" diameter. The bump-feed feature doesn't work. There's a kluged spring in the hub that's too long, and that's inhibiting the bump-feeder's operation. Also, the face of the bumper is all but worn through.


- - -

Where all The Preceding Leaves Me

Given that I obtain all the following items, I may have a saleable string trimmer here:
  • Air filter element.
  • Air cleaner cover.
  • Bump feeder spring.
  • Bump feeder bumper.
I'm hoping that the installation of an air filter element improves wide open throttle operation a bit, by providing a slight 'choke' effect. We'll see.

- - -

A Shop-Made Air Filter -- THURSDAY, MAY 16, 2019


I had some 3/8" thick foam on hand that looked suitable, so I cut two rectangles of that for a filter element. I've given the foam some oil, and I hope that it's up to the task, and doesn't get ingested by the engine.

The 'cover' is 1/4" mesh hardware cloth, fastened by a couple of M4 x 16mm truss head threading screws. The No. 2 Phillips recesses give a better appearance than is had from square recess screws, which always look incongruous on equipment like this.

Bump-Feed Spring And Bumper

The small engines place in Pickering gave me a written-off Homelite UT20006 string trimmer for parts, so now I've got a proper spring and a bumper that's in better condition. Here's a view of the 'new' spring alongside the old one.


The proper spring is at the right.

- - -

To be continued.

# # #


# # #

A Black & Decker LM110 Electric Lawn Mower


A roadside find.


The blade measures about 17 3/4" end-to-end, so I guess that makes it nominally an 18 inch mower.

I don't have much use for electric lawn mowers -- I don't care for the noise they make, and minding the cord is a nuisance.

The last time I looked into a discarded electric lawnmower, it turned out to be a basket case of the first order. On this mower, at least the blade can be turned, so maybe the machine is recoverable.

Top Cover Removal

At either side of the cover, way down by the handlebar brackets, there's a No. 10 x 5/8" pan head threading screw, No. 2 Phillips recess. Removing those two screws gets one to here.


A big DC motor, and a lot of lawn debris to vacuum up. The commutator and brushes are worn, but they look like they still have service life in them.

I tried powering up the unit, and it does run, but with a nasty vibration.


Blade Condition

It isn't good.


The blade is pretty dull, and somehow that blade looks to me like it's been ground the wrong way -- I'd expect to see the chamfer on the upper edge, not the lower.

Blade Removal

Underneath, a single 1/2"-20, 3/4" A/F (across flats) hex washer-face nut holds the blade onto the motor's spindle.


There's the hex nut (an impact wrench makes short work of getting the nut off), a keyed square washer, a square plastic alignment/shear washer, the blade and the motor's cooling fan. The fan is well and truly seized in place. I doubt that it could be non-destructively removed.

The blade is quite imbalanced. I may look into a replacement blade. I'd like to know whether I'm right about the way the blade is ground.

- - -

A Mystery Feature


There's a loose 1/4"-20 screw eye on the line cord, with no obvious place for it to go to. Presumably, the screw eye should be up on the handlebar somewhere, keeping the line cord out of harm's way. If I replace one of the handlebar fasteners with the screw eye, then the screw eye can do its job, instead of flopping about uselessly.

- - -

And here we are with the screw eye installed at the right side handlebar fastening point.


A ty-wrap is holding the line cord in position. The cord is now held up away from the right side rear wheel; much better.

- - -

Blade Update -- THURSDAY, MAY 9, 2019

I checked with the small engines place in Pickering, and it seems that the manner in which the blade is ground is correct -- with the chamfer on the grass side.

The blade took a lot of grinding to balance it. The blade was measurably wider at one end than the other, and I was at it for quite a while with a 1/4" die grinder to correct the imbalance. I was using a primitive rig for a balance indicator, like so.


That's an 8mm bore x 22mm O.D. ball bearing mounted on an 8mm hanger bolt. It served reasonably well, and I got the blade balanced well enough that the dreadful vibration is gone from the machine.

I imagine that blade balance is quite critical on electric mowers because of the high blade speed. I don't know the rpm figure for this mower, but I suspect that it's well in excess of the 3,000-or-so rpm of a typical four-stroke gasoline engine powered mower. A better balancing tool would be a conical-type balancer, like this one from Amazon. I may just get myself one of those.

- - -

Blade Balancing Done To Near Perfection -- TUESDAY, MAY 21, 2019

The blade balancer arrived today. 'Can't say that I'm impressed with it, but I got it to do the job.

The mower's been sold via Kijiji. One less piece of gear cluttering up the place.

# # #


# # #