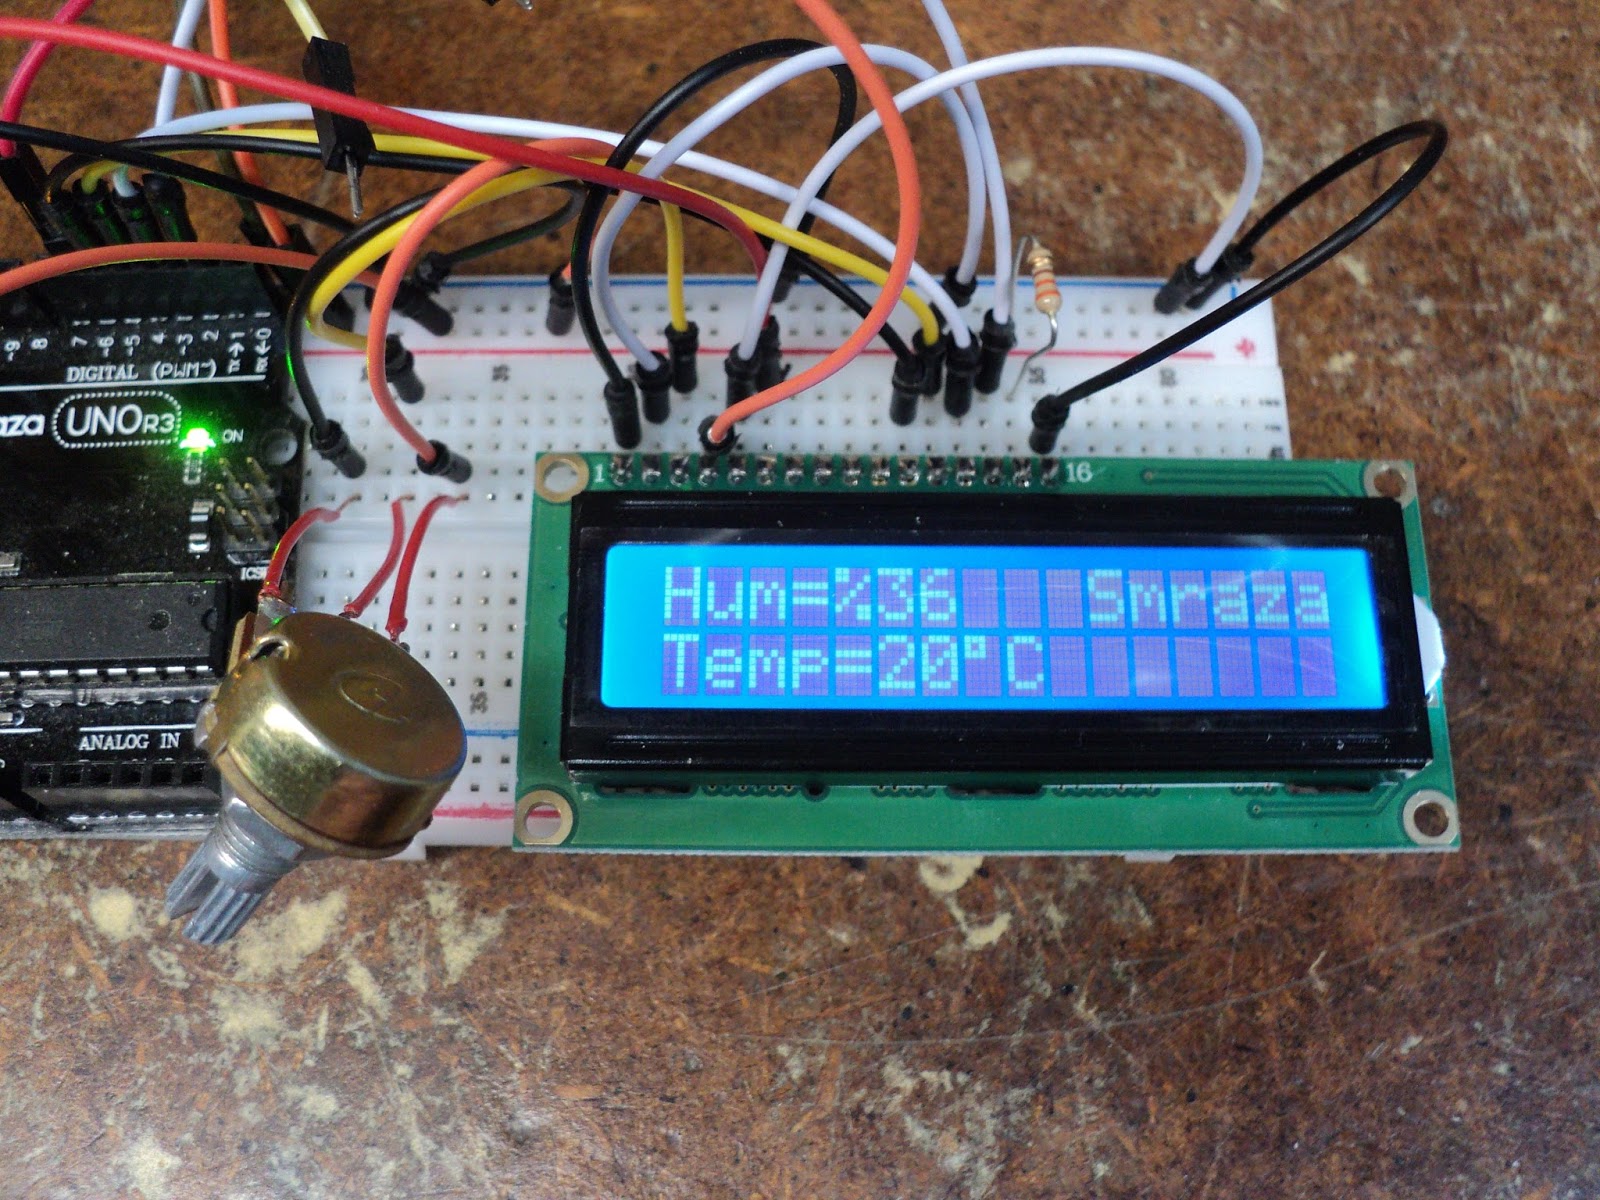
I wrote a brief post a while back about my new Smraza Arduino kit. In all the projects that accompanied the kit, I finally came across one that looks useful to me -- a temperature/humidity monitor. Here are views of that breadboarded up and working.

Next up is to get it working with an Arduino Nano, then I'll see about packaging it up into a hard-wired, enclosed unit that I can put to permanent use in the house.
It's too bad that the DHT-11 sensor's range only goes down to 0°C; I'd like to have a unit for outdoor temperature sensing as well.
- - -
Update -- WEDNESDAY, APRIL 18, 2018
I got the monitor to work with an Elegoo Arduino Nano from Amazon.

At first, I could not get the Nano to accept an upload; I'd get an error every time I tried. I fiddled and monkeyed about with the software, not really knowing what I was doing, then out of nowhere it started to work properly. Pure voodoo.
Anyway, now I can get on with designing a power supply and packaging arrangement.
- - -
Power Supply Built -- WEDNESDAY, MARCH 13, 2019
See this post for the regulated power supply that I made from a 9V AC adaptor and an LM317L three-terminal regulator.
- - -
A Finished, Packaged Temperature/Humidity Monitor
Here's a view of the unit installed and working.

The enclosure is an enamelled steel storage bin that I got from the dollar store. The bin is about 5 1/2" square by 4" deep. That's a generous size that makes for relatively easy prototype construction. I added 3mm threaded inserts and screws at either side for lid fastening. The unit is attached to the wall by a couple of 3/4" steel corner braces.
The DHT-11 sensor is attached to the plenum of the house's furnace, so I can observe conditions right at the exterior of the furnace plenum. I thought that might be a little more interesting than monitoring living quarters temperature and humidity. Here's a view of the sensor.

For a sensor mount, I used a small rectangle of aluminum sheet. The DHT-11 is glued to the aluminum with CA adhesive.
Here's a bare-bones schematic of the Arduino/display interface.

And here's a schematic of the DHT-11 wired to a 1/4" stereo phone plug.

Here are two views of the monitor's innards.


Messy, eh? Getting from a nice neat schematic to a functioning piece of gear is quite a journey.
Anyway, following is the code:
/*
Author: SMRAZA KEEN
Date:2016/6/29
IDE V1.6.9
Email:TechnicSmraza@outlook.com
Function:
*/
#include <LiquidCrystal.h>
#include <dht11.h>
dht11 DHT;
const int dht11_data = 6;
int temp = 0;
int hum = 0;
LiquidCrystal lcd(12, 11, 5, 4, 3, 2);
int inPin = 6;
int val = inPin;
void setup()
{
int inPin = 6;
lcd.begin(16, 2);
lcd.print(" Rouge River ");
lcd.setCursor(0, 1);
lcd.print(" Workshop ");
delay(2000);
lcd.clear();
Serial.begin(9600);
}
void loop()
{
DHT.read(dht11_data);
temp = DHT.temperature;
Serial.print("Temperature=");
Serial.print(temp);
Serial.println(" degrees Celsius");
hum = DHT.humidity;
Serial.print("Humidity=");
Serial.print(hum);
Serial.println(" percent");
lcd.clear();
lcd.print("Hum=");
lcd.print(hum);
lcd.print("%");
lcd.setCursor(10, 0) ;
lcd.print(" Rouge");
lcd.setCursor(0, 1);
lcd.print("Temp=");
lcd.print(temp);
lcd.write(0xDF);
lcd.print("C");
lcd.setCursor(10, 1);
lcd.print(" River");
delay(500);
}
Note the following:
- I left in the original author's name, of course, so no one can accuse me of plagiarism. I have made changes, though.
- I've deleted all comments, aside from the opening one with the author's name. I find that most comments in Arduino code aren't all that helpful; mostly they just clutter up the code.
- I changed the start-up herald to read "Rouge River Workshop", and the running logo to read "Rouge River". Those items are easily changed to read whatever one might wish.
- The code outputs the temperature and humidity readings to the serial monitor, as well as to the 1602 liquid crystal display.
- - -
Update -- SUNDAY, MARCH 17, 2019
I modified the code to report Fahrenheit temperature as well as Celsius. Here it is:
/*
Author: SMRAZA KEEN
Date:2016/6/29
IDE V1.6.9
Email:TechnicSmraza@outlook.com
Function:
*/
#include <LiquidCrystal.h>
#include <dht11.h>
dht11 DHT;
const int dht11_data = 6;
int temp = 0;
int hum = 0;
LiquidCrystal lcd(12, 11, 5, 4, 3, 2);
int inPin = 6;
int val = inPin;
void setup()
{
int inPin = 6;
lcd.begin(16, 2);
lcd.print(" Rouge River ");
lcd.setCursor(0, 1);
lcd.print(" Workshop ");
delay(2000);
lcd.clear();
Serial.begin(9600);
}
void loop()
{
DHT.read(dht11_data);
temp = DHT.temperature;
Serial.print("Temperature=");
Serial.print(temp);
Serial.println(" degrees Celsius");
hum = DHT.humidity;
Serial.print("Humidity=");
Serial.print(hum);
Serial.println(" percent");
Serial.print(temp*9/5+32);
Serial.println(" degrees Fahrenheit");
lcd.clear();
lcd.print("H=");
lcd.print(hum);
lcd.print("%");
lcd.setCursor(8, 0) ;
lcd.print("RRW");
lcd.setCursor(0, 1);
lcd.print("T=");
lcd.print(temp);
lcd.write(0xDF);
lcd.print("C");
lcd.setCursor(8, 1);
lcd.print(temp*1.8 +32);
lcd.write(0xDF);
lcd.print("F");
delay(500);
}
# # #
# # #
No comments:
Post a Comment