A garage sale find.

As you can see, it's in pieces, and whoever took it apart lost the fasteners, so this is going to be challenging.
Allegedly, the engine has no spark. I'm not even going to try to investigate that until I've come up with a bench-mount for the engine. I want to be able to work on the engine at a bench, not down on the scooter's chassis.
- - -
Here's the quick-and-dirty rig I came up with for a bench-mount.

It's just a steel flat attached to the engine by a single M6 screw underneath, then c-clamped to a small bench. It's adequate for spark testing, and that's all I'm concerned with right now.
- - -
And the outcome of my spark test was to confirm that, yes, there's absolutely no spark. So. the next step will be to obtain a replacement coil module, and try that out.
- - -
My son has ordered a coil from China. Here are two views of the original coil

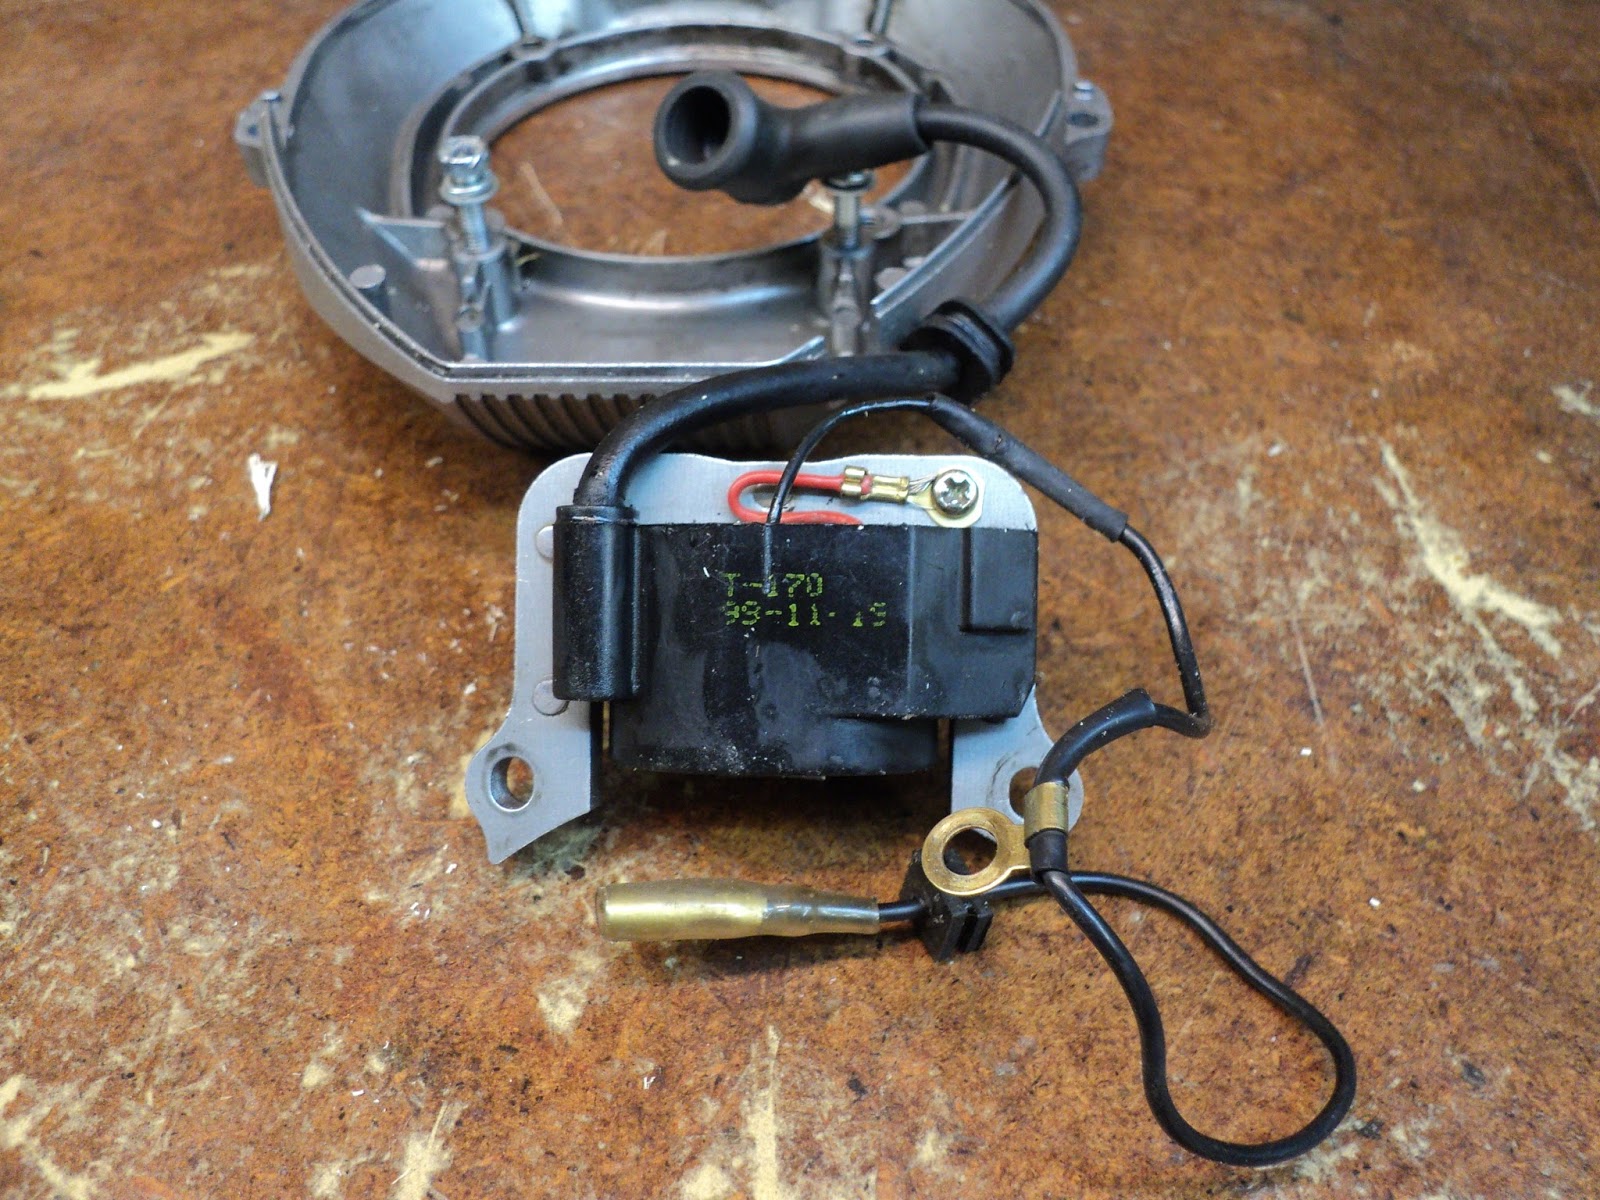
Note that the coil is mounted such that it's inaccessible for air gap measurement. Installation of the replacement coil will be a trial-and-error affair to achieve a more-or-less correct air gap.
- - -
While I'm waiting on the part's arrival, I suppose I should record some information about the scooter and its engine.
Scooter
Made by VISA MOTORS LLC (Limited Liability Company). As best as I can make out the I.D. plate, the model is CZ-2BS, VIN is V60882 and Model Year is 2013. The I.D. plate is a cheesy affair, hand-written with a ballpoint pen, so some of those characters could be in error. There's a decent, embossed I.D. plate on the fork tube that has the scooter's serial number (V-60882) on it.

From what I can see on the internet, VISA MOTORS LLC is no longer with us, so factory support is out of the question.
Engine
A model KY171 from Keyang Electric Machinery Co. Ltd. of Korea. There's a rather odd entry on the I.D. plate -- "(MAX) 1.7PS/7000RPM". I don't know what to make of '1.7PS'. On the starter it says, "33cc ENGINE DESIGN BY MITSUBISHI".
There's a Keyang internet presence, but it looks like they no longer make two-stroke engines, so there'll be no help from them, either.
Spark Plug
The machine came with two spark plugs. The one that looks like it might be the original is an NGK BM6A. The other, that looks like a new equivalent replacement, is a Champion CJ8. They're gasketed, non-resistive types with a 3/4" hex.
A New Coil -- FRIDAY, AUGUST 4, 2017
The coil my son was able to obtain has arrived, and it's not an exact replacement. The poles' configuration is slightly different, and the frame can't be positioned far enough from the flywheel for there to be clearance between the poles and the flywheel.
Since we can't seem to find an exact match for the original, defective coil, we're going to have to go with the ill-fitting replacement. I filed out the mounting holes in the new coil, and so got it fit with clearance from the flywheel. Here's a photo of the new coil installed, alongside the original coil.

The new coil has an extraneous black wire lead that I'll delete, and the insulating sleeve on the high voltage lead may need to be cut back a bit, but the coil does work. I now have spark.
- - -
Random Notes -- MONDAY, AUGUST 7, 2017
Following are some notes, in no particular order, on items that were attended to in order to rectify problems or make improvements.
Brake Lever Angles
The brake levers appear to be angled for a standing rider. I think I'd rather have them set for a seated rider.

A 5mm hex key is needed to loosen off the brake lever fasteners, and permit adjustment of the brake levers' angles. A small change in brake lever angle is all that's needed to make the angle more suitable for a seated rider.

Front Brake
The front brake is a single-pivot side-pull caliper type made by ALHONGA of Taiwan.

The front brake is operated by the left side lever.
Wheels/Tires
The wheels are marked "TAMI", as are the fenders. Following is the data from the sidewalls of the tires:
CHENG SHIN
MADE IN TAIWAN
250-4 N.H.S.
C-202S-3 [C-202S-5 on rear]
4 P.R. LOAD RANGE B
INFLATE TO 50 PSI
NYLON
TUBE TYPE
Here's a view of the front wheel/tire.

Note the valve stem. That's accessible with an air chuck. The one on the rear isn't.

The rear valve stem is blocked by the chain and sprocket. The rear tire is all but deflated, and there's no way to get an air supply connection onto it. It appears that you inflate the rear tire by first removing the wheel.
Rear Wheel Removal
An 8mm hex key and a 17mm open-end wrench are needed to undo the rear axle. And pulling out the rear axle (a 10mm x 140mm hex socket head cap screw) didn't get me very far; the wheel remains firmly in place between the frame members and the brake. I'll remove that chromed rear cross-bar, and see if I can spread the frame members a bit to allow the wheel to escape.

And it's still no go. That rear frame is a solid piece of construction that has a firm grip on the wheel and brake. Some sort of spreader arrangement is in order.
- - -
It may be the iffiest arrangement that I've ever rigged. but it got the wheel freed.

Whether it's stable enough to work for getting the wheel back in place is anybody's guess, but I'll cross that bridge when I come to it. For now, it's sufficient that I got the wheel out, and can maybe re-inflate the tire.
I'm hoping that the tire's inner tube is ok, and that the deflation is just from normal, extremely slow air loss over a period of years. It's a safe bet that the tire's pressure was never checked or attended to since day one, given the inaccessibility of the valve stem. All I can do right now is re-inflate the tire and put the wheel back and see how it goes.
- - -
And this may be the most perverse, ill-considered arrangement that I've ever come across on a piece of machinery.

With that sprocket in place, there's simply no way to get an air fitting of any kind onto that valve stem. The stem is rigid -- it can't be flexed over away from the sprocket. The sprocket is held on by a hub that requires a special spanner to remove. I appear to be stymied here.
- - -
Not quite stymied after all.

I managed to loosen off the sprocket by hammering at one of the hub's spanner notches with a punch. Now I can re-inflate the tire.
- - -
As long as I have the sprocket off the wheel, I may as well show the back side of it with the maker's name.
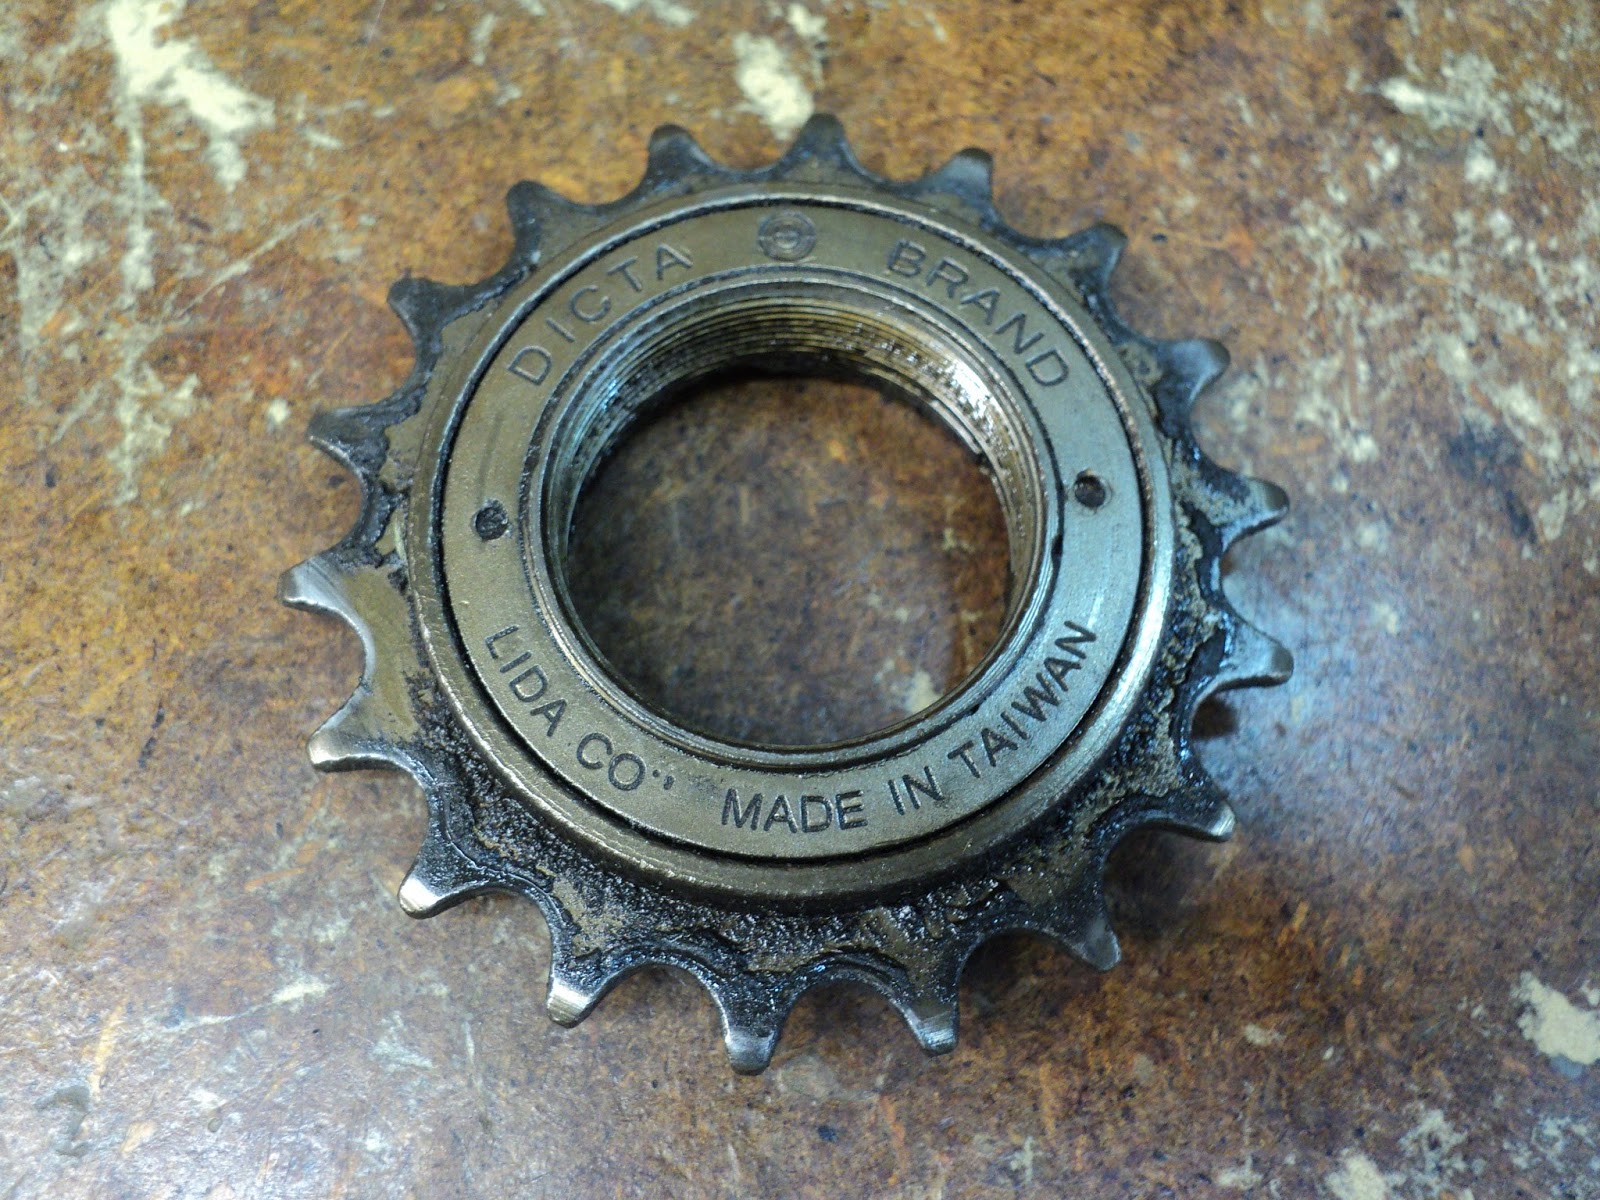
It's an 18-tooth sprocket that incorporates a free-wheeling clutch, similar to what's employed on bicycles.
- - -
And a minor miracle -- my hideous, makeshift frame spreader stayed put securely enough to let me get the wheel back in place.

And all without disturbing the chain-tension/wheel-alignment adjustment.
On to other bits of work that the scooter needs to have done on it.
- - -
Fuel Tank Cap Gasket
It's seen better days.

It's just shy of 1 1/2" in diameter. I'll make a new one out of some truck tire inner tube material that I have on hand.

There. The hole in the middle is for fuel tank ventilation, so the engine doesn't get fuel starved by an evacuating fuel tank. There's a tiny hole in the tank's cap for the same purpose.
That material I used may swell with exposure to fuel fumes. If it becomes too swollen to fit properly and work reliably, I have some cork gasket material to fall back on.
- - -
Seat Post Anchor Clamp Screw
The original screw was missing. I found an M8x40mm hex socket head cap screw at Canadian Tire that's just long enough for the application.

That screw was a nice find. With the scooter's shroud in place, the screw's head is only accessible for seat post removal via a hole in the front of the shroud. The hole is only big enough to accept a hex key, not a socket wrench, so a hex socket head cap screw was just what was called for.
Transmission-To-Chassis Fasteners
I wasn't happy with the fit of the engine's cowl to the transmission's flange, so I wanted to get the transmission off the chassis, to facilitate correction of the problem. When I went to remove the transmission, three of the four screws snapped off.

They're M6x20mm screws. I had some slightly longer screws on hand that fit ok. They have T30 security Torx recesses instead of hex sockets, but they'll do fine for the job. I've installed them without threadlocker for the time being. For final assembly, I'll want to use blue threadlocker on them like the factory did with theirs. It's imperative that nothing on the scooter ever shake loose; nasty damage could ensue by the time a loose fastener or fasteners was/were discovered.
Engine Cowl To Transmission Flange Fit

The engine cowl's opening around the clutch is supposed to fit easily over the mating flange on the transmission, but what I had was an interference fit. I shaved the perimeter of the engine cowl's opening with an X-Acto knife blade, and got it to where I now have a nice no-slop/no-bind fit.
Fuel Tank Fasteners
The two M5 screws for mounting the fuel tank were missing. I came up with two M5x16mm screws that were ideal, along with appropriate washers, so that's now resolved.

Shroud Fastening
The shroud is fastened in place by three M5 screws. The rear screw holes aligned very poorly, so I drilled and tapped a new threaded hole in the chassis bracket that lines up properly with its mating hole in the shroud. Here's a view of that.

The upper threaded hole at the centre of the photo is the factory's; the lower threaded hole near it is mine. That original hole alignment wasn't just a little bit off; it was waaaay off.
The shroud now fits in place nicely.

I just have to get it some steel screws and washers. I don't care for the appearance of those brass screws.
- - -
Lower Right Side Engine Strut -- THURSDAY, AUGUST 10, 2017
I'm not sure how much it's actually needed, but there's a strut at the lower right side that supports the starter end of the engine.

Kill Switch
I had nothing to go by for what the original kill switch consisted of, or where it was located. I just put together an arrangement that works.

Where I'm At Now
Except for the temperamental, balky engine, the scooter is in pretty nice condition.
I've left out a lot of work that I did to try to get the engine starting and running reliably. Nothing I've done has fixed it, and I've done a lot. It looks like outright engine replacement is the only thing that will get this scooter into fit condition for use.
Just for the sheer helluvit, and as a further exercise in futility, I could dismantle the engine far enough to examine it for the possibility of crankcase leakage. Crankcase leakage might explain a lot of the odd symptoms I'm seeing.
- - -
Nah. Some other time.
Speaking of exercises in futility, suppose I try peeling the encapsulation off the dead coil to see what's inside.
At the end of the centre pole, there's one folded-ever leaf of the armature lamination that appears to be what holds the coil assembly onto the armature.

I'll see if I can straighten out that fold-over, and so free the coil assembly from its armature.
Here's the lamination leaf straightened.

And here's the coil assembly off of its armature.

What I'll do now is try to carefully cut through the coil's 'skin' and peel it away. Good flaming luck with that, eh? We'll see how this turns out.
# # #
# # #
Any idea where I could find a rear rim for one of these?
ReplyDelete'Sorry I didn't get back to you in a timely fashion.
DeleteAs far as I know, Viza Motors LLC is no longer in business, so that's a dead end. You could try finding a local scooter dealer. Other makes of scooter might use the same, or a very similar, rear rim. Also, you might keep an eye on Kijiji for another Viza scooter, especially one that's for sale as a parts machine.
Regards,
Tom
need the transmissioin do you have one
ReplyDeleteNo. I no longer have the scooter.
DeleteI have one transmission for the right price.
DeleteI have a transmission for these if you're still looking for one.
DeleteI need a transmission for my viza viper HMU hears my email is jeremyclipz@icloud.com
DeleteI have a second hand engine if anybody is intrested with broken gearbox
ReplyDeleteI could use the pull start if it's available, can't find one anywhere. Thanks
ReplyDelete'Sorry, the scooter is long gone.
DeleteAny idea what size sprocket should be on the motor and how many teeth? I have one but it is missing the sprocket...
ReplyDelete'Sorry. I can't help you. The scooter is long gone from here. Try a local scooter dealer.
DeleteRegards,
Tom
Hi. Ive got a Tami scooter and have tried everything to pump up rear tyre. I wonder why they made it so difficult and how have others got around the problem? Tim
ReplyDelete