My wife found this iron patio chair some time ago.

It's quite an attractive piece, but it has a flaw -- a broken weld at the front left.
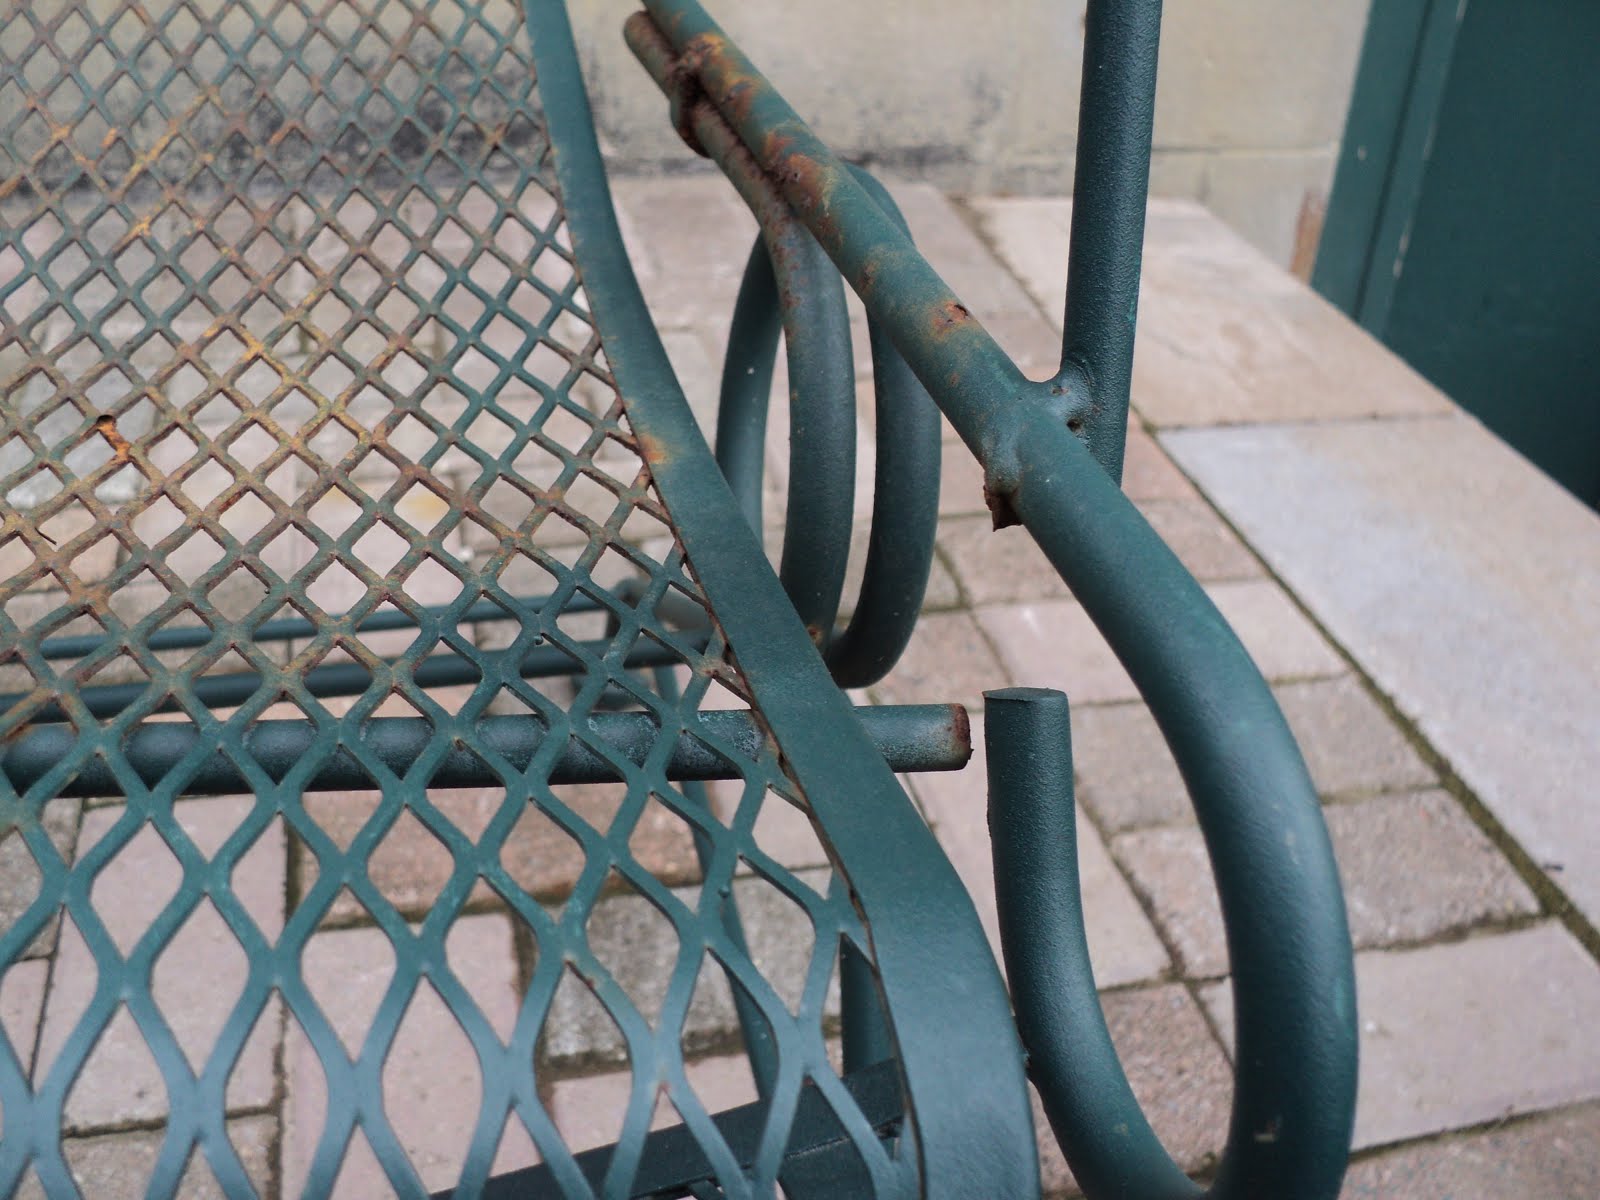
I don't have welding gear. I might be able to braze it, but I'm not all that practised at brazing; I'm not certain I could obtain a good outcome. That leaves me with the option of a mechanical repair method similar to one that's already been applied to this chair by someone in the past. Here's a view of that repair at the upper left of the back.

This will be a bit of a challenge. The repair pictured above would have been relatively easy to accomplish, since that added strap was attaching to a flat piece. I need to do a similar repair, but I'll be attaching to a round piece -- that complicates things a little. Anyway, we'll see how it goes.
- - -
First off, what's left of the broken weld on the underside of the large diameter round has to be ground away -- it will interfere with installation of a strap.

That went reasonably well.

Then it turned out that the upper part of the old weld had to go as well; it would interfere with positioning the end of the lateral round.

Now I can begin to fabricate the attachment strap, and figure out how to go about installing it.
- - -
Here's what I've rigged for a metal forming jig.

That 's a couple of pieces of 12mm diameter steel rod[1] clamped very tightly in the vise, and very tightly clamped across/to the work by Vice-Grips. The masking tape on the work gave a me a way to mark distinct positioning lines. The material is 1/2" wide mild steel flat stock, 1/8" thick. Here's the short end after forming with the aid of Channellocks.

And here it is almost fully formed.

This method doesn't yield a perfect result, but with a little more persuasion from another pair of Vise-Grips while the work is still in place there, I'll get an adequate approximation of the shape I need for my repair strap. Then I can cut off the excess material and carry on with fitting the strap to the chair.
- - -
I've prepared the strap. I've drilled a 5/32" pilot hole through its upper side. Here it is clamped in place ready for the drilling to be completed.

And here it is done.
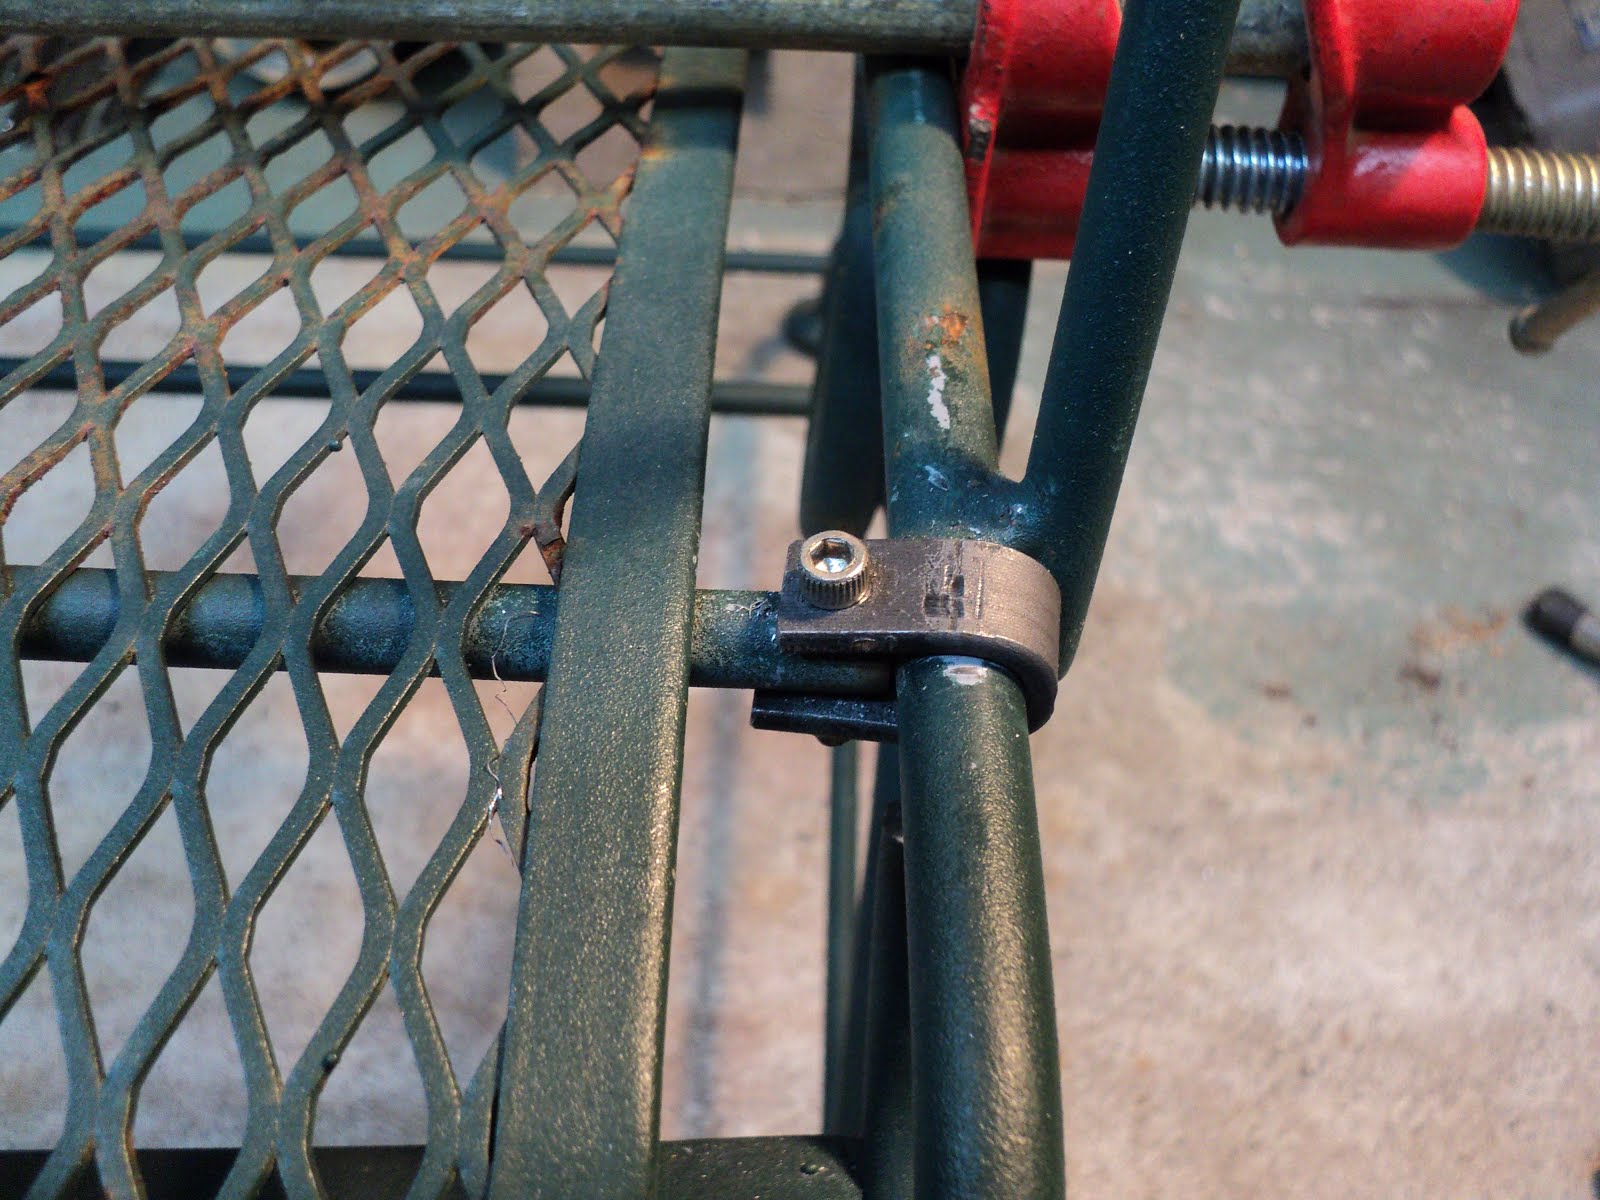
After drilling completely through 5/32" diameter, I bored the hole out to 11/64" diameter, and installed a stainless steel 8-32 screw. That will make for a more-than-adequately strong repair.
I'm not entirely done with this. I still want to refine that repair job a bit, and I need to plan out a repaint job for the entire chair. But I'm pleased that my methodology here panned out as I thought it would -- that's a sound repair that will never need attention again.
- - -
The Finished Repair -- SATURDAY, JANUARY 26, 2013
Here it is fully completed.

I've rounded off the strap's corners, and cinched the strap as snugly as I could around the large diameter rod. I shortened the screw by 1/8" so it would fit correctly with two stainless steel flat washers added, and an acorn nut installed with blue thread-locker. The repair is now well and truly done.
- - -
Note:
[1] My loathsome day job is as a laser and impact printer repair technician. That gives me access to an excellent supply of discarded steel rod material from parts replacements and from scrapped printers. For an amateur machinist, it's a treasure-trove of useful material.
If your workshop interests are similar to mine, you might want to make the acquaintance of a local printer repair shop -- you'll be amazed at the stuff they throw out.
# # #