
These things don’t deserve their obscurity; they’re quite a useful fastener. That’s my entire stock of them in the photo – they’re M4. I can’t recall how I came by them, but I’m glad I did. A couple of them are just what I need for a repair to the housing of an old Hoover portapower vacuum cleaner. If I didn’t have these on hand, I’d have to go to an industrial supply outfit like Spae-Naur for them, and buy a package quantity of 50 or 100.
The problem with the vacuum cleaner is a stripped female screw thread in a plastic boss. There’s a photograph of the complete unit here, along with a motor bearing replacement procedure. Here’s a close-up photo of the site of the stripped thread:
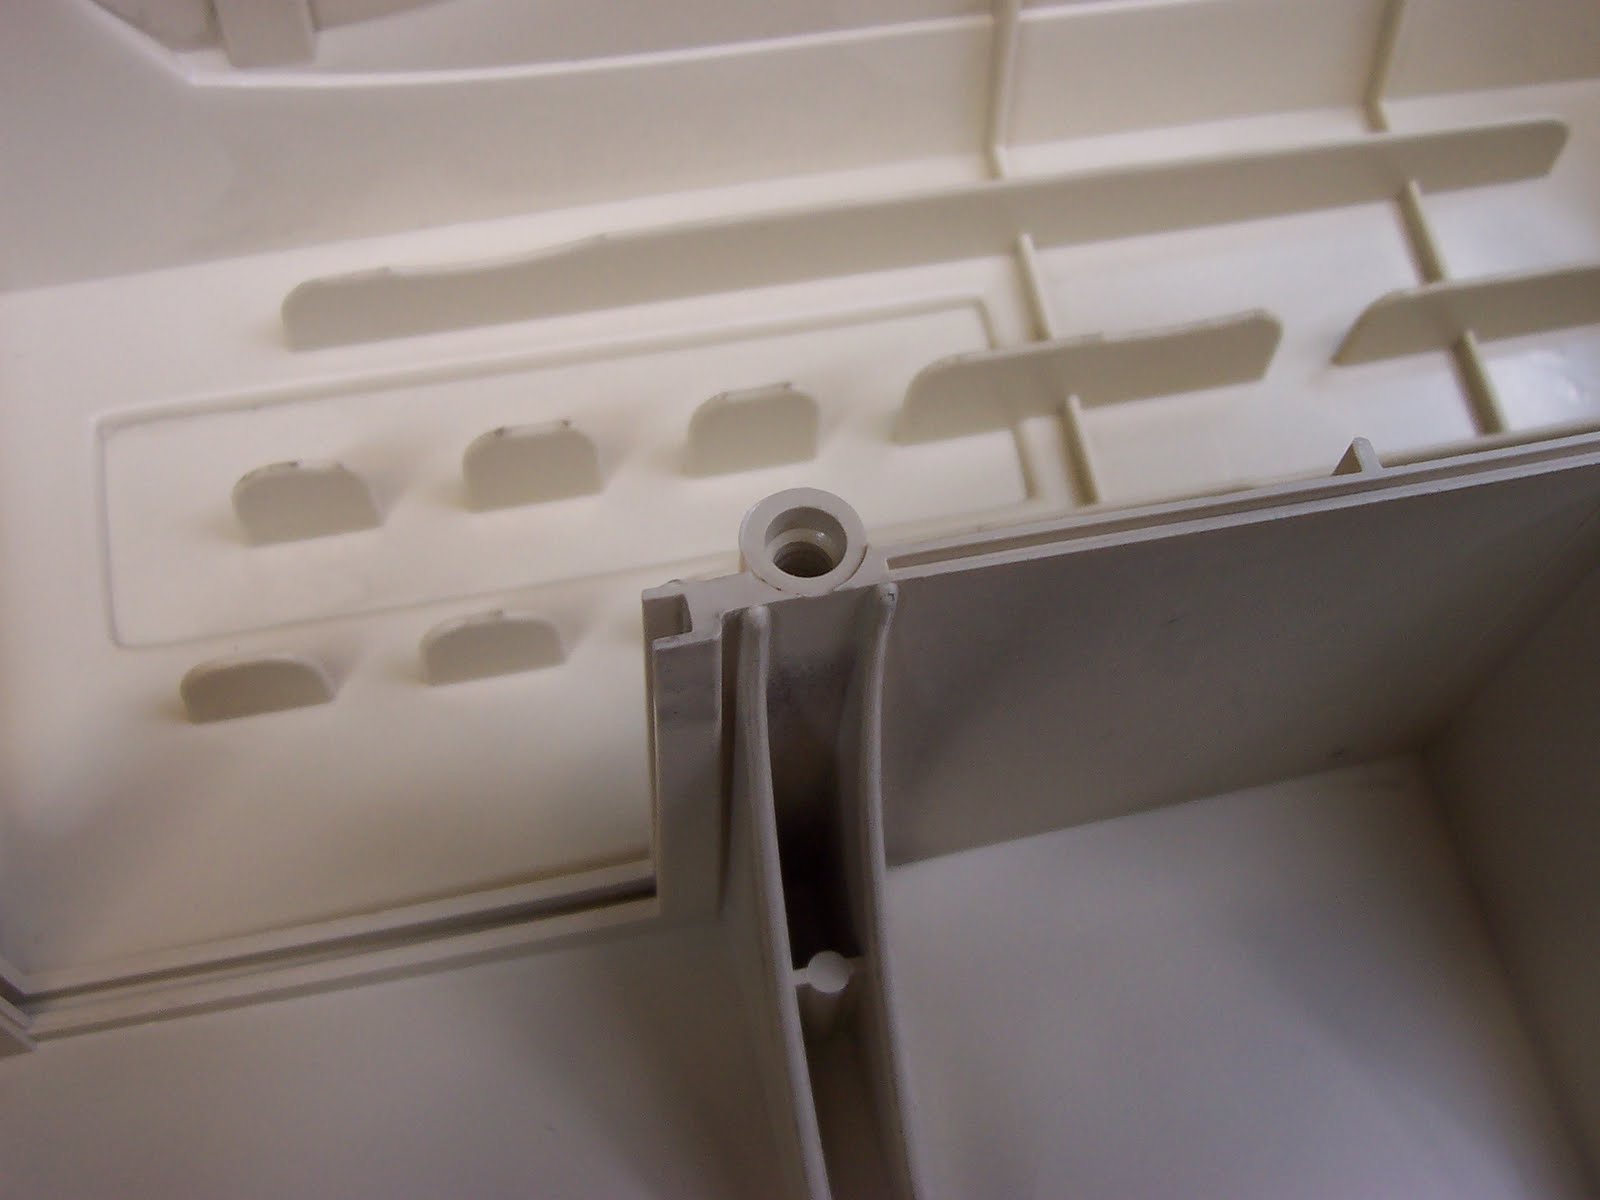
There’s nothing but a vestigial trace of the thread left. I have a method for repairing such threads in most cases, but it won’t work here because of the type of threading screw Hoover used. Permit me to digress a bit to point out some characteristics of threading screws used in plastic.

Pictured are the six screws that hold the vacuum cleaner’s housing together. They’re of two different types.
The two short ones are thread-forming screws. They make a female thread by displacing and compressing plastic material, not by cutting it. The resultant thread is quite strong because no material is removed to form it.
The four long screws are thread-cutting screws. They make a thread in much the same way as a thread cutting tap does. The resultant female thread is inferior to that achieved by the thread-forming screws, and is much more prone to stripping out. And when they do strip out, I can’t apply my thread repair method. That only works with thread-forming screws. So, I have to take a different approach to dealing with the stripped thread that’s at issue here, and that’s where sleeve nuts come in.
Sleeve nuts make it possible to fabricate tie-rods of just about any length with decent looking, unobtrusive ends on them – just what I need here. I’ll drill a 4mm clearance hole through that stripped out boss and out the side, then counterbore and countersink for one of those sleeve nuts. On the side where the original screw entered, the existing counterbore and screw hole accept a sleeve nut already with no modification required. Then I just have to determine the length dimension I need for a piece of 4mm diameter steel rod, thread both its ends and I’ll have a neat repair for the ruined thread.
Here’s the side of the housing made ready, and with a sleeve nut trial-fitted in place:

The finished appearance will be quite acceptable -- nothing cobbled up looking about it at all. Now it’s time to make the tie-rod.
I'll be die-threading a rod that's exactly 4mm in diameter with a 4mm die here, which is to say I'll be cutting a 100% thread. I can get away with doing that on a diameter this small, but on larger diameters (say, 6mm and up) cutting a 100% thread is a poor practice, and is likely to result in a rough-looking thread that's more difficult to cut than need be. It's wise to take a few thou off the diameter of larger rods with the lathe before die-threading them. Just how many thou gets a bit intricate. A publication like Machinery's Handbook is a good reference to have at hand for dealing with such questions.
Here's a method I came up with for die-threading small diameter rods. It beats the orthodox method by a country mile. (The chuck has to be tightened very firmly.) You'll find it much easier to start and cut an external thread this way than by using a die-stock. For split dies, when you want to make use of the die's adjustability, you can still use a die-stock; just clamp the die-stock w/die in the vise.
 And finally, here's my tie-rod ready to take the place of the screw that was in a stripped-out thread.
 I've installed one nut with blue threadlocker, so what I have in effect now is a long screw and nut.
I'm quite pleased with that. It's an excellent example of what can be done with sleeve nuts.
This is an easy step, but one you must pay special attention to, or you'll waste your time trying to get the right size screwdriver so you don't drill another hole. Source for more about stripped screws.
ReplyDelete