Thursday, May 30, 2019

Tool Review -- 1/4" Corded Die Grinder; Mastercraft No. 054-7149-8


It was on special for half price, and I had a heap of Canadian Tire money saved up, so I got one.


The tool comes with two 17mm spanners for the collet chuck. It's a basic, single speed (28,500 rpm) die grinder. 120 VAC, 60 Hz, 4.5 A.

Line cord length is a little over six feet. Line cord specs are:

  • SJT (Service Junior -- i.e. 300 VAC -- Thermoplastic).
  • 105°C.
  • VW-1 flame rating.
  • 18 AWG  (0.824 mm2) x 2 conductor..
- - -

I've sharpened three rotary lawnmower blades with it so far, and it has performed nicely. The motor is well balanced; I've no complaints. (The on/off switch's action takes a bit of getting used to, but that's not a problem.)

The only thing that I find a bit odd is the exploded parts drawing and parts list in the instruction manual. There are no part numbers, and one knows perfectly well that service parts will never be available for something like this, so why do they bother with the pointless documentation? It's a mystery.

Anyway, the die grinder is fine, especially if you get it when it's on special.

# # #


# # #

Sunday, May 26, 2019

A Leaky Garden Hose Faucet


This whimsical turtle-handled faucet has begun leaking badly around its stem.


It leaks worst when it's shut off with a pressurized hose attached. The back pressure from the hose forces water past the stem's gland.

Stem leak aside, the faucet was due for a new washer. I took the faucet apart and replaced the washer. Here's a view of that with the old washer alongside.


I don't have a replacement for the stem's gland, but I do have an assortment of O-rings. So, let's try something -- an O-ring on the stem to go under the gland, like so.


I reassembled that with silicone grease applied, and it partly worked. The O-ring works as a stem seal, but the gland nut's thread leaks.


So, let's try an additional O-ring -- a bigger one for the perimeter of the gland nut.


That appears to be working. Here's the revised faucet with a pressurized hose attached.


We'll see how that holds up.

# # #


# # #

Friday, May 24, 2019

A Poulan 260 PRO 42cc 18" Chainsaw


Here's the ID label data, as best I can make it out:

FAMILY 2002 US I: PA PH 2
                2PWES.0424CS
DISP. 42CC: EM
SERIAL # 02288D200830-3: (06-59)
Durability Period 50 hours

The small engines place that I frequent gave it to me. They'd have given it to a trade school, but I guess the school didn't want it, so I got it.

There's fuel in it but it won't start. I'd really like to have this machine in useable condition. It's all the chainsaw I'd ever need. Let's see what's what with the thing.

Top Cover Removal

Three obvious screws, T25 Torx recess.

Spark Plug

It's an immaculate Champion RCJ7Y.  It looks like someone replaced the plug, couldn't get the engine to run and gave up on it.


Hex is 3/4" A/F (across flats). Gap is a tight 0.030". I've been cranking the engine, and the tip of the plug is bone dry. That doesn't bode well for fuel system fitness. Let's at least see if we have spark.

- - -

And we have spark.

- - -

Fresh Fuel

First thing to try is fresh 40:1 fuel.

- - -

And that's no go, so it's on with investigating the fuel system.

- - -

Left Side Cover With Recoil Starter -- SATURDAY, MAY 25, 2019

The left side cover has to come off for access to the primer bulb. There are four obvious screws, T25 Torx recess.


Note the following regarding the primer bulb:
  • The bulb has two nipples -- a longer one in front and a shorter one in back.
  • The longer front nipple is fuel return to the tank.
  • The shorter rear nipple is fuel draw from the left side of the carburetor.
  • Two No. 6 x 5/8" pan head screws, No. 2 Phillips recess, fasten the primer bulb to the frame.
- - -

Carburetor Removal

Underneath the foam air filter element there are two washerface hex nuts, 8mm A/F. Remove those nuts and you're presented with a diabolical arrangement. The process of extracting the carburetor defies tidy exposition, so I won't even try.

Anyway, the carburetor is a Walbro 236 WT391, as best I can make out the embossed characters. I deleted the mixture screw limiting caps, and tore down the carburetor. The metering diaphragm looks marginal, but it should work well enough to get something out of the machine. I found nothing else untoward. 'Reassembled the carb and the saw, and it's no go. I've not been able to get so much as a single 'pop' out of the engine. Whatever is wrong is a mystery to me, and I don't think a new metering diaphragm will solve it. The saw can go down to the bottom of the yard to languish until I either scrap it, or come up with a solution.

You win some; you lose some. Two-strokes can be mystifying.

- - -

Further Notes -- THURSDAY, MAY 30, 2019

An interesting feature is the pressurized fuel tank. There is no fuel tank vent for air to enter through to take up the space left by spent fuel; the filler cap seals tightly and perfectly. It behooves one to depressurize the fuel tank by cracking open the filler cap prior to disconnecting the fuel take-up line from the carburetor; else there'll be a considerable spout of fuel out of the disconnected fuel take-up line until fuel tank pressure subsides.

I've had the flywheel off to check that the flywheel is correctly keyed to the crankshaft. It is, so the engine can't possibly be mistimed, presumably. Can it be possible for an ignition coil to fail in such a way that it still produces spark, but at the wrong time? I don't know. It seems highly unlikely.

I've tried leaning the mixture screws, and richening the mixture screws. Nothing changes.

I've tried squirting oil into the cylinder to up the compression. That produces a brief, marked increase in compression, but the engine still won't start.

I went to Canadian Tire and got a can of their Quick Start starter fluid spray. 'Tried that. No effect.

Removing the muffler to examine the piston reveals appreciable scoring of the piston. I've been told that that's an indication of 'game over' for a two-stroke engine. Measured compression is about 60 psi, which is low, but I would expect the engine to still be able to run with that, albeit poorly. I'm baffled.

- - -

Update -- WEDNESDAY, JUNE 5, 2019

Going on the theory that possibly something may be amiss with the ignition coil's spark timing, I ground down the flywheel's integral 'key' so I could experiment with timing.


I know, that was a gross, possibly retarded (no pun intended) thing to do, but I had nothing to lose. Needless to say, that got me nowhere. I'll just have to put the failure down to that scoring I can see on the piston, and finally give up. The saw can go in the next load of stuff bound for the scrapyard.

# # #


# # #

Tuesday, May 21, 2019

Tool Review -- Oregon No. 42-100 Lawn Mower Blade Balancer


As received from Amazon, it's a piece of junk.


For the balancer to work properly, the needle that the cone perches on must come to quite a fine point. The point is blunt, and ridged at the bottom. The cone exhibits a 'detent' at apparent balance. It might reveal gross imbalance, but the blunt, ridged needle point will tend to conceal slight imbalances.

I chucked the balancer's base in my lathe, and filed a better point profile.


That ought to work.

- - -

I tried the balancer with a blade from an electric lawn mower that I suspected of being slightly imbalanced. I do appear to be getting a slight imbalance indication, so maybe I've got a useful tool now.

- - -

In conclusion, if you're not prepared to have to perfect the needle point of the Oregon 42-100, stay away. It's a piece of slovenly manufacture.

Update -- THURSDAY, MAY 23, 2019

It gets worse. The 3/8" nominal diameter step is undersize for a blade hole for a 3/8" diameter bolt, so such a blade centres poorly. For the type of blade hole pictured below, there's no suitable cone step at all.


One can do as well by balancing a blade on a nail or a screwdriver shank.

'Not impressed. I'll look into returning the thing.

- - -

It's on its way back to Amazon.

# # #


# # #

Monday, May 20, 2019

A Small Engine Spark Tester


I got fed up with gimmicky spark testing apparatuses, so I came up with this.


It's an 18" length of wire with an alligator clip on one end, and a battery terminal post clip on the other. The alligator clip is big enough to clip onto an engine cooling fin or whatever for a ground connection. The battery terminal post clip will fit any spark plug's body.

Here's a view of the tester connected on a string trimmer.


In the above photo, the cooling fins are inaccessible, so the ground connection is made at the carburetor's idle speed adjustment screw.

The tester works nicely. It's best to have the machine under test inside a darkened workshop, where you can be certain of seeing the spark if there is one.

Some lawn mowers can be awkward for positioning the spark plug so it's visible. At times, you may need an assistant to observe the spark plug while you yank the starter cord.

Anyway, it's 'farewell' to gimmicks like this thing.


And 'hello' to reliable spark testing.

# # #

FEEDBACK

# # #

Sunday, May 19, 2019

A Canadiana 20" Lawn Mower


It's a basic 20" mower with wheel height adjusters. When I first tried it, it started on the first pull. Then it wouldn't start. Then it started on the first pull again. Then it wouldn't start. 'Not a condition that one could put up with.

Here's a shot of the ID label.


I have no idea what "HOP" stands for.

Engine is a Briggs & Stratton 300 Series, 148cc. Model 9L602, Type 0009 F1, Code 13012251. DOM JAN 2013.

- - -

The mower appears to be in fairly good condition overall. The engine has a tall, 1/4-turn fuel tank cap that I've not encountered before.

- - -


Enable/Kill Bail Cable

The enable/kill bail cable has a laceration that refuses to photograph well.


There's also a bit of a kink in the cable. In spite of that, the cable works smoothly. I would like to repair the jacket's laceration, though. A 1/4"-20 coupling nut split lengthwise, and a couple of small hose clamps may be the solution.

There's what appears to be a part number embossed on the cable's jacket -- "440934".

Enable/Kill Bail Cable Update

Here's the cable's jacket laceration repaired.


That looks good. I've mostly gotten the kink out of the cable, and the cable still moves freely. That should be a long-lasting repair.

- - -

Spark Plug

The spark plug has one of those big, clunky, shielded connectors on it.


I've seen that before. I'd love to know what that style of spark plug connector is all about.

The spark plug is a Champion RJ19LM.


It's a 14mm plug with a 13/16" A/F (across flats) hex. Gap is 0.030". It looks to be in reasonably good condition.

- - -

So, 'time to remove and dismantle the carburetor/fuel tank and see if anything is amiss there. There's some evidence of water in the fuel tank. It may be that all the engine really needs is a fuel tank flush and dry-out, and fresh gasoline. We'll see.

- - -

Air Cleaner

The filter could stand some attention.


Yikes! That's more filth accumulation than I'm accustomed to seeing on an air filter. The machine's been neglected.

Governor Link/Spring

It's a little different from what I'm accustomed to seeing on Briggs & Stratton engines.


It's a fixed speed governor -- there's no speed adjustment lever. And there's no air vane. This engine has a mechanical governor like Tecumseh engines have.

- - -

Carburetor

'Found nothing untoward, except for a badly stretched diaphragm.


'Replaced that along with its gasket. 'Cleaned and flushed the fuel tank and the carburetor. 'Put it all back together and the mower starts and runs fine.

- - -

Blade Removal -- WEDNESDAY, MAY 22, 2019


The blade retaining screw has a 9/16" A/F hex head. Reinstall it with anti-seize compound on the threads.

Governed Speed

3,000 rpm.

# # # 


# # #

Friday, May 17, 2019

A Murray 20" Lawn Mower


Model No. is 7800325. Serial No. is 2013045351.

Engine is a Briggs & Stratton 475 Series, 148cc, Model 9T702, Type 0118 B1, Code 0804075.

- - -

It's a nice little basic lawn mower that's been 'worked' on, to no good effect.

The enable/kill bail and cable are missing altogether. The kill switch and brake have been deleted from the engine.


An atrocious installation of a toggle switch for a kill switch has been done.


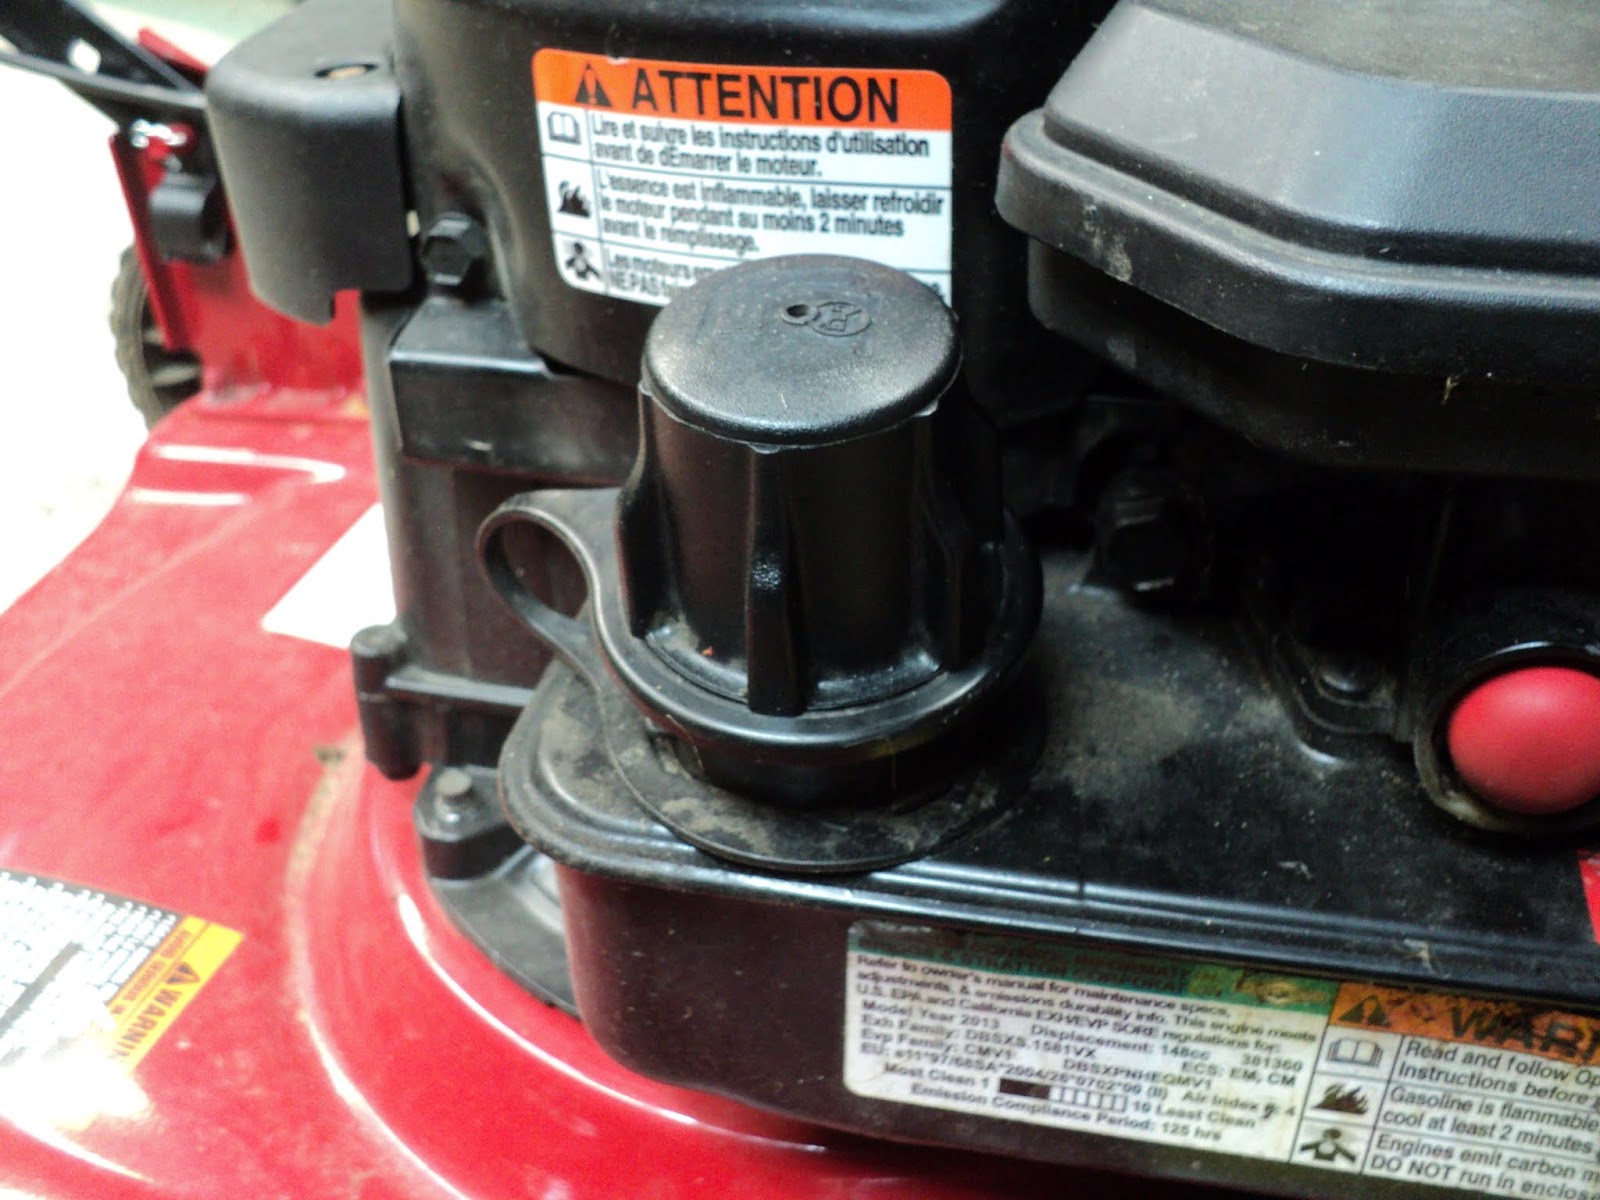
The muffler has been tampered with for some reason.


The screws are loose, and the anti-loosening bar is out of place. Why on earth anyone would fiddle with a perfectly sound muffler on a small engine is beyond me.

Anyway, the engine won't start. 'Time to check for spark.

Spark Plug Connector

This is a new one on me.


A big, clunky, shielded spark plug connector. I think it may have to do with electromagnetic radiation suppression.

Spark Plug


It's a Champion RJ12C. Hex is 13/16" A/F (across flats). Gap is 0.030". The plug appears to be in quite good condition. Let's see if we have spark.

And there's spark. The engine can be made to run.

- - -

Spark Plug Update -- SUNDAY, MAY 19, 2019

It dawned on me that the RJ12C can't be the correct spark plug for this engine, owing to the fit of the shielded connector. The metal shield on the connector is supposed to reach down to and contact the hex on the spark plug. On the RJ12C, the ceramic is too long for that to happen. The correct spark plug is probably Champion No. RJ19LM.

- - -

Muffler

The loose muffler must be attended to. Here's a view of it off altogether along with its fasteners.


It's a large muffler. I take it that Briggs & Stratton have really made an effort to quiet their engines.

The screws are special shoulder screws, 1/4"-20 x 2 3/8". The threaded portions are 1/2" long. The hex heads are 7/16" A/F. I'll reinstall the whole affair with anti-seize compound on the screw threads.

- - -

Fuel Tank

There's some fuel in it. I can see little globules of water down in the bottom.

I've cleaned and rinsed the tank with solvent, and left it by the furnace to thoroughly dry out. I may take a hair dryer to it to see if I can get it dried out quickly.

Governor Vane

The governor vane was sluggish. It was binding because its mounting base (the top surface of the coil's laminations) was dimpled. I filed down the length of the vane's pivot sleeve a bit, and reinstalled the vane. Now it's fine -- it pivots freely.

Carburetor

'Cleaned and flushed and blew it dry. The diaphragm looks marginal. I'll try reusing it and see how it goes.

- - -
It Starts And Runs

Fresh gasoline in a clean tank and carburetor and away it goes.

Now I have to decide how much to put into this machine regarding the enable/kill function. I'll seek my son's advice.

- - -

Update -- SUNDAY, MAY 26, 2019

I looked into the cost of reconstructing the enable/kill bail function, and I can't see going ahead with it -- it would be too costly. I could simply do a nice installation of the toggle switch, and the mower would certainly be useable, but I don't want to be selling gear that doesn't comply with currently mandated safety standards; that would be asking for trouble. So, the mower can go languish at the bottom of the backyard for now. Perhaps I'll come across a similar mower that's an utter ruin but for its enable/kill components. Then I could rob parts from it, scrap what's left and get this pretty nice Murray machine in good order.

- - -

Update -- WEDNESDAY, JULY 3, 2019

I decided to be optimistic about the possibility of obtaining the parts for the mower's enable/kill function, and go ahead with refurbishing the deck.

I stripped everything off the deck, and pressure washed it. The deck is rusty underneath, of course, but it's sound. The pressure washer did a pretty good, albeit imperfect, job of stripping away the flaking paint from the underside of the deck. The underside finish is unimpressive -- just one thin coat of black enamel.

For an underside primer, I got a can of this stuff.


It's basically a grey primer. The price is outrageous -- $10.99 CDN for a little 1/2 US pint can. When I've used that up, I think I'll stick with Tremclad's grey primer; the price is halfway reasonable compared to the Rust Check product, and for all I know it's just as effective.

After priming, I applied two coats of Tremclad gloss black. We have a couple of sunny days ahead, so I've left the deck out on the lawn for the paint job to age in the sun and the free air.


Once that paint job has hardened sufficiently, I'll reassemble the machine and resume pursuing the enable/kill function components.

- - -

Kill Switch Update -- WEDNESDAY, OCTOBER 9, 2019

For want of anything better to do, I went ahead and did a proper installation of the kill switch.


The switch's 'L' bracket is from 3/4" steel strapping, with a 15/32" hole drilled in it to accept the switch's shank. The ground terminal and cable clamp fasteners are 10-32 x 1/2" screws.

# # #


# # #

A Homelite TrimLite String Trimmer


Here's a view of the ID label.


It's a machine that's been written off. It was given to me as a parts machine by the proprietor of the small engines shop that I frequent. I'll see if I can get it going.

Following are the problems I know about so far:
  • The fuel uptake tube is a ruin that must be replaced. The return tube may as well be replaced too.
  • I took the bump-feed spring to repair a Homelite UT 20704 string trimmer. I'm left with a kluged spring that won't work, unless I can modify it successfully. The bump-feed bumper is almost worn through.
  • Compression feels abnormally high. From experience with a pocket motorbike engine, that may indicate a stiffened piston ring. We'll see.
Anyway, let's see if we have spark.

Spark Plug

It's an NGK BPMR7A, and it looks pretty fouled.


It's a 14mm plug with a 3/4" A/F (across flats) hex. Gap is 0.025". I'll clean it up and do a spark test.

- - -

I've got spark.

- - -

Compression Test

I did a compression test while I had the spark plug out, and the gauge registered 110 psi! That's remarkable compression for an old engine. The engine's 'pull' feels normal with the spark plug out, so I guess the piston rings are ok.

- - -

Carburetor Removal
  • Air cleaner cover off. Air filter element removed.
  • Fuel uptake and return tubes slipped off their nipples. Mind/label/note which tube goes where.
  • Two 10-24 hex nuts, 3/8" A/F.
  • Pull off the air cleaner base. Let it dangle by the kill switch wire.
  • Pull off the carburetor and unhook its throttle cable 'Z' fitting. Mind the gasket.
Embossed on the carburetor's body is "C1U 163H"; that's the body type. Etched on the carburetor's body is "H60E 5ZA"; that's the model number.
Metering Diaphragm And Needle Valve


Note the following:
  • The two screws are M3 x 6mm, No.2 Phillips recess.
  • The metering diaphragm gasket goes directly to the carburetor's body; the diaphragm goes to the cover.
  • The metering diaphragm must be supple. Stiffened diaphragms are a common fault. A stiffened diaphragm will render the carburetor inoperative.
  • Exercise extreme caution when handling the tiny spring for the needle valve. It'll take off on you in an eyeblink if you're not careful.
Primer/Fuel Pump Side


Note the following:
  • The two screws are M4 x 15mm, No. 2 Phillips recess.
  • The diaphragm goes directly to the carburetor's body; the gasket goes to the fuel pump block.
 Mixture Needles


A 'Pac-Man' tool works to get the needles out. Note and record the number of turns it takes to close the needles before removing them. At reassembly, set the needles as they were to get going. Odds are that further adjustment will be needed.

The shorter needle at the left above is the main jet's needle -- the one nearest the choke.

The longer needle at the right above is the idle jets' needle -- the one nearest the throttle.


Fuel Line Tubing Replacement

[The following is from my post about the Homelite UT20704, where I had the fuel tank off the engine. Fuel line tubing replacement can be done with the tank in place, though. That's how I actually did it on this TrimLite.]

The factory installs the tank's tubes by squeezing them through undersize holes. The same thing can be done in repair work; you just have to obtain the correct size of tubing.

The tubing holes in the tank are 11/64" diameter, so 3/16" O.D. tubing can be squeezed through nicely. The stuff to have is Tygon F-4040-A tubing, 3/16" O.D. x 3/32" I.D. Any small engines place should have the tubing. It's sold by the foot.

For a return tube, feed about an inch of tubing into the tank, then cut off a length outside the tank that's sufficient to reach the carburetor. It's helpful to cut the starting end of the tubing at an angle, to facilitate getting it started through the hole in the tank.

For an uptake tube, feed in tubing until it emerges from the tank's filler neck, where you can install the fuel filter, like so.


Cut the tubing end squarely and install the fuel filter. With the fuel filter in place, pull back on the tubing until the filter is back inside the tank, then cut the tube outside the tank as you did for the return line.

Label the tubes 'R' for 'Return', and 'U' for 'Uptake' with a Sharpie marker.

Bump-Feed Spring

I managed to kluge the kluge, and got the bump-feed feature to more-or-less work.

Bump-Feed Spring Update -- SATURDAY, MAY 18,2019

No, it's not working. String trimmer bump-feed mechanisms are diabolical. The only solution may be to get a complete after-market hub/reel.

- - -

I dropped into Canadian Tire and took a look at an aftermarket hub/reel. I couldn't plainly see how the thing could possibly fit the end of the Homelite's spindle, so I gave it a pass. The bump-feed that I have could be made to work if I could just come up with a suitable spring.

- - -

And It's Working

After an outrageous amount of mixture screw fiddling, I appear to have a working string trimmer. I'll see if I can unload it on Kijiji.

- - -

Trouble --TUESDAY, MAY 21, 2019

Two things:

1) 'Started it up and the bump-feed hub flew apart. I have no idea how that could happen; the hub screw's thread direction is such that the hub ought not to unscrew on its own. The kluged spring that I had in the hub went God-knows-where.

2) Wide open throttle operation is erratic. It'll work for a while, then it'll start dying when the throttle is opened wide. Possibly due to a marginal metering diaphragm.

- - -

Mystification -- FRIDAY, MAY 24, 2019

I put in a new diaphragm kit, Zama P/N GND-18, and I've still got much the same wide open throttle trouble.

- - -

Update -- WEDNESDAY, JULY 24, 2019

I put back the original diaphragms, and set aside the new diaphragm kit for future use when it's really needed. I also cut slots in the heads of the mixture adjustment screws, so they can be turned with an ordinary screwdriver.


Bump-Feed Trimmer Head

The correct spring seems to be unavailable, and the price of a new bumper is about that of a complete after-market bump-feed trimmer head, so I decided to give an after-market bump-feed trimmer head a try. See this post for the write-up of that.

- - -

To be continued.

# # #


# # #