* * *
Part I of this post is here.
* * *
Leg Weldment Preparation -- WEDNESDAY, SEPTEMBER 3, 2014
There's not much to tell about this aspect of the restoration; it's mostly just a matter of getting the weldments clean enough to accept a rudimentary paint job, as I did a bit earlier with the unattached angle braces.
The legs have cross-rails that would be ideal for supporting a plank shelf underneath the deck. To make use of that feature, I have to grind a couple of lumpy welds, and drill two 1/4" holes in each cross-rail, like so.
My 4 1/2" angle grinder took care of the lumpy weld; that turned out fairly well. That steel angle was not difficult to drill with a portable drill. I'll give the other weldment the same treatment, and I'll have decent shelf supports ready for when the legs and deck are back together again.
Here's a view of the weld that's still to be ground.
Once the grinding and drilling are out of the way, I'll clean and sandblast the two weldments and get them set up for painting. With that done and the deck painted, the lathe will have a presentable stand.
Preparing The Deck For Painting
The deck is a frightful mess -- riddled with holes and badly scarred. It's going to take a lot of filler and sanding to get it fit for a paint job.
One thing I should point out concerns the use of filler -- the more you can minimize the use of filler, the better. Small holes and flaws can be filled with filler only, but outright large holes should be filled with glued in bits of dowel, as I did here.
Make the dowels' lengths such that the dowels' ends sit just below flush with the surrounding surface. Then, an application of filler, once sanded, will present a uniform surface for paint.
Anyway, that's about it for now. Once I've gotten done with the heap of tedious work that I have ahead of me here, I'll return with a view of the completed lathe stand.
- - -
Back Early -- SUNDAY, SEPTEMBER 7, 2014
The first leg weldment is looking good. Here's a view of it after two coats of Tremclad grey.
What a difference a paint job makes.
- - -
Stand's Done -- THURSDAY, OCTOBER 23, 2014
Here's the stand fully painted and assembled.
It's very rigid; it should be well up to its job. A shelf spanning the two lower leg weldment rails wouldn't hurt.
What I'll do from here on is get the un-refinished lathe fully assembled and operational, and add the shelf I just mentioned. Once the machine is completely satisfactory, I'll tear it down again for a paint job.
- - -
Getting It Together -- TUESDAY, OCTOBER 28, 2014
Here it is on its way to operability.
The motor mount is installed, and the motor wiring is done. I want to replace the v-belt with a link-belt style of belt. The stiff, old v-belt that I have for it now is noisy, and I 've been looking for an excuse to get some experience with link-belt installation.
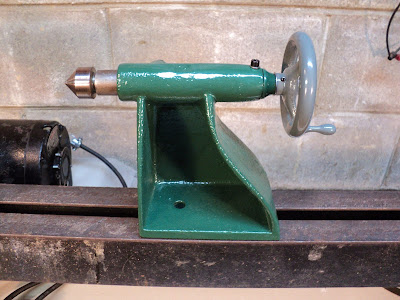
The tailstock casting is painted 'shutter green'. That's to be the colour overall, with a few grey accents. (Grey goes with anything and everything.) I'll leave the upper surface of the bed ways unpainted, so as not to interfere with smooth sliding of the tailstock.
- - -
TheTailstock -- WEDNESDAY, OCTOBER 29, 2014
Here's the tailstock fully painted and reassembled.
I'm very pleased with the colours.
The centre's meet-up with a centre in the headstock was a bit low, so I shimmed up the front of the headstock casting with a couple of washers, like so.
I glued the washers in place with CA adhesive. They appear to be quite secure. We'll see how that shimming job holds up to service.
The taper of the dead centre and the tailstock ram is nonstandard. It's a deviant form of MT2 taper that I've never encountered before. It's an impediment to having a fully functional tailstock, that will accept different centres and accessories. I'll have more to say/show about that later on.
- - -
The V-Belt
The original v-belt was delaminating and done for, plus it was way too long for my revised motor mount arrangement. I had a stiff, old v-belt that fit and worked, but it had a 'set' to it that made it lumpy and noisy.
Busy Bee carries a link-style v-belt that I've long wanted to try out. It's made by Fenner Drives; it's Fenner Drives PowerTwist Plus A/13. It's sold by the foot. Here's a view of the three-foot length that I bought, along with a couple of loose links.
The A/13 size shown replaces 4L (1/2") v-belts.
The stuff is fairly easy to work with, once you get the knack of disconnecting and re-hooking the links. It didn't take me long to get my approximate length of belt material to where it fit the motor mount's tension adjustment range nicely. Here's a view of the installed belt.
Note that there's a directionality to the belt. Every tenth link has an arrow printed on it, so you can't go wrong.
The belt runs pretty smoothly. It's not cheap; Busy Bee's price is $9.99 per foot. Nonetheless, I'm sold on the stuff.
- - -
Painting The Foot Castings -- THURSDAY, NOVEMBER 6, 2014
It seems like every time I spray paint something, I find myself thinking, "There. That's got to be the most awkward thing to spray paint that I'll ever encounter." And then, the next thing comes along and proves to be even more awkward. Such was the case with the first of the two foot castings. Here's a view of how I rigged it for painting.
That vise is on a turntable -- it simplifies things a bit when spray painting many items.
All things considered, it's not a bad outcome.
It certainly looks better than the casting that's still to be painted.
- - -
Operational -- SATURDAY, DECEMBER 6, 2014
Here it is with the basic components painted. It's ready to turn something.
And here's the lathe's first project -- a handle blank for a knockout bar.
Done.
Now I have proper knockout bar for dislodging centres from the spindle's taper.
I'm getting the feeling that I could make a career out of this lathe.
Next up is to make what improvements I can to the tool rests and paint them.
- - -
One Toolrest Done -- MONDAY, DECEMBER 15, 2014
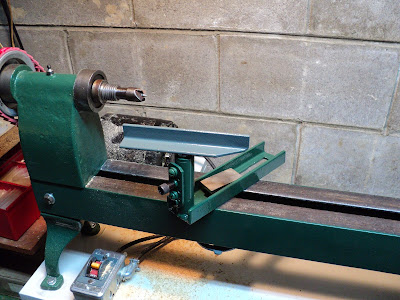
Here's one of the lathe's toolrests repaired, painted and fit for service.
I think the original toolrest(s) went missing, and was/were replaced by locally fabricated equivalents. The fabrications are pretty rough, but serviceable.
The Steady Rest
It's quite the construction. It needs some work. The screws/nuts are all seized, and one of the three bearings is seized. It's all not in too bad a condition, though, so it should be recoverable with a little TLC.
- - -
And here's the steady rest all recovered and ready for use.
And with that, I'll close off this post and get on with putting the lathe to use.
# # #
# # #


No comments:
Post a Comment