Wednesday, October 26, 2016

A Toy Dump Truck


I'm on a roll here with the toy making. 'Latest is a dump truck.


It's small -- only about seven inches in overall length; a proper sandbox toy ought to be at least twice that size. But it was an interesting, challenging project, and I'm quite pleased with the outcome. Two aspects of it are noteworthy:
  • I again used my method for making stub axles, and I expect to be using that method routinely on future toy vehicles.
  • The original plan for the truck that I had obtained from the internet had no provision for latching the truck's tailgate shut. That struck me as a flaw -- cargo would tend to push open the tailgate and spill while in transport. I came up with a latch using a plastic turn button and a notched cross-bar, like so.


I think that makes the toy more useable and engaging.

* * *

A Refinement -- TUESDAY, DECEMBER 6, 2016

Something I neglected to show in the above photos is the front bumper. Truth be told, I made a bit of a botch of that. Here's a front-on view of the bumper.


There's some nasty tear-out, and the vertical registration of the two headlights doesn't match up well.

So, I made a replacement bumper with better headlights, like so.


Now I have to chisel off the old bumper, and glue the replacement bumper on in its place.

- - -

That turned out reasonably well.


# # #


# # #

Saturday, October 15, 2016

Princess Auto's Wood Burning Stove -- Cat. No. 8282303


I've long dreamt of having a wood stove in my workshop, both for auxiliary heat, and to usefully dispose of woodworking off-cuts. (If you do any amount of woodworking, you soon find yourself up to your ears in off-cuts.) So, when Princess Auto put their little wood stove on special, I went and got one. Here it is still in its box.


And here it is out of its box.


You have to attach the four feet with the screws and nuts provided.

Right on the label on the box it says, "This heater is not C.S.A. or U.L. approved and is not intended for residential installation. Using this heater in an insured structure will void the fire insurance coverage."

Hmmm.

Moving right along, here's the stove assembled and sitting where I'd like it to be.


The lid pivots on a single 1/4"-20 nut-and-bolt, and opens like so.


The flue opening at the back is 6" diameter. It's a sort of a socket affair.

The intake draft control is obvious down in front. On top, between the lid and the flue opening, there's a tiny draft control that I don't really understand the use of. A few more points about the stove:
  • The only way to clean out ash accumulation is via the lid.
  • The stove has no grate inside -- just the naked sheet metal bottom.
  • The instruction booklet advises you to add a 2 1/2" deep layer of sand or fine gravel to the bottom of the heater. The booklet goes on to say, "Sand can be installed between the corrugated liner and the heater body to lengthen heater life and hold heat." Hmmm. I really don't see how it would be possible to do that.
The way that I mean to have this thing installed, it will have to function with a 4" diameter flue pipe. I found a 6" to 4" HVAC reducer at the Home Depot. With that, and a length of aluminum dryer vent tubing to vent the thing out a window above, I built a small trial fire in the stove to see how it would work. That seems to have been a success -- the fire drew nicely out through the 4" diameter tubing.

- - -

Anyway, that's the story so far. I knew from the get-go that my plan here was fraught with difficulty, and this little project may end up getting filed under 'folly'. We'll see.

* * *

Update -- FRIDAY, NOVEMBER 11, 2016

I've abandoned the project, and put the stove back in its box to await the day when I can put it to use somewhere more suitable. What I had in mind was just too complicated and dangerous to carry on with.

# # #


# # #


Tuesday, October 11, 2016

A Toy Eighteen Wheeler


I have an old Ryobi project book that has quite a nice toy truck in it. The book is Vol. 3, No. 1, February 2001. Here's the cover.


And here's the truck.


I like that truck. I think it's a fine truck.

I'm going to depart from the text's instructions in several ways, though.
  • The text makes much of making your own wheels with a circle-cutter.[1] The prospect doesn't really interest me, especially not when Lee Valley has exquisite ready-made hardwood wheels for a reasonable price. (I'll be using the 1 1/2" x 1/2" version of item 'A' -- Cat. No. 41K01.66.) Here's a view of Lee Valley's wheels, along with axles that I've made for them.

  • The text would have you build the truck using maple stock throughout. That's a nice choice of material, but maple is costly. I'll be building this truck from whatever odds and ends I can scrounge up. I splurged a bit on the wheels, so I'll make up for that on the rest of the material.
  • The text appears to have the wheels fixed to the axles, with the axles rotating within oversize holes through the chassis. I'm going to do the opposite -- the axles will be glued into the chassis, with the wheels rotating on the axles.
The Trailer Bed And Trailer Front Wall

The trailer bed is 1/2" x 3" x 10". The trailer front wall is 1/2" x 1 1/4" x 3". That 1/2" thickness figure is a bit of a complication -- I don't have a thickness planer. I'll have to resaw and hand plane some 3/4" stock; not one of my favourite activities.

- - -

That turned out not too badly -- I only had to make two attempts on the trailer bed. Here's what I have so far.


Where I went wrong on the trailer bed the first time was in trying to use stock that had the outskirts of knots at the ends. When thickness planing it, the knot outskirts tore out, like so.


Not useable. It's ok to use knotty material, but avoid knots or knot outskirts at ends of pieces.

The hand thickness planing was a chore; I'm glad that I'm working with softwood here. Maple would be more difficult -- a lot of plane sharpening would be in order.

- - -

The Rear Axle Mount

I have that made from a scrap of softwood. Here it is.


It's 7/8" x 1 1/8" x 3", bored through in two places 1/4" diameter for wheel axles.

There was an error in the drawing for this part that fortunately I caught in time. Had I not caught the error, I'd have ended up with the two axle bores too close together. You can't trust how-to drawings to be error free -- it's wise to go over them and make sure that dimensions add up correctly.


Wheel Bores

Since I mean to have the wheels turn freely on the 1/4" diameter axles, I have to give some attention to wheel bore diameter here.

The wheels I bought have 1/4" diameter bores. If I just install those wheels on 1/4" diameter axles, I'll have binding wheels. This is where a set of letter size drills comes in handy. Letter size drill 'F' is 0.257" diameter -- 0.007" greater than 1/4". So, boring out all the wheels with a letter size 'F' drill gives me nice, free rolling wheels. It's an important consideration; any child with his wits about him would rightfully perceive binding wheels as a defect in his toy. It would diminish his enjoyment of it.

Wheel Spacing (Axial Clearance)

Another consideration for freely rotating wheels is axial clearance; wheels mustn't bind between a vehicle's chassis and an axle's hub -- some axial slop is called for. Some plastic shim stock is helpful for establishing axial clearance at wheel installation time. I have a plastic display card from a store gift certificate that's exactly 1/32" thick. I cut it and notched it to give me a pair of wheel installation shims, like so.


Insert the shims between a wheel and the vehicle's chassis while the axle glue-up is tacking, and you'll end up with about the right amount of axial clearance for a free rolling wheel.


Progress So Far

Here's a view of what I've got done so far.


The trailer's rear axle mount and front wall are glued in place, but they lack reinforcement. I'll be adding dowels for that. I want this truck to be able to take rough handling without anything breaking loose.

- - -

Here are the reinforcement dowels installed, awaiting flush-trimming with a chisel.


A toy like this one is liable to be in for some rough treatment, and needs to be able to take it without anything breaking.

- - -

Taking Shape

Progress so far.


- - -

All Done


The 'logs' are from apple tree branches.

That was a delightful and satisfying project. I must pursue more.

- - -

Note:

[1] In fairness to the text's author, I'll make a wheel per his instructions and see how it turns out, and how it compares to the Lee Valley wheels.

There's a slight difficulty right from the get-go; i.e. 1/2" thick stock is called for. 1/2" thick stock is not something that's readily available -- it has to be resawn and/or planed from thicker stock. The text makes no mention of that.

I come across this often in published plans -- authors blithely call for stock thicknesses that one will not find at a typical lumber outlet, with nary a word about how one is to obtain such thicknesses.

Anyway, I'll resaw and hand plane a bit of 3/4" stock; I only need enough for one wheel here.

- - -

And here's my resawn and hand planed wheel blank from a scrap of softwood that was destined for the stove.


Hand thickness planing is quite a skill, and I don't really have it. What you see in the photo is a variable thickness approximation of 1/2" that will suffice for this exercise. I'd love to have a thickness planer in my shop, but those things aren't cheap.

Next up is to bore a hub recess, 3/4" diameter x 1/8" deep, with a Forstner bit. Then, I can apply my circle cutter to get the basic wheel cut out of the blank.

- - -

And here we are with the circle cutting just done.


The text then has you bore out the circle cutter's pilot hole to 1/4" diameter, and mount the wheel on a simple 1/4" mandrel for sanding and chamfering in the drill press. Here we are with that operation just completed.


And here's my shop-made wheel next to a Lee Valley wheel.


If you don't mind the austere plainness of the shop-made item compared to the factory-made wheel, the shop-made wheel is quite acceptable for toy making. I can't fault the text's author at all for his approach to fabricating toy wheels.

- - -

A couple of closing notes:
  • Wheel material really should be hardwood, and the text's choice of maple is a good one. 
  •  In any shop with a wood lathe, it's obvious that the wood lathe is the preferable machine for the sanding and chamfering operation. I only used the drill press to adhere to the text's instruction. I've never much cared for the use of a drill press as a 'vertical lathe'.
# # # 


# # #


Monday, October 10, 2016

Stub Axles For Toy Vehicles


These little stub axles can be bought ready-made. Lee Valley carries a selection of them, along with some very nice wheels.


But if you need axles of dimensions that aren't available, you have to make your own, and that's not easy to do from solid stock. I currently need axles with a quarter-inch diameter, two-inch long shaft, not including the wheel-retaining hub end. Those would be  challenging things to turn as single pieces from hub-diameter stock.

Here's a method for constructing such axles from two different diameters of dowel stock:

For each axle, begin with a 2 1/2" length of 1/4" diameter dowel for the shaft, and a 1/2" length of 1/2" diameter dowel for the hub. The hub piece ought to be cut as squarely as possible -- i.e. on a table saw. If you're making multiple axles, as you likely would be for most any toy vehicle, you'll want to rig your saw to produce uniform lengths of dowel. Here's a view of my crude rig for doing that.


The green-painted plywood scrap is clamped to the saw's table. (The clamp is out of view of the photo.) That plywood scrap is my registration block -- it's positioned so as to get the dowel stock launched at the saw blade such that a 1/2" length of dowel will result from the cross-cut. Note that the registration block's front edge is positioned so that the dowel stock will have moved forward enough to clear the registration block before the cut completes. That's important -- the short, cut-off piece of dowel must not be able to get pinched between the saw blade and the registration block. A cut-off piece of dowel that got pinched that way would be ruined.

Use at least an 80-tooth finishing blade, and go slowly. No matter how careful you are, the small cut-off may get hurled at the end of the cut -- be ready for that, and hope that you can find where the thing lands.

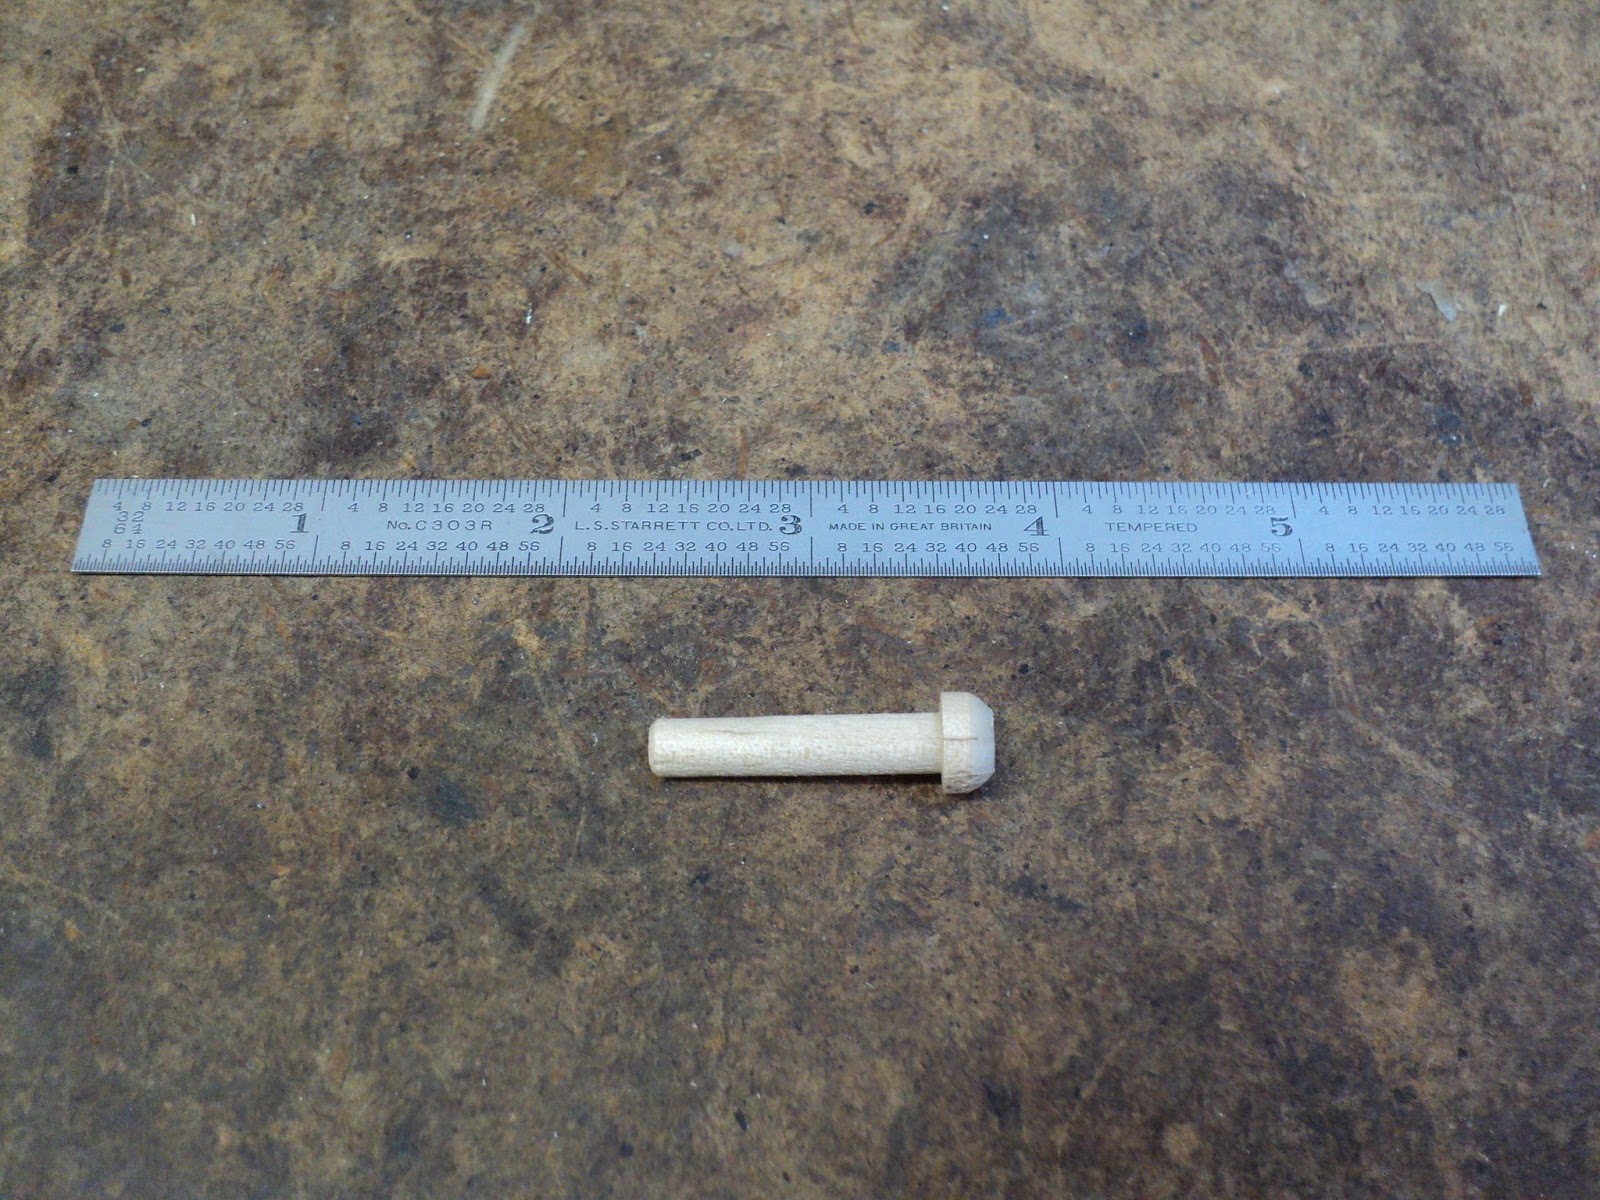
So, here we have the makings of an axle.


Next up is to bore the 1/2" dowel hub piece through 1/4" diameter to accept the shaft. I'm fortunate in having a small metal lathe, which is the ideal machine for such an operation. Here's a view of that part of the axle's construction just done.


Now the two axle pieces get glued together, and left to cure for awhile.


That 1/2" dowel stock that I used was prone to splintering out when I was cutting it on the table saw. That's ok here because I'll be turning down the diameter to 7/16", and the splintering out will disappear.

- - -

And here's the axle with its hub turned down, and ready for further shaping.


Now, if what I was after was just a clunky. cylindrical hub, I'd just about be there; square off the end to the desired length and that's that.

But what I want is a much lower profile hub with a somewhat rounded-off face. So, I'll saw off the excess hub length, and finish off the hub to its correct length with a parting tool.[1]

- - -

And here we are.


That hub just needs a bit of sanding to remove the pencil mark and finish off the face a bit better, and it's done.

Here's a view of  finished axles, and the wheels that I'll be using them with.


Not bad at all.

The axles are a bit of work, but the cost is very low, and the method is very flexible -- the dimensions can be altered any which way for particular applications.

- - -

Note:

[1] You may be wondering why I made the hubs so much longer than I meant them to be in the end.

The reason was simply to facilitate chucking the hubs for boring them through. Thin hub blanks would tend to be a bit difficult get chucked squarely. The 1/2" long hub blanks were readily chucked squarely, for a good outcome from the boring operation.

# # #


# # #

Friday, August 26, 2016

A Grubby Old Electric Space Heater With A Noisy Fan Motor


This old heater has outlasted its warranty period by decades.


I haven't cleaned it in a long time, so it needs to be at least partially dismantled for a good cleaning. It's also exhibiting a clattery fan motor bearing, so I need to look into that and see if I can come up with a solution.

A single, vertical tie-rod and two thermostat connections are all that need to be undone for lid and cover removal.


Three screws and two spade terminals are what's holding the heating element in place.


The fan has its own mounting brackets held in place by four screws, plus its two spade terminal connections that piggy-back onto the heating element's connections.

And here's the fan out of the heater's base, with its mounting brackets still in place.


Note the dust accumulation on the leading edges of the fan blades. The dust accumulation throughout the heater is awesome. Any fan-cooled household appliance is susceptible to such accumulation, and ought to be periodically inspected for it and cleaned of it. I've let this heater go for too long without tending to it.

The fan motor exhibits just the condition I expected it to; i.e. perceptible, excessive clearance in its fan-end sleeve bearing. That accounts for the noise that it makes.

Next up is to pull off the fan. Then I'll be able to dismantle the motor, and see if there's anything I can do about the bad bearing. Here's a view of the fan being pulled off by a little puller I devised for this.


With the fan off, I dismantled the motor and got a good, close look at its fan-end bearing. It turns out that the bearing/shaft interface is just fine -- that was not the source of the excessive clearance and noise I'd observed. Instead, the spherical, self-aligning sleeve bearing is loose in its keeper inside the mount. Here's a view of the bearing in its keeper in its mount.


I could see no way to snug up the spherical bearing in its keeper, but the fact that both bearing mounts in the motor are identical gave me an idea. I transposed the two bearing mounts, so the good one was at the fan end of the motor. I reinstalled the fan and gave the assembly a trial run. That appears to have done the trick.

I'll clean and reassemble the heater, and see if my repair method has truly cured the fan motor of its noisy operation.

- - -

Success

Transposing the two bearing mounts worked. The motor now runs quietly.

The reason it worked lies in the distribution of radial forces between the motor's two bearings. Any slight imbalance of the fan's blades results in a radial force that must be borne by the motor's bearings. By far, most of that force is borne by the bearing nearest the fan. Since that was the loosely retained bearing, it would tend to clatter within its keeper.

Moving that loose bearing to the other end of the motor relieved it of absorbing the radial forces exerted by the fan -- clatter gone.

# # #


# # #

A Line Cord Repair


The line cord's jacket has separated from its strain relief on my ancient Stanley belt sander, and strands of jacket filler are billowing out.


It looks awful, and it's not something I should neglect, so here goes with a repair.

The sander's handle is the connection box. Remove four obvious screws to open up the handle.


Note that the front-most screw is shorter than the others. Here's what's inside the handle.


The line cord presently installed is a replacement for the original, so the two wire nuts were originally top hat connectors.

And here we are with the line cord's jacket back in it's strain relief as it ought to be, and new connections made for inside the handle.


Now I can button that up and have the use of the sander back, at least until the next time the line cord needs attention.

- - -

Line cord failures are most likely to occur right near where the cord enters the appliance -- that tends to be where the line cord experiences the greatest amount of flexing. Right where the line cord joins its plug is another stressful spot that's liable to fail with prolonged use. Repair is easily effected, as it was in the example above.

# # #


# # #


Tuesday, August 23, 2016

A Four Hook Key Hanger With A Flaw


This is a not unattractive little piece of brass work.


But there's a problem with it; i.e. while the hanger provides four hooks for hanging keys on, there's no provision for a way to hang the hanger itself. I'll have to drill two holes for No. 4 brass screws, so I can attach the thing to a wall or something, and have the use of it. Here goes.

- - -

Done


I had some empty space on a cleat under a tool cabinet, so there it went. Countersunk, flat head screws would have been nice, but I don't have any No. 4 brass ones, and No.6 would have been too large.

- - -

I found that key hanger in my next door neighbour's garbage, by the way. Now, before you go thinking, "Oh my God! The guy rummages through people's garbage for stuff -- his next door neighbour's yet. Has he no shame?", permit me to explain.

My neighbour had to be away for garbage-setting-out day, so he asked me to take care of his bin for him. I peeked inside the bin when I went to set it out, hoping there'd be room enough left for an item I wanted rid of, but didn't have space for in my bin. That's when I spotted the key hanger and snagged it. It's not like I was rummaging, ok?

Anyway, rummaging or not, people do throw away some pretty good stuff at times, and it's a shame to let it go to the landfill, surely.

# # #


# # #